
Hostwinds Tutorials
Search results for:
Table of Contents
How to Install htop command on CentOS
Tags: CentOS Web Panel
If you're running a web hosting company, monitoring server resources and processes is crucial to ensure your servers are running efficiently and to diagnose any performance issues. htop can be a valuable tool for this purpose.
What is htop Command?
The htop command is a customizable system monitoring utility in Linux and Unix-like operating systems. It provides a dynamic and real-time view of system processes, CPU usage, memory usage, and other system statistics. It's an interactive and more advanced alternative to the traditional top command as it allows users to navigate through the list of processes, sort them by various criteria, and even send signals to them for management purposes.
Why Use htop?
Many VPS users will install Webpanels such as CentOS Web Panel, VestaCP, and Virtualmin to manage their server via the web browser and SSH to the server accessing the command line. Having access to a visual aid in the command line can be a very insightful tool when monitoring your server, especially when communicating potential issues to others in technical support roles, not to mention other interested stakeholders.
How to Install htop:
Step 1: Open the CentOS terminal window
Once open, copy and paste the following command into your terminal session
sudo yum -y install htop
Step 2: Enter your password when prompted
Step 3: Now that the installation is complete, type htop and press enter
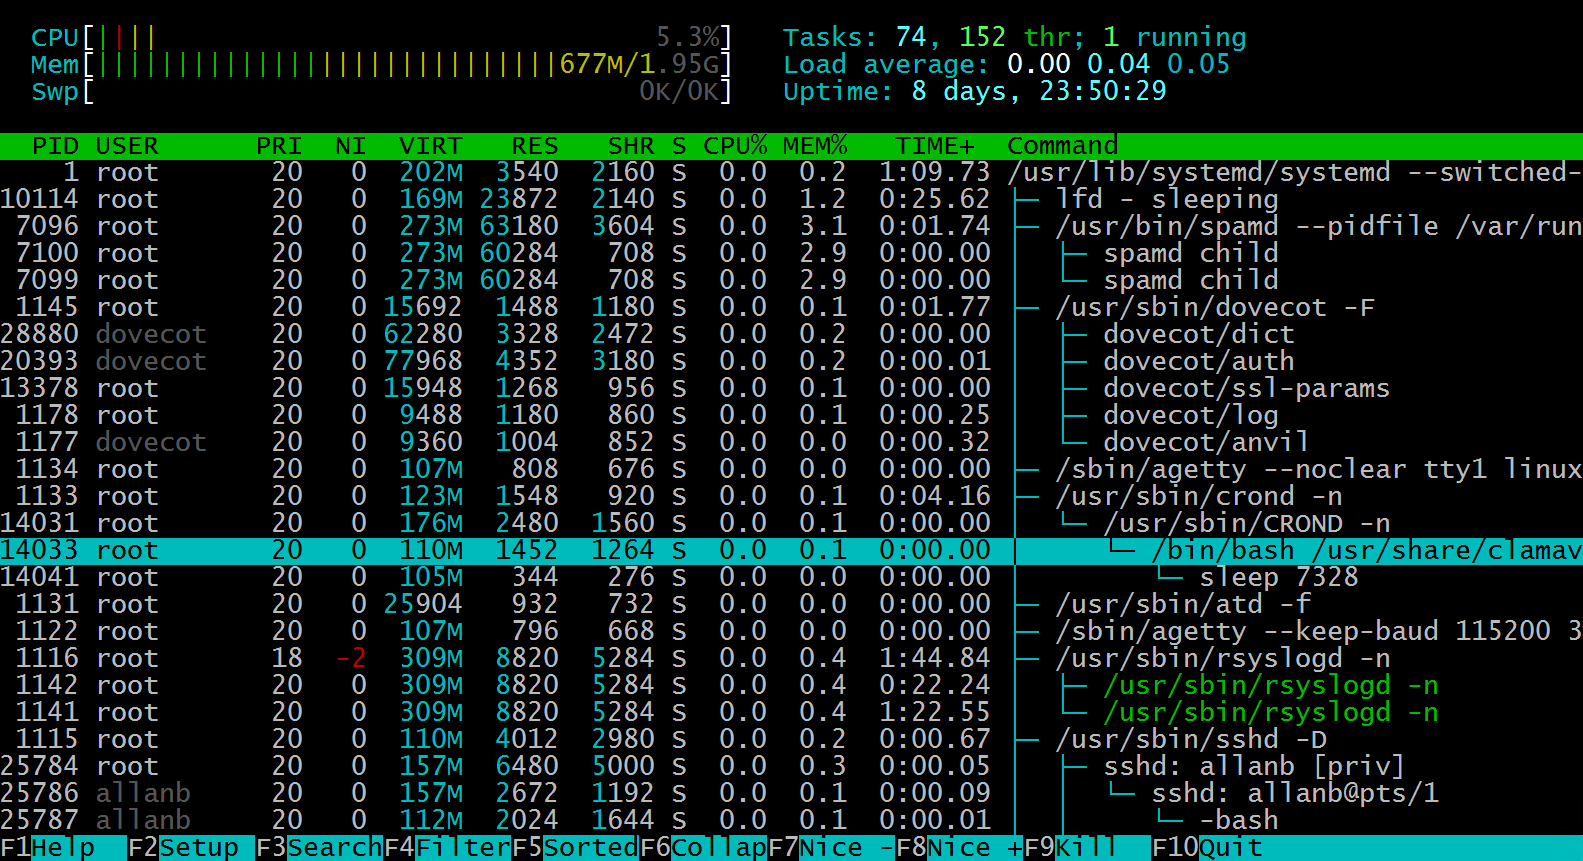
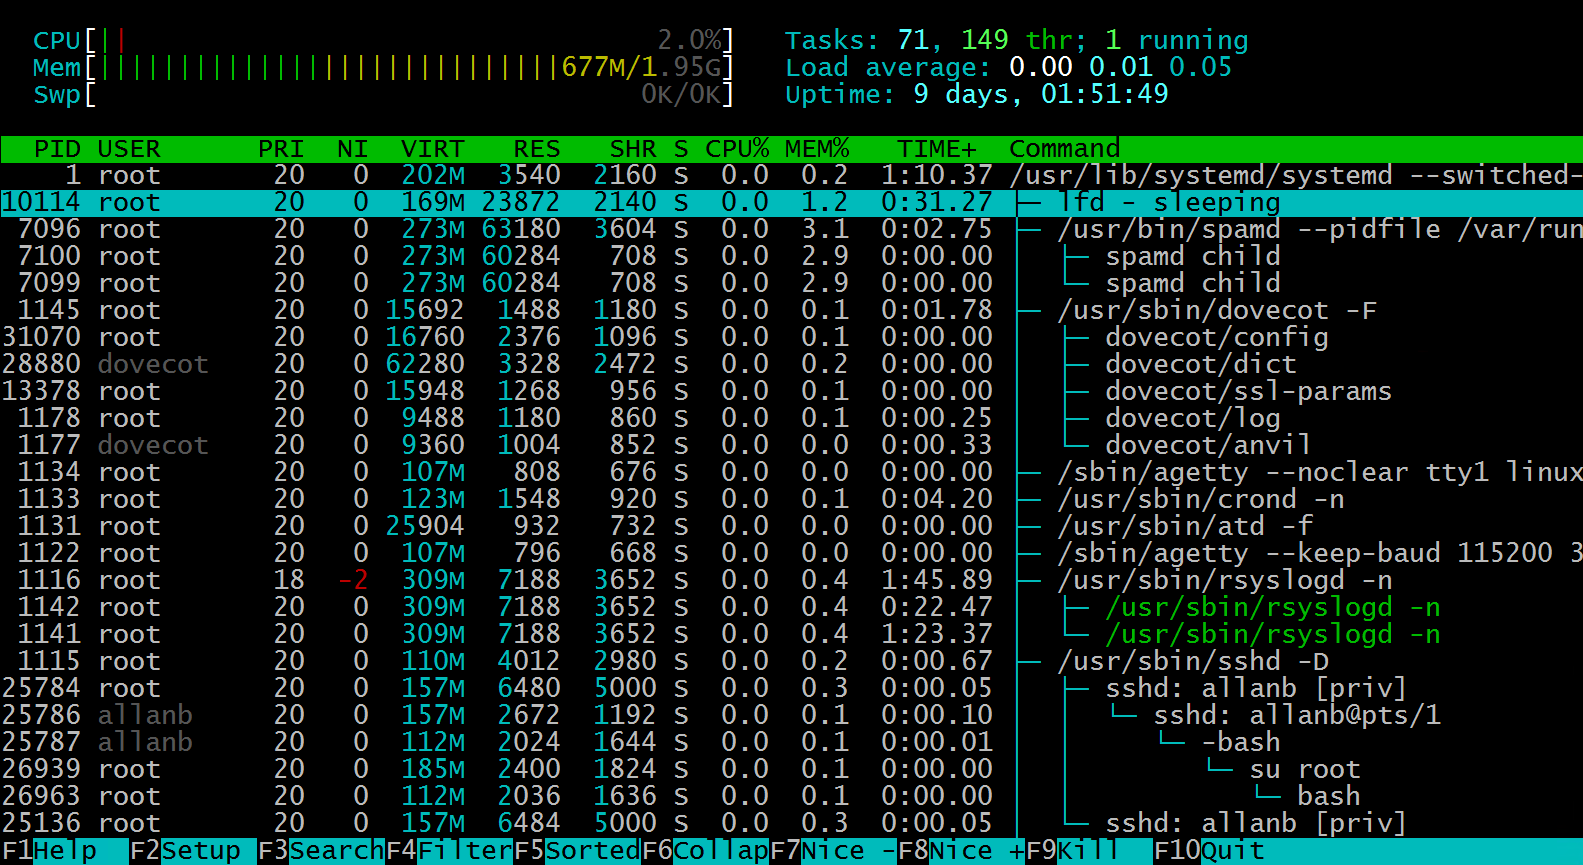
Step 4: You now have htop installed by the looks of it, great job. Htop will also work for regular users.
Notice all the F key functions at the bottom of the screen.

htop Function Keys
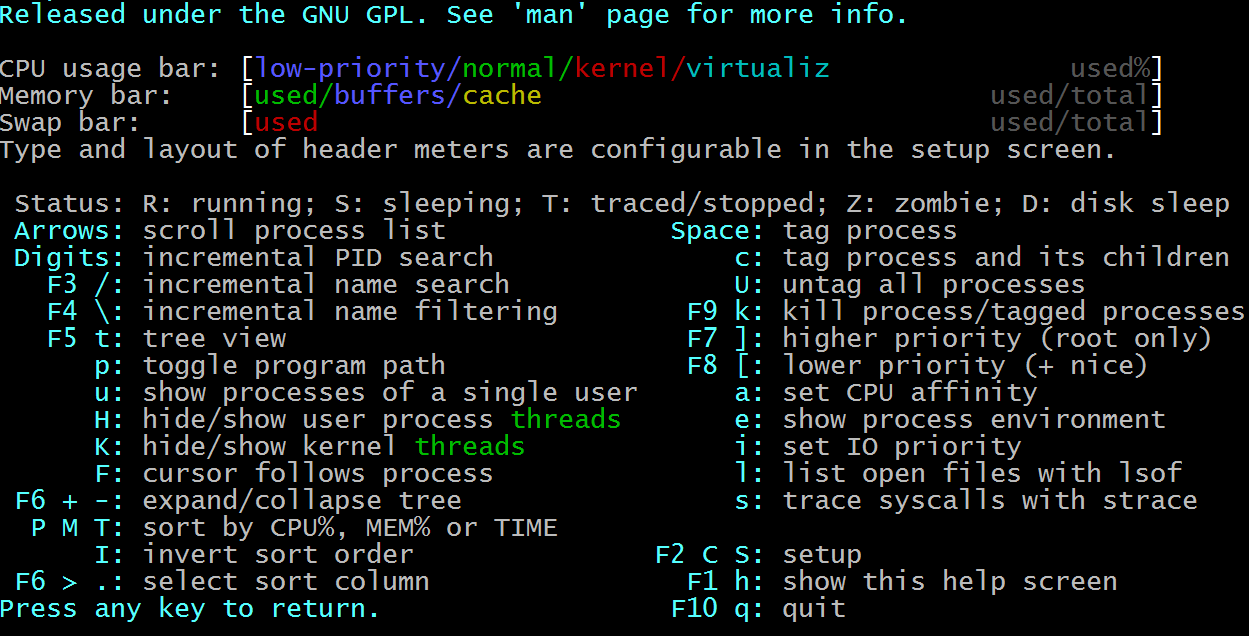
F1 Help
As pictured above, htop has many options
In the F1 window, we see there are many shortcut keys to work with:
Arrows – These up and down keys allow you to scroll up and down.
Digits – As in number keys, allow you to type in a PID number to search
F3 – Incremental name search
F4 – Incremental name filtering
F5– Toggle Tree view
t – tree view
p – toggle search path
H – hide or show user process threads
K – hide or show kernel threads
F – hide/show kernel threads
F6 + or – expand and collapse the tree
PM T– sort by CPU%, MEM%, or TIME
I – invert sort order
F6 > . select sort column
Space Bar– Tags a process
C – tags process and all of its children
U – untag all processes
F9 k – kill processes or tags processes
F7 ] – higher priority (only works when logged in as root user)
F8 [ – lowers the priority of process just like (+nice)
a – sets a CPU affinity
e – shows the processes environment
i – lowercase sets IO priority
I – capitol lists open files with lsof
s – trace syscalls with strace
F2 C S- setup
F1 h – show this help screen
F10 q – quit
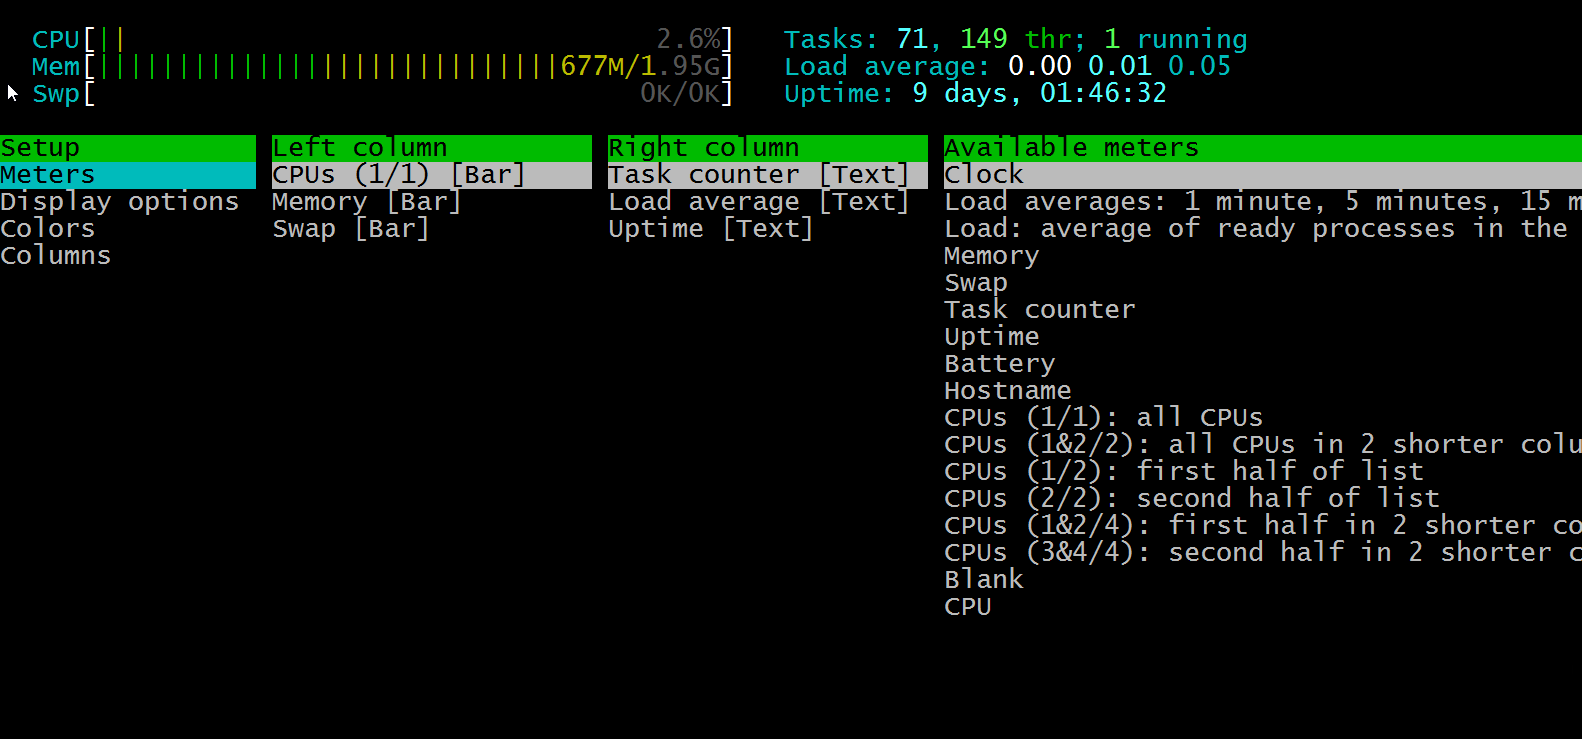
F2 Setup. Using the Setup feature, you can customize your Htop dashboard with the options listed here. Set your colors, the graphs, columns, and monitor options.

F3 Search
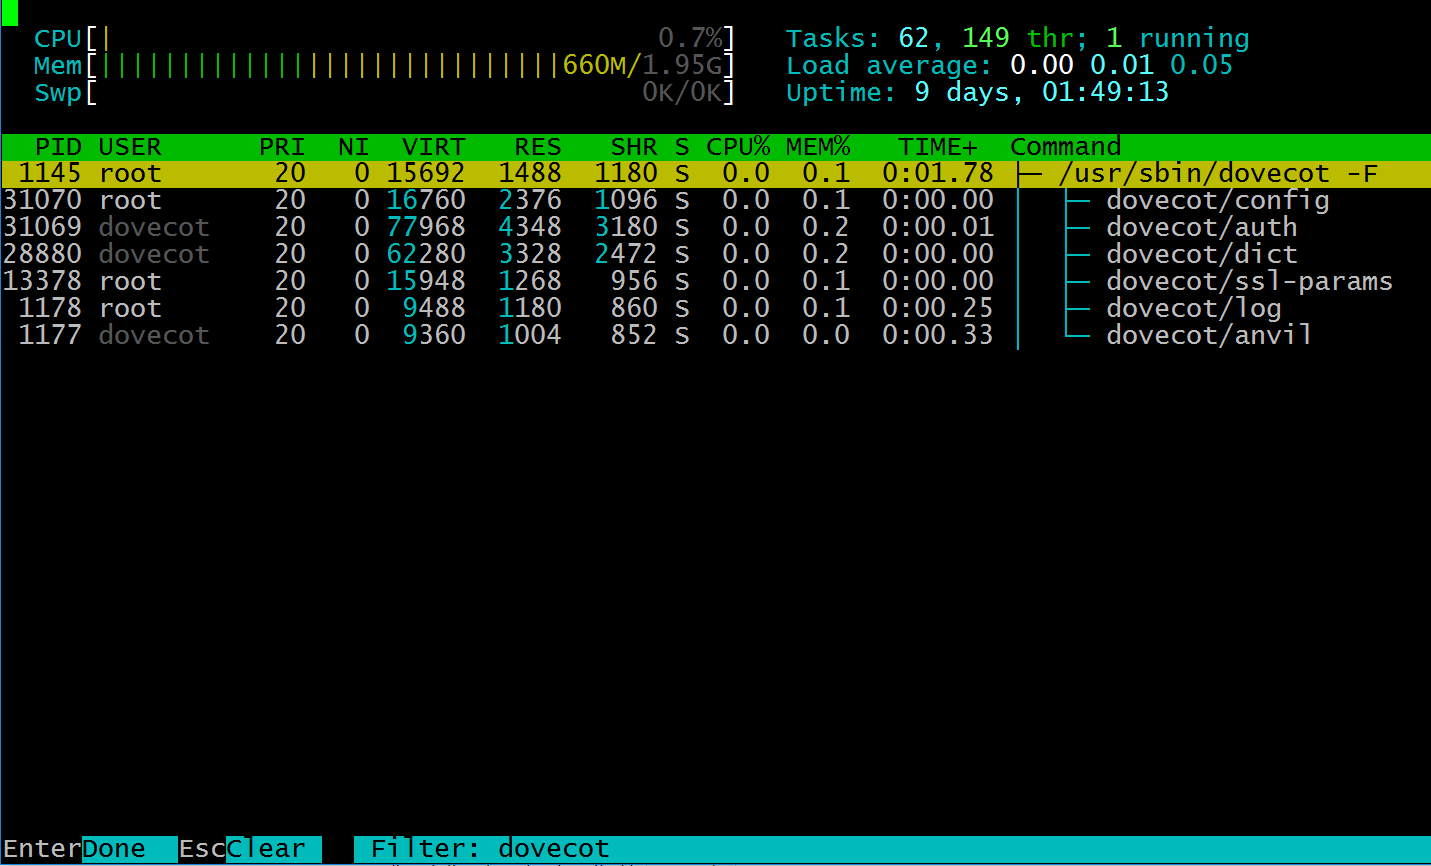
F4 Filter your process list.
F5 Sorted
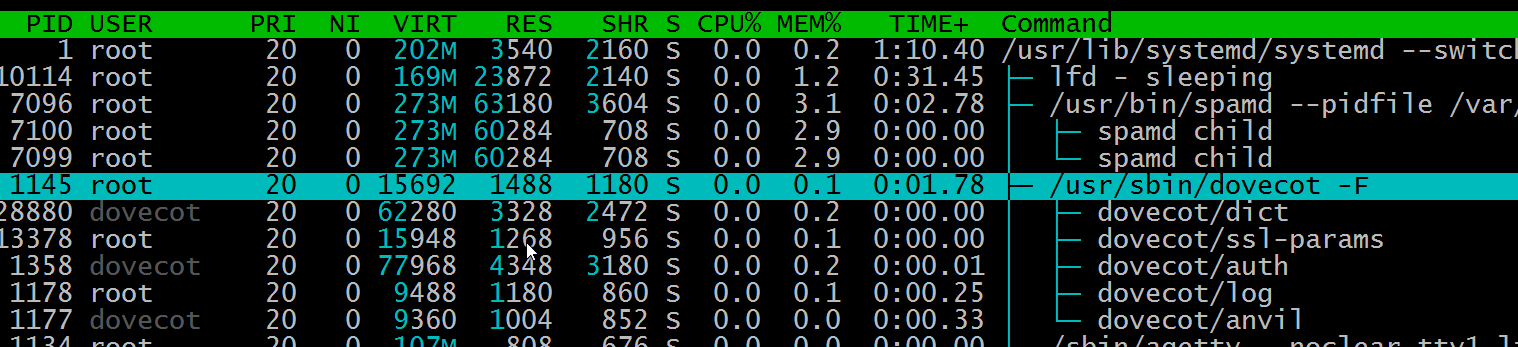
F6 Collapse a group of processes.

F6 collapsed the dovecot process group.
F7 and F8 to change the Nice values, what does that mean?
A Linux nice value is a priority value, with -20 being the highest and 19 the lowest priority.
The nice command allows you to manage the CPU scheduling priority of each process manually.
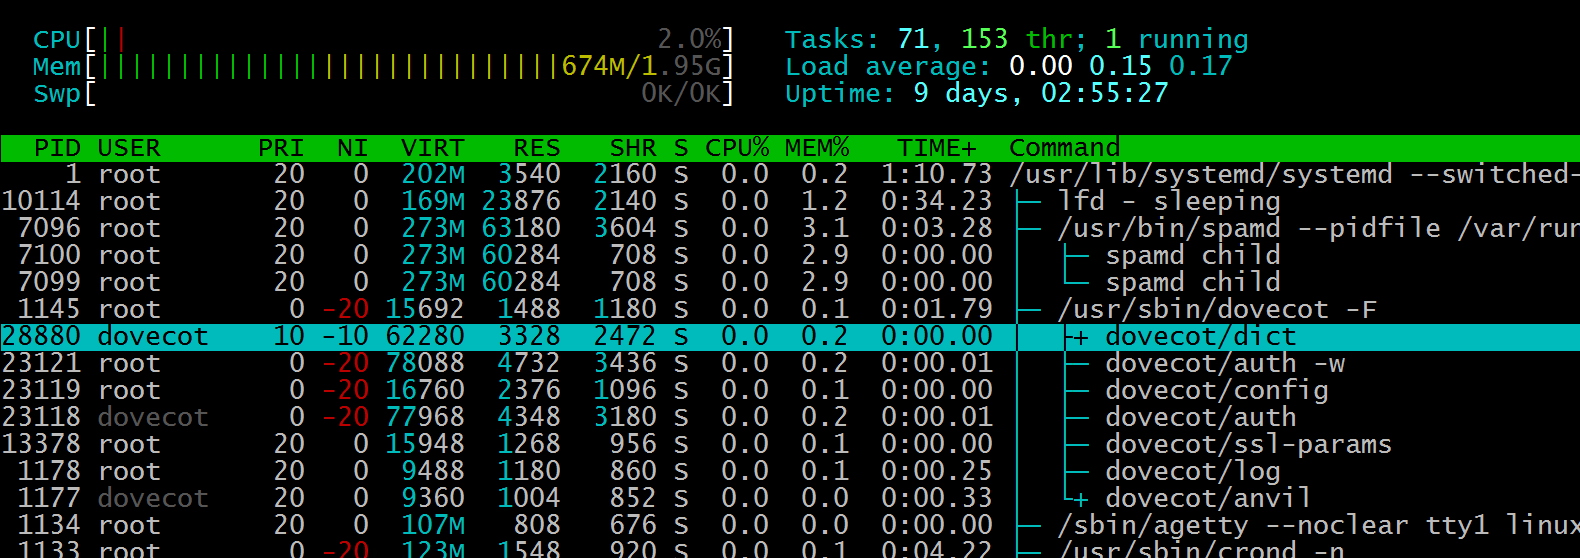
Changing the Nice values using the F7 and F8 Function keys.
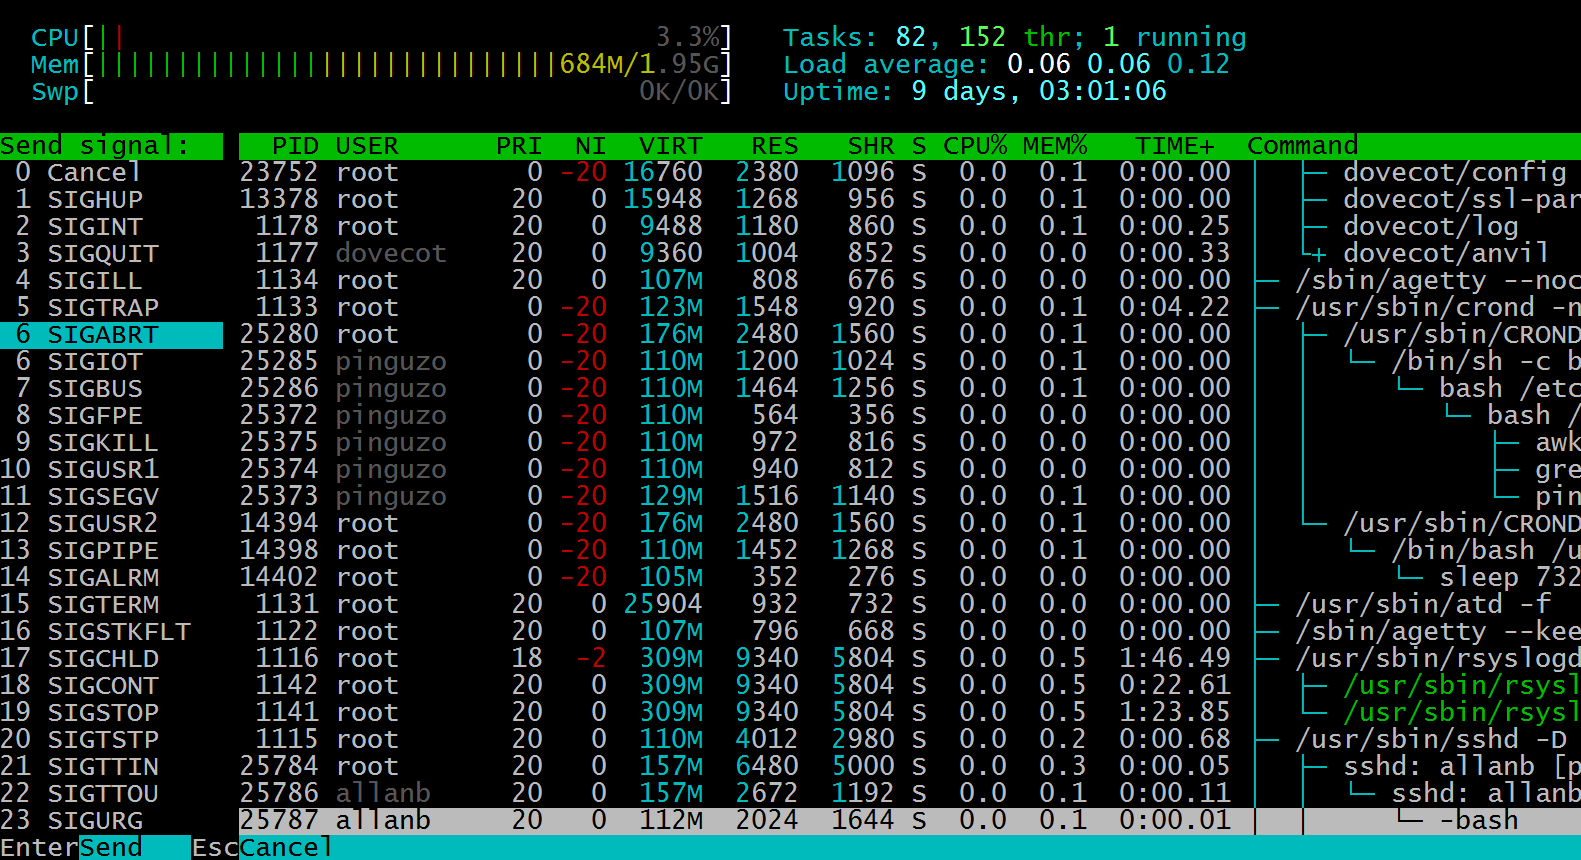
F9 to Kill Selected processes are listed in the dashboard. Notice on the left-hand side of the screen, you can send kill signals with different options. Step 1, select the kill signal, usually -9, to kill runaways and zombie processes. Once selected, press enter, select the process to send the kill signal to, and press enter.
Selecting F10 will exit Htop back to the command prompt.
Written by Hostwinds Team / July 24, 2019