
Hostwinds Tutorials
Search results for:
Table of Contents
CentOS Web Panel Setup Process
Tags: CentOS Web Panel
After installing CentOS Web Panel within the Cloud Control Portal, there is a brief process to complete. This guide will go over the CentOS Web Panel Setup Process and cover installing CentOS web panel on a new Cloud VPS Server.
Prerequisites
- Installation of CentOS Web Panel from the Cloud Control Portal
- It's highly recommended that a Snapshot Backup of your server be taken before making any changes to your server
CentOS Web Panel Install
Connect to your server using ssh from a utility such as PuTTY or the Mac OS Terminal to remotely access your server. You will see the green text if the server is still setting up your CentOS Web Panel installation. Otherwise, you should see the CentOS Web Panel welcome message similar to the one shown below:
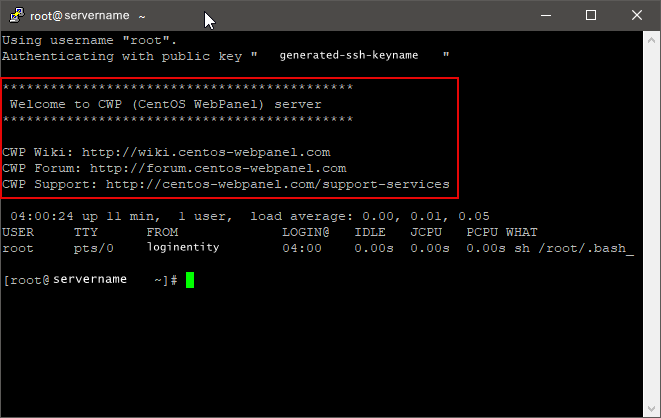
We can now progress to the CentOS Web Panel Setup.
Setting Up CentOS Web Panel
Step 1: Navigate to the CentOS Web panel login page on your browser. This URL will be your server's IP Address and will access port 2030. It will look like this:
http://192.168.101.13:2030
Eventually, we will be able to use an associated domain name instead of the IP Address, but for this guide, this will suffice for now. The CentOS Web Panel page will display.
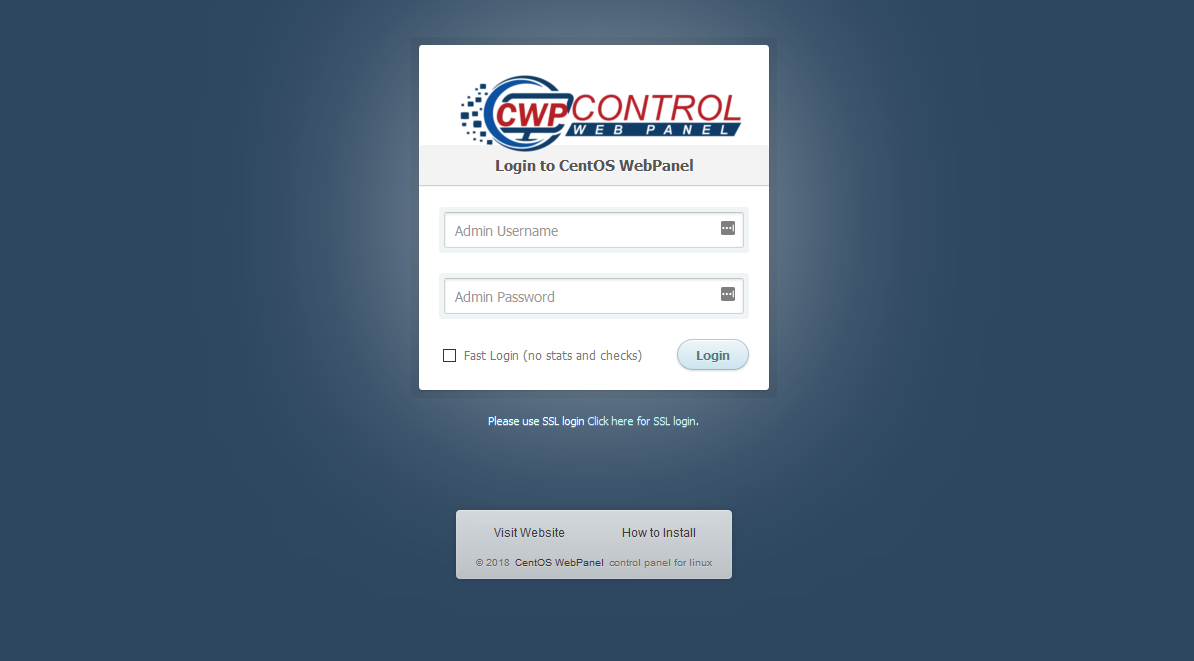
Step 2: Finally, log in to the Admin panel using the user "root" and the password for the root account. An email is sent to any Hostwinds account on file when a new VPS is created. This email will have the password for the root account. After a successful login, you will be presented with the CentOS Web Panel Dashboard.
Written by Hostwinds Team / December 26, 2018