
Hostwinds Tutorials
Search results for:
Table of Contents
Configure SMTP Server (Windows 2012)
Tags: Cloud Servers, Windows
After choosing to install IIS on your Hostwinds Windows 2012 VPS, you will want to configure SMTP. To do this, follow the steps in this guide after you have gained access as the Administrator user to RDP on your VPS.
Configure SMTP
Step One: Open Server Manager by clicking on the Server Manager icon on the lower left side

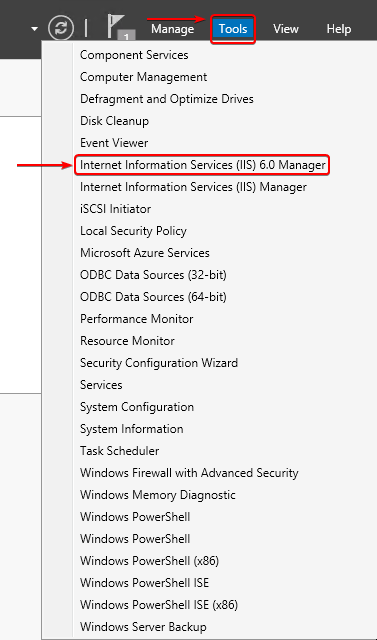
Step Two: Click on Tools on the upper right-hand side of the screen and select Internet Information Services (IIS) 6.0 Manager from the drop-down menu
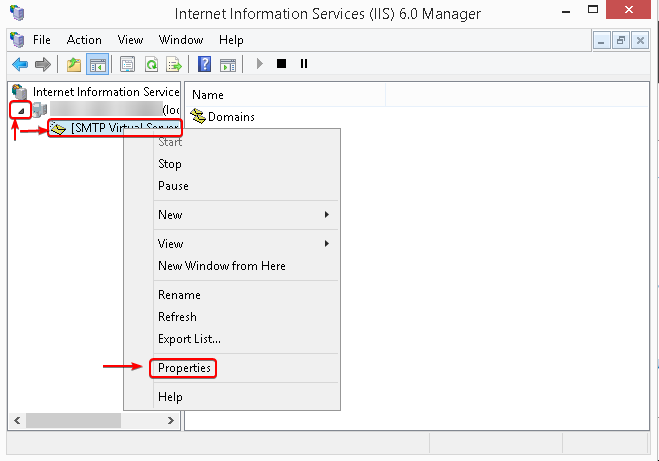
Step Three: Click on the drop-down arrow next to your server name and right-click on the SMTP server. From here, select Properties.
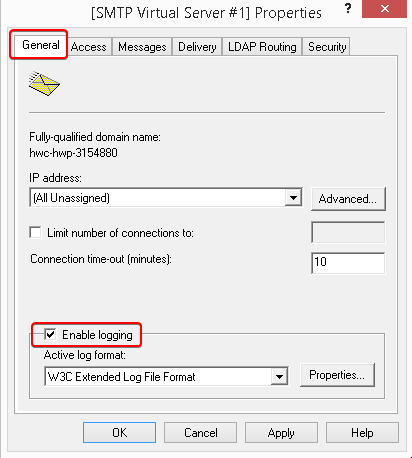
Step Four: In the General tab, check the box to Enable logging if you wish to have logging of your SMTP server enabled
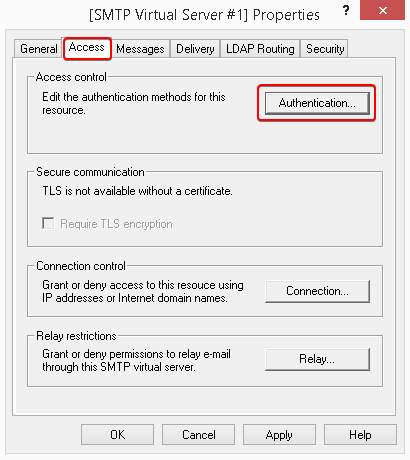
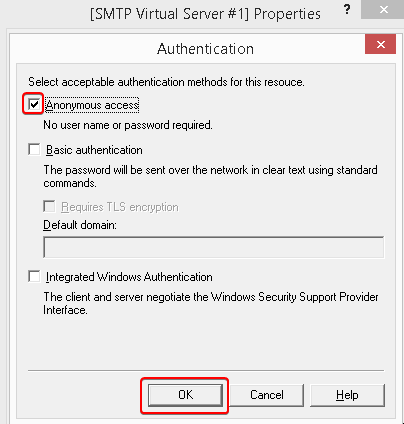
Step Five: On the Access tab, click the box that says Authentication at the top
Step Six: Ensure Anonymous Access is checked and click on OK to proceed.
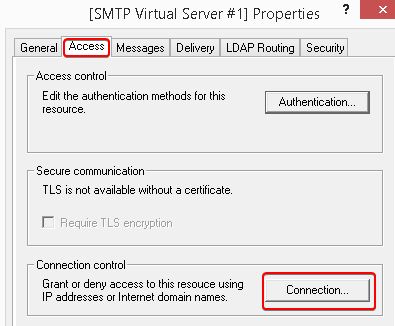
Step Seven: When you enter back in the Access tab, click the Connection button
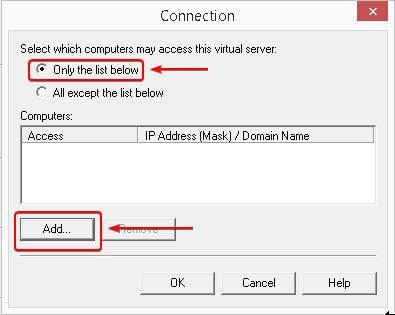
Step Eight: Check the box for Only the list below and click on the Add button.
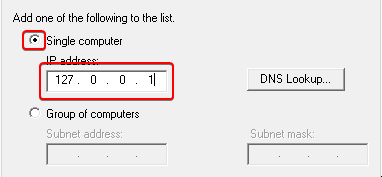
Step Nine: Check the Single Computer radio button and enter in 127.0.0.1 to add localhost to the list of single computers that can send mail from your VPS and click on OK
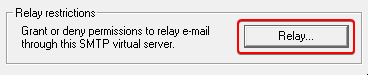
Step Ten: Once you enter back to the Access tab screen, click the Relay button
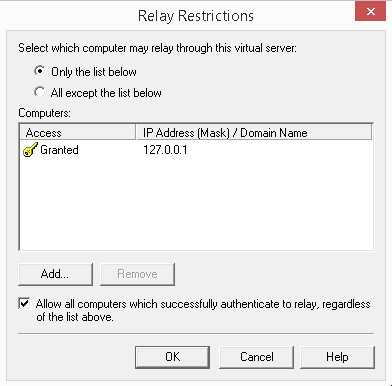
Step Eleven: Check the radio button for Only the list below and click the Add button. Again, check the radio button for a Single computer and enter 127.0.0.1 and click on OK.
Step Twelve: Confirm the settings in any other tabs and click on the Apply button to make these changes. Click on OK to exit the window.
Written by Hostwinds Team / August 16, 2018