
Hostwinds Tutorials
Search results for:
Table of Contents
cPanel Web Disk Setup Guide
Tags: cPanel
cPanel offers several different options to be able to upload and download files to and from your host. While the most popular method would be FTP, and even the cPanel's built-in File Manager can do file transfers, cPanel also provides an alternate method to directly mount the remote host's filesystem to your local computer.
This guide will cover how to set up a Web Disk account within the cPanel, and how to connect to it from your local computer.
Create a Web Disk Account
For connecting to the Web Disk, you can use your cPanel's username and password, which would give you access to the entire home folder for the cPanel.
Otherwise, to also have more control over what directories are accessible to the user that connects, you can create a new Web Disk user from within the cPanel.
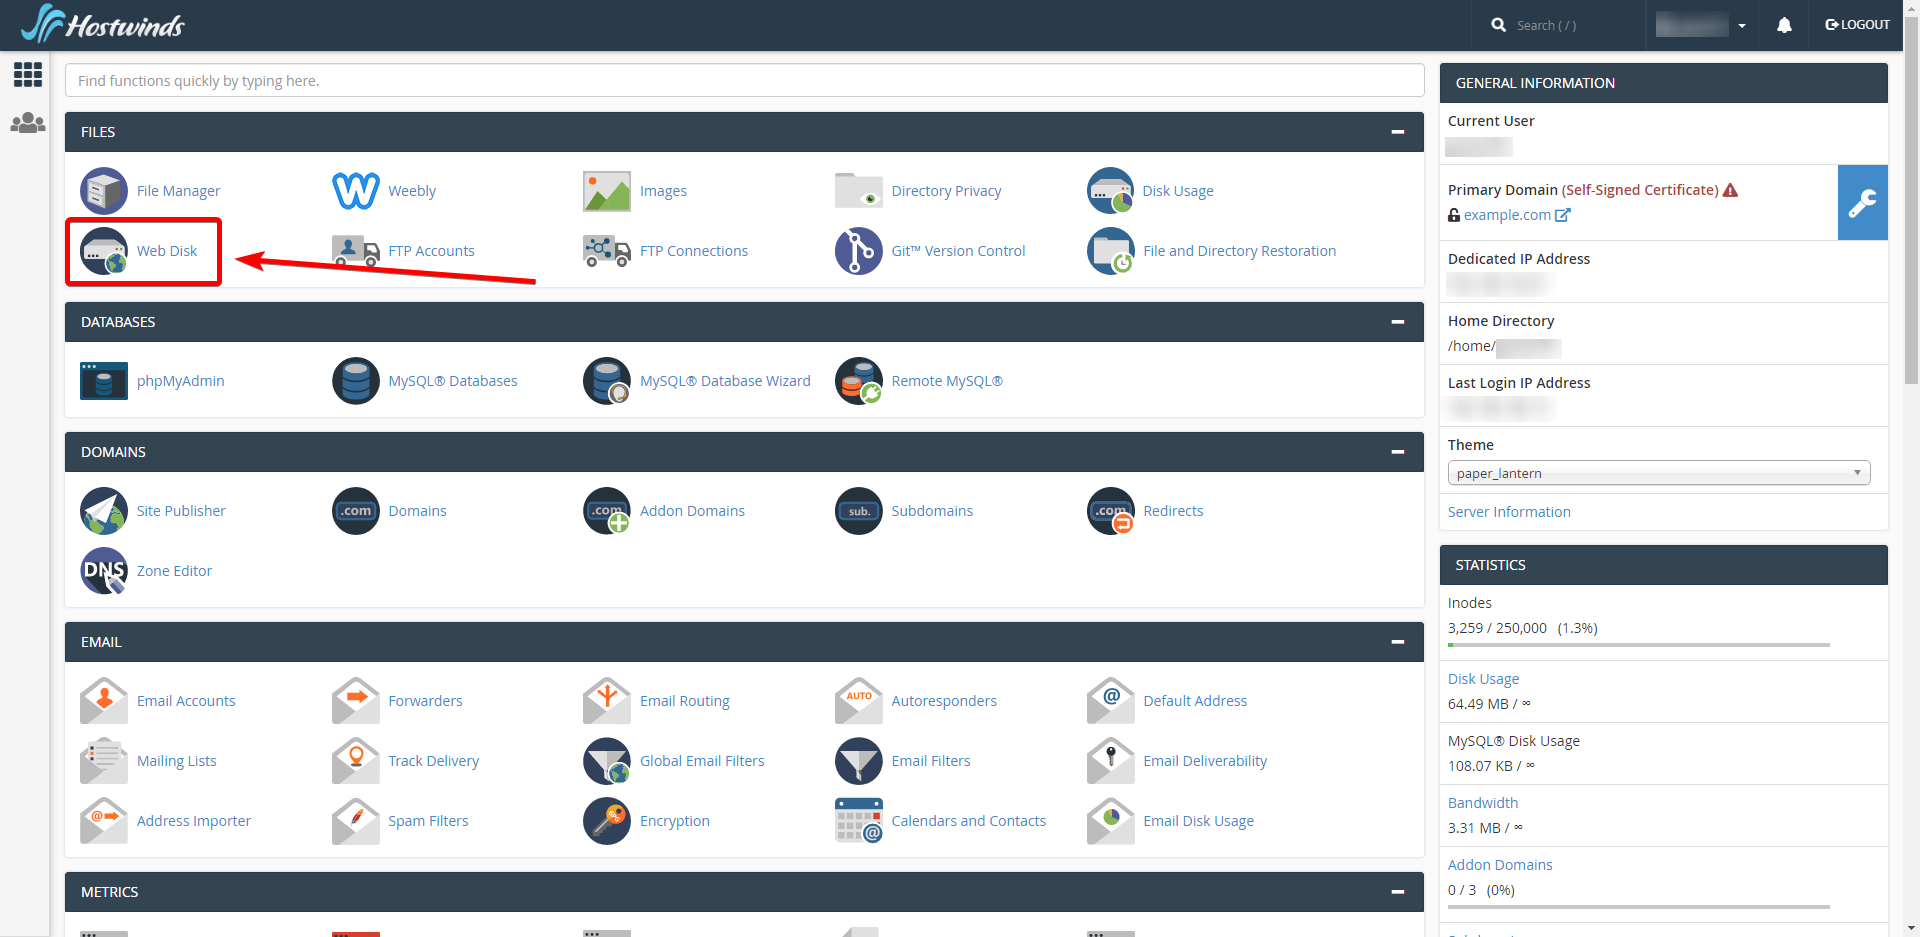
To create a new Web Disk user, first, navigate to the Web Disk link in your cPanel under the Files category:
From the Web Disk page, you will be able to fill in the form to create a new user:
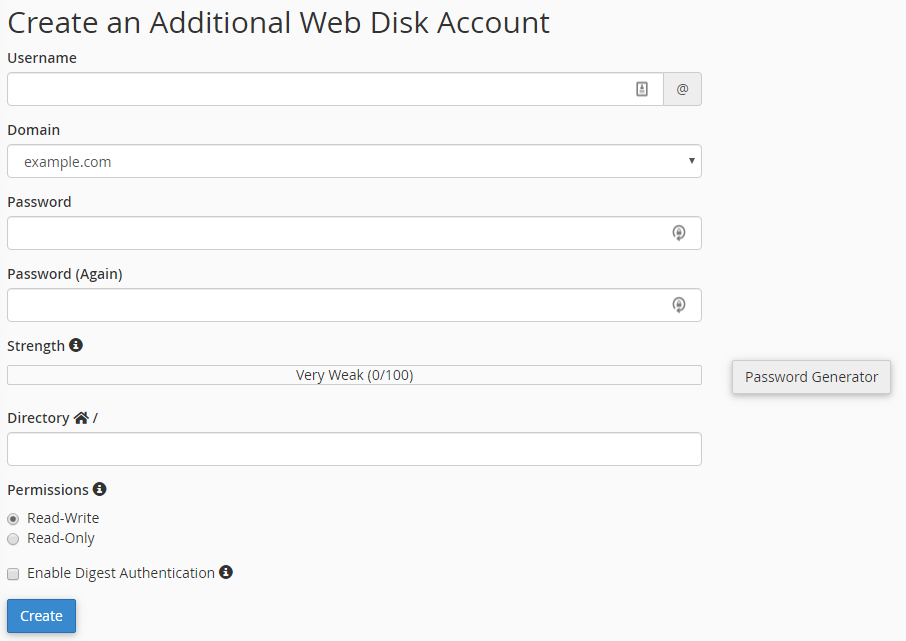
You'll need to specify the following:
- Username: Give the account a name.
- Domain: Specify which domain the account is for (only if you have multiple domains within the cPanel).
- Password: Set the account's password.
- Directory: Specify what directory the account has access to (the account will access this directory and any of its subdirectories).
- Permissions: Specify if the user can only view/read files and folders or if it also has to write permissions to change files.
- Enable Digest Authentication: Check this to enable digest authentication. Accessing the Web Disk from a computer running Windows 7+ requires either having an SSL certificate for your domain to encrypt the connection or to enable digest authentication to allow an unencrypted connection.
Connect from Windows
To first get the required access details to connect, go back to the Web Disk section of your cPanel and click Configure Client Access for the account you want to connect with:

Then select the option that matches your operating system, and it will display the connection details for your account.
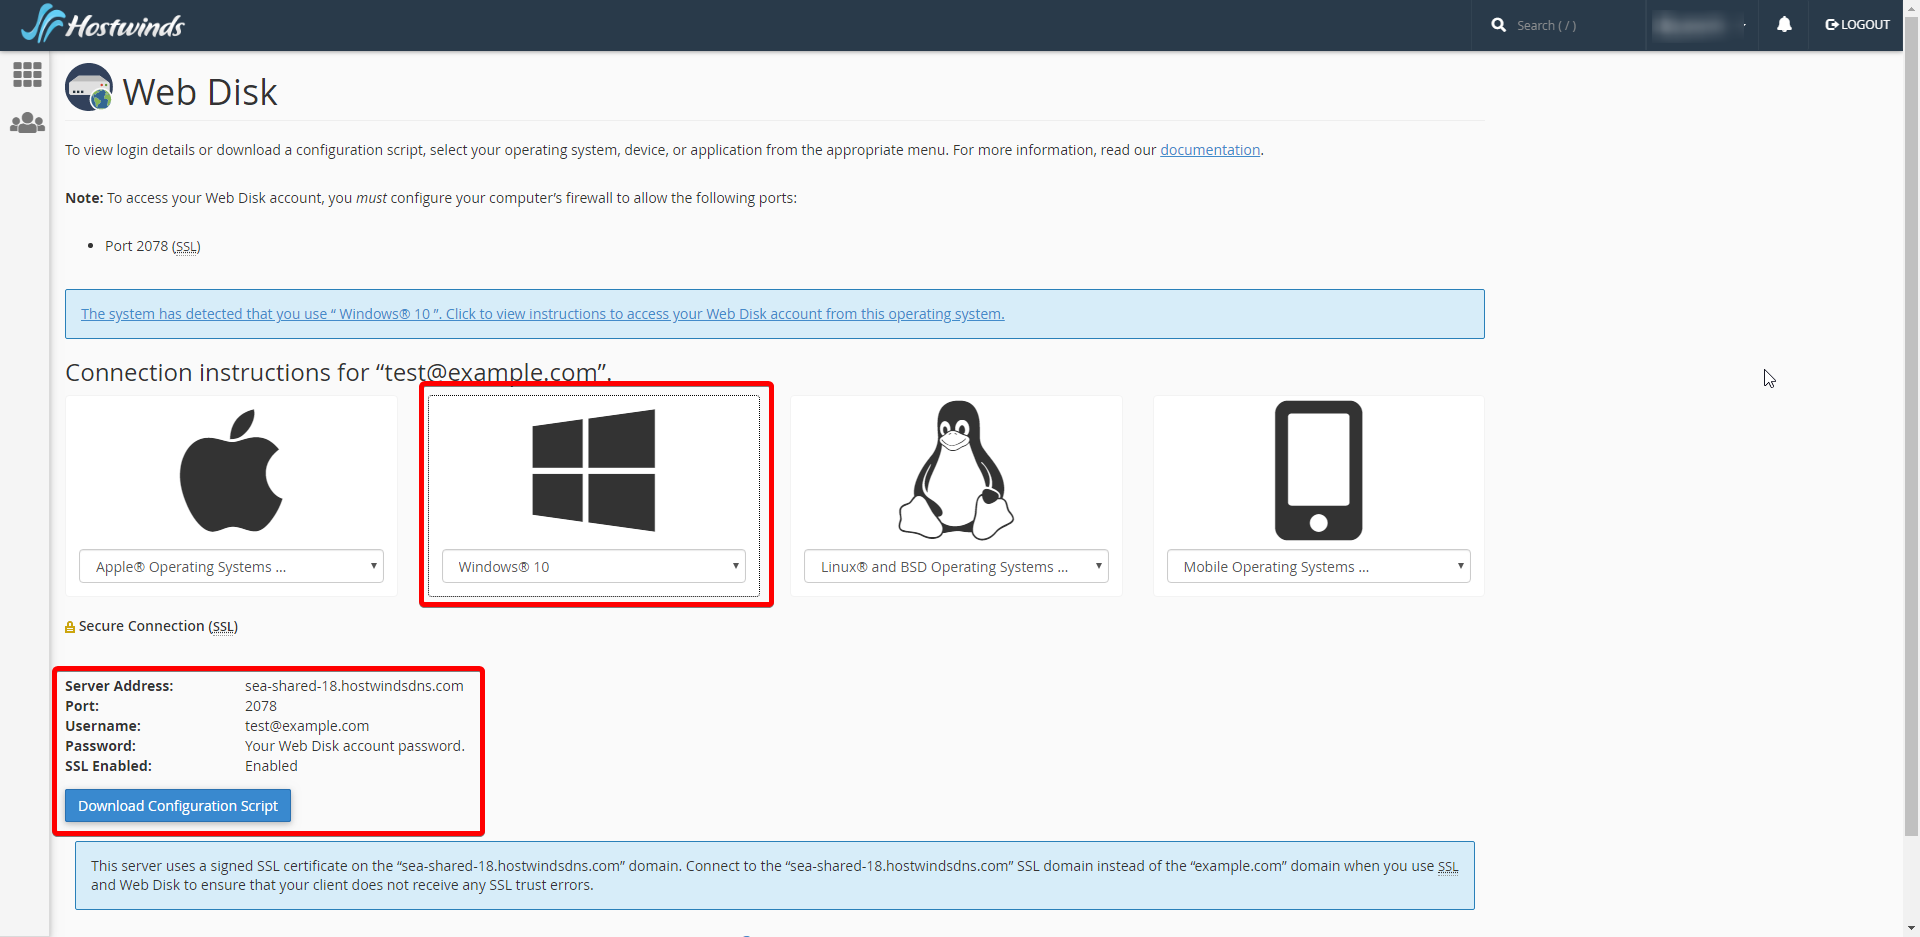
For some systems, it will also give the option to Download Configuration Script. You can download that script and run it to attempt setting up the Web Disk connection automatically.
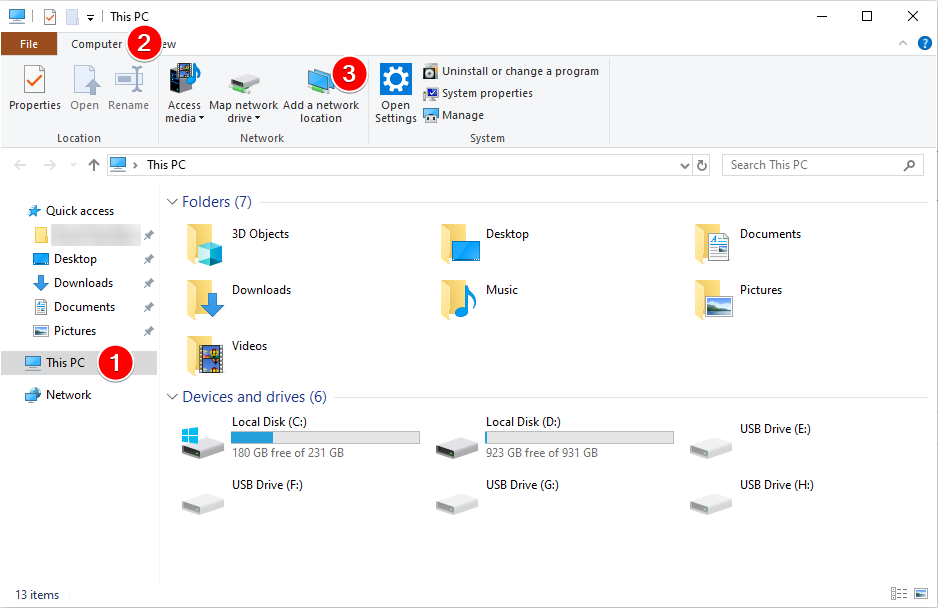
To set up a Windows connection, open your file browser and click 'This PC' in the sidebar. Then under the 'Computer' tab at the top, select 'Add a network location.'
This will pop up a new window for the Add Network Location Wizard.
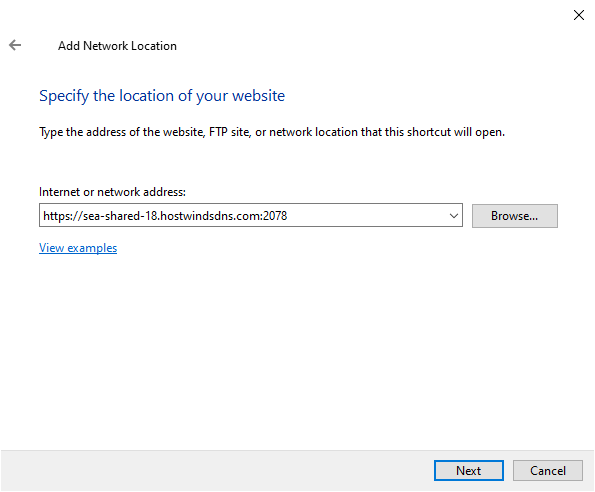
Click Next to proceed through the Add Network Location Wizard until it prompts you for a network address.
If your cPanel had shown in the connection details that SSL Enabled is enabled, then start the network address with https://, otherwise with HTTP:// followed by the Server Address, a colon ( : ), and then the Port number.
Example:
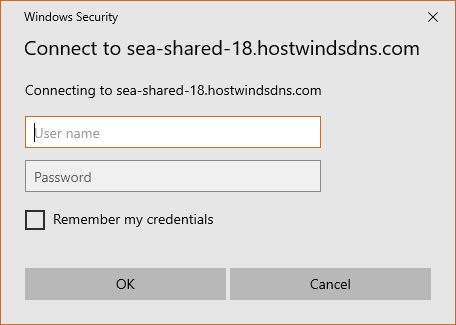
When you click Next, you will be prompted for the Username and Password for the Web Disk account. Enter those and optionally choose to remember them, then click OK.
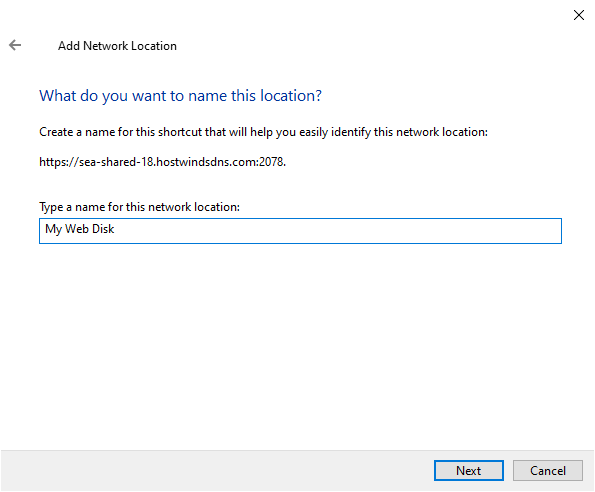
Give the network location a name, then click Next.
Finish the setup by clicking Next once more.
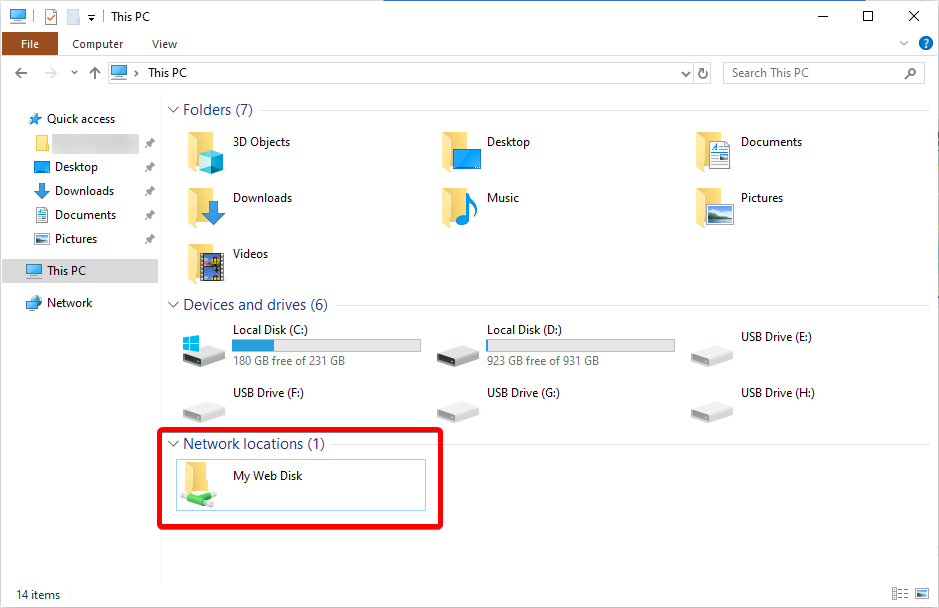
The web disk will be saved as a network location that you can access in the 'This PC' section of your Windows File Browser.
Written by David Hamilton / October 7, 2019