
Hostwinds Tutorials
Search results for:
This guide will cover how to create local user accounts on your Hostwinds Windows Server when connecting using Remote Desktop.
If you would like to create multiple RDP users, you may want to purchase an RDS CAL license from an authorized retailer. By default, Windows will support up to 2 remote users connected at the same time.
To continue with this guide, you need to connect to your Hostwinds VPS using RDP to manage your server.
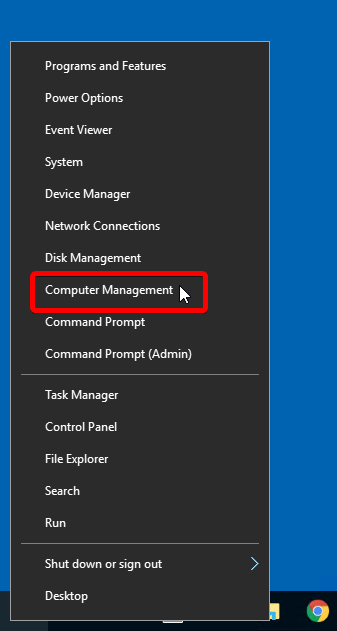
- Open the Computer Management console by right-clicking on the Windows Start button in the bottom left corner of your server's desktop.
- Select the Users folder within Local Users and Groups
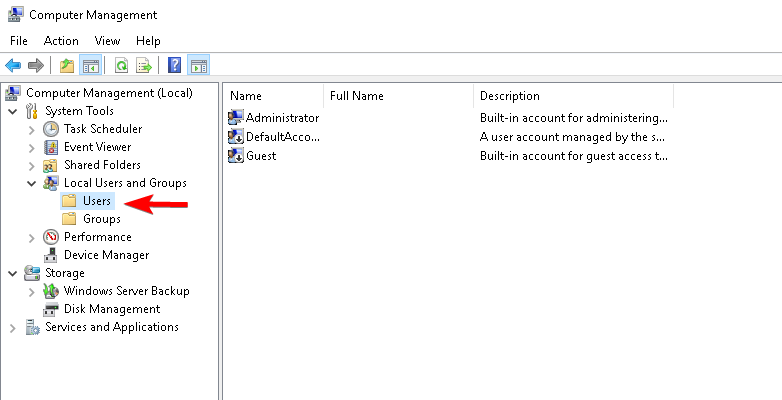
- After selecting the Users folder at the top of the window, go to:
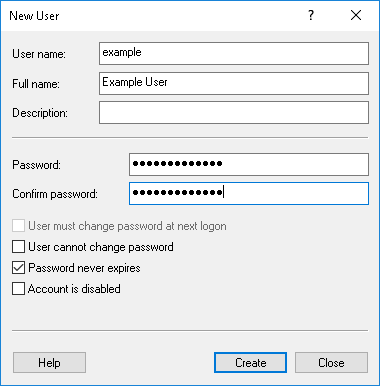
Action -> New User
- Fill out the New User pop-up window that opens as shown below using the username and password you want. It is recommended that you set the checkboxes as shown in the image to avoid issues.
Uncheck User must change password at next logon
Check Password never expires
Password requirements:
It must be at least 6 characters in length
And have at least 3 of the following items:
Uppercase characters (A – Z)
Lowercase characters (a – z)
Numbers (0 – 9)
Non-alphabetic characters (for example, !, $, #, %)
The password cannot contain the user's account name or parts of the user's full name that exceed two consecutive characters.
Click Create when ready.
If the account were successfully created, the text fields would be empty again. If this is the only account you are creating, you can close this window and proceed to the next step. Otherwise, go ahead and create any additional user accounts as needed.
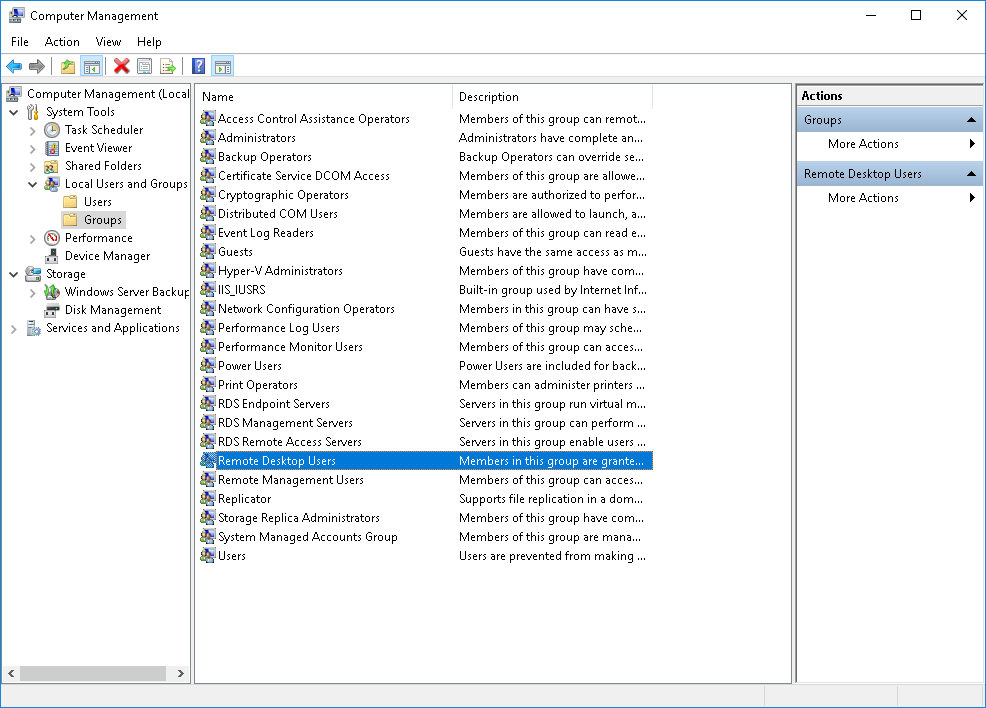
Next, we'll add the new user account to the Remote Desktop Users group so they have permission to connect and log in remotely.
Select Groups from the left side and then on the right side, double click Remote Desktop Users to open it.
If you want this new user to have full administrator rights to the server, instead of selecting Remote Desktop Users, double click on the Administrators group and add the username.
The user only needs to belong to one of those groups, not both.
- In the newly opened Remote Desktop Properties window, click Add.
Enter the username you just created and click Check Names.
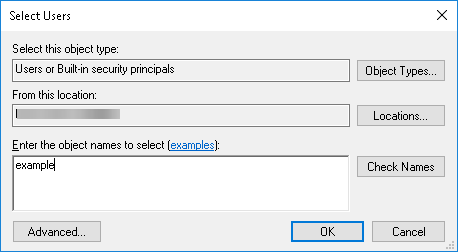
- Click Check Names.
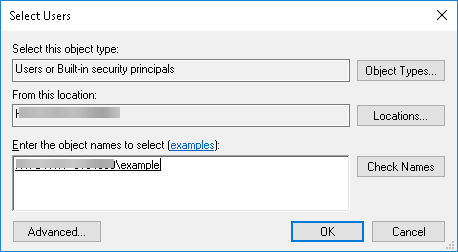
It should find that username and draw a line below it as shown.
Click OK
You should see this afterward. Click OK to close the window.
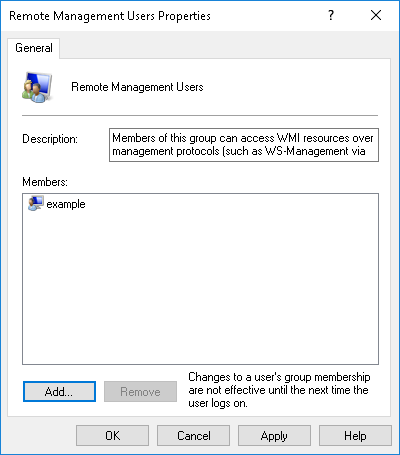
You can close the Computer Management console window when done and start using this new account when connecting to your Windows server with Remote Desktop.
Written by Christopher Langdon / October 23, 2019