
Hostwinds Tutorials
Search results for:
Table of Contents
Guide to Custom DNS Settings in CentOS Web Panel
Tags: CentOS Web Panel
CentOS Web Panel (CWP) offers a couple of different methods of managing DNS within its settings. The easier option is FreeDNS, but using FreeDNS does rely on externally managed DNS. Although this is not necessarily bad, some may wish to allow the CWP server to manage DNS directly. In this guide, we will discuss CentOS Web Panel Custom DNS settings.
This guide covers an advanced setup process and requires at least a small degree of understanding of DNS and how it works.
Prerequisites For Custom DNS
This guide is going to assume the following prerequisites as having been completed:
- CentOS Web Panel installed and the basic setup complete.
- Private Nameservers: For domains registered with Hostwinds, please let us know if you need help via Live Chat.
- Hostname set to an FQDN (fully-qualified domain name, this can use a domain you plan to set up in your DNS afterward)
- rDNS Record set (if you plan to use an email with this setup). Use the Manage IPs option from the cloud control portal to set your primary IP rDNS.
Enabling Your Private Nameservers
The first step to any nameserver host creation is enabling the nameserver application. Luckily, CWP sets this up for us. This section will cover implementing the private nameservers that we set up before starting.
Step 1: From the CentOS Web Panel Dashboard, click the DNS Functions dropdown, then Edit Nameservers IPs


This will bring you to the Edit Nameservers page. The default nameservers for CentOS Web Panel will be listed with IP Addresses set to:
127.0.0.1
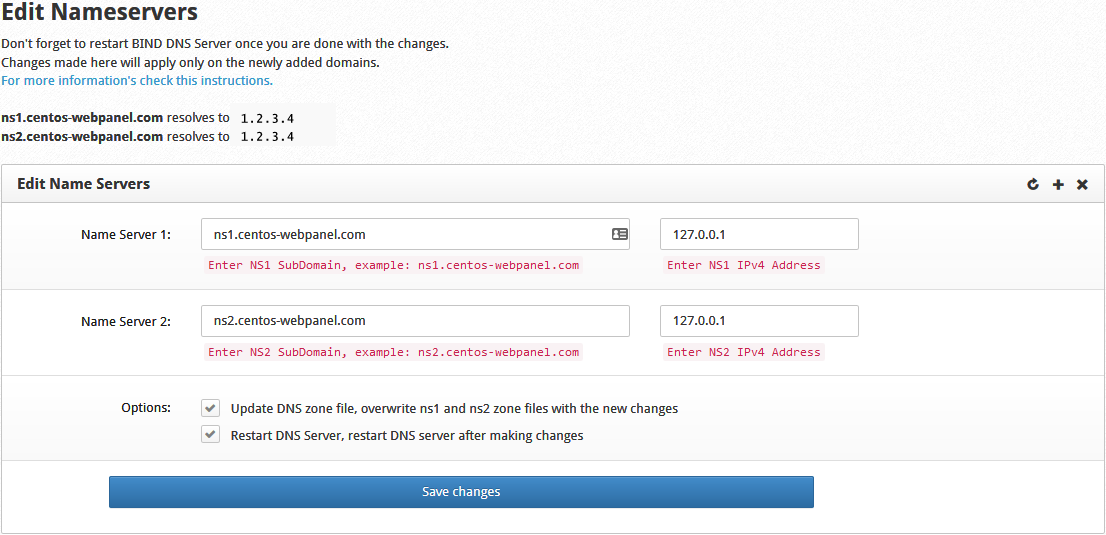
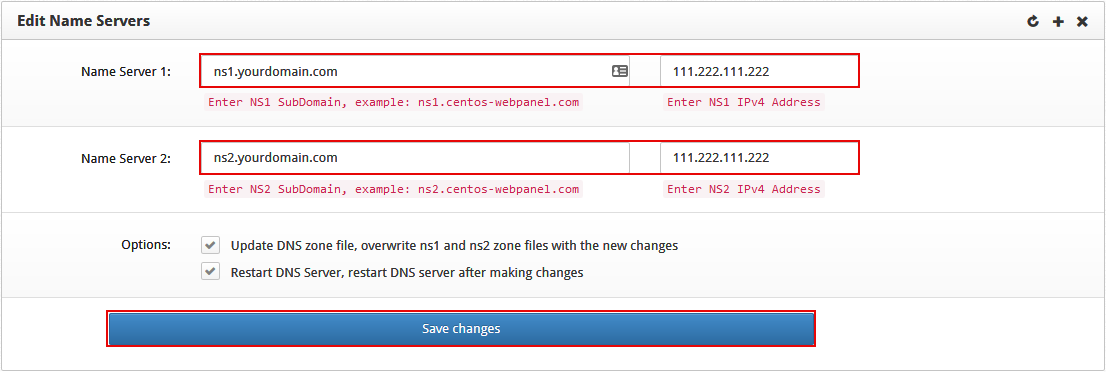
Step 3: Modify the nameservers here to the private nameservers you created with your domain name registrar. Then, add the IP Address of your Hostwinds VPS in both IP address boxes. Finally, click Save Changes to finalize these nameservers. Leaving the two checkboxes checked will allow the DNS zone and server to perform the necessary tasks to enable the changes.
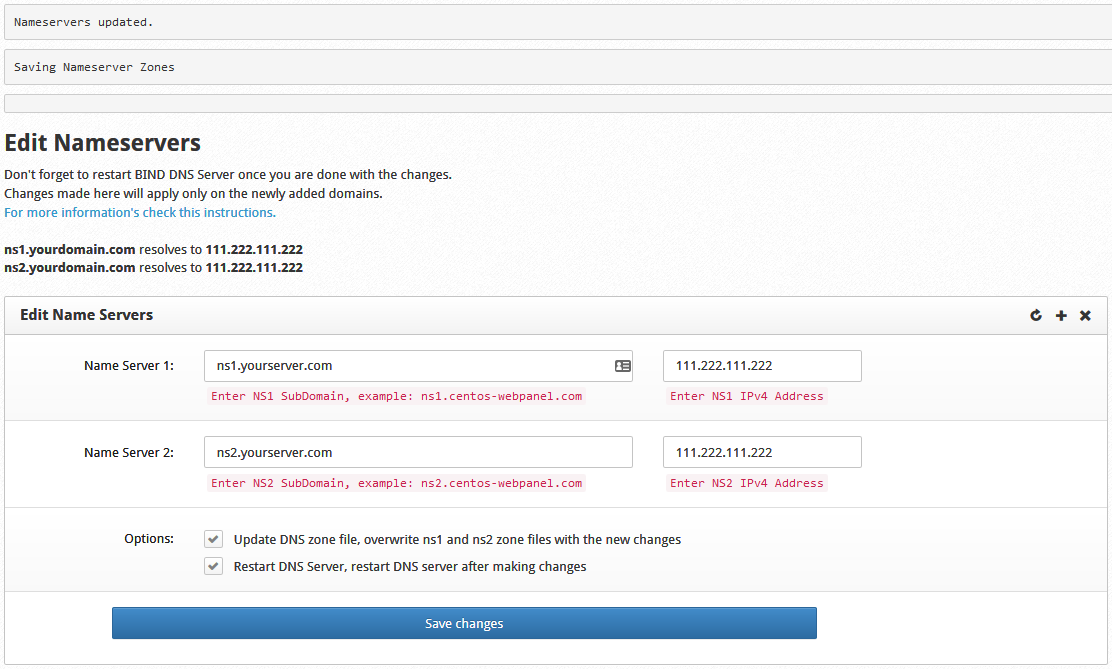
When you save the changes, a success message will appear. Then, assuming you had the private nameservers setup, you should see your new nameserver records resolving correctly.
Confirming the Nameserver Functionality
After setting your nameservers within CentOS Web Panel, the standard DNS delays will apply. After you have waited to ensure DNS propagation is completed, you can perform a couple of tests to confirm your settings.
Step 1: Click the DNS Functions dropdown. then List DNS Zones


This will show you all active DNS Zones, including the primary zone and nameserver zones for the domain set up in the first part of this guide.
Please do not delete any of the standard zones, as they are required for core functionality.
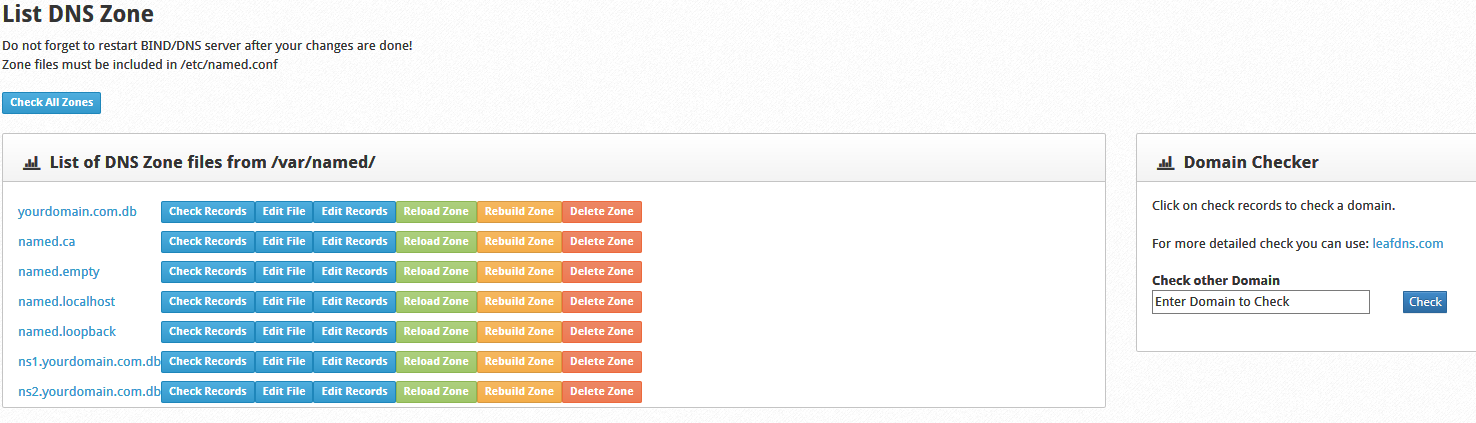
Step 2: Click the Check Records button located next to your newly added zone. The results for this check will appear on the right side of the page.
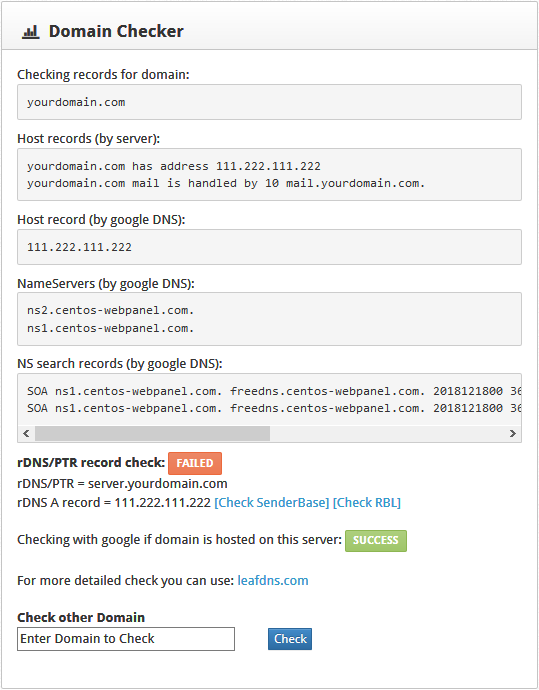
You may notice that your listed nameservers in the above results still show up as the default CWP nameservers. We will fix that next by modifying your domain zone Start of Authority (SOA) record.
Modifying Your SOA Records
The Start of Authority (SOA) record tells the internet what DNS Nameserver holds the top priority for your domain. Usually, this is to be set as your primary nameserver (i.e., ns1.yourdomain.com). CentOS Web Panel, however, creates new DNS Zones using its global default SOA. This means that the first DNS Zone created will have its SOA set to ns1.centos-webpanel.com. This section will discuss how to fix that.
Step 1: While still browsing the List DNS Zones page from the previous step, click Edit Records on the row containing your new DNS Zone. This brings you to the Zone Editor page for this zone. You'll see three locations on the page.
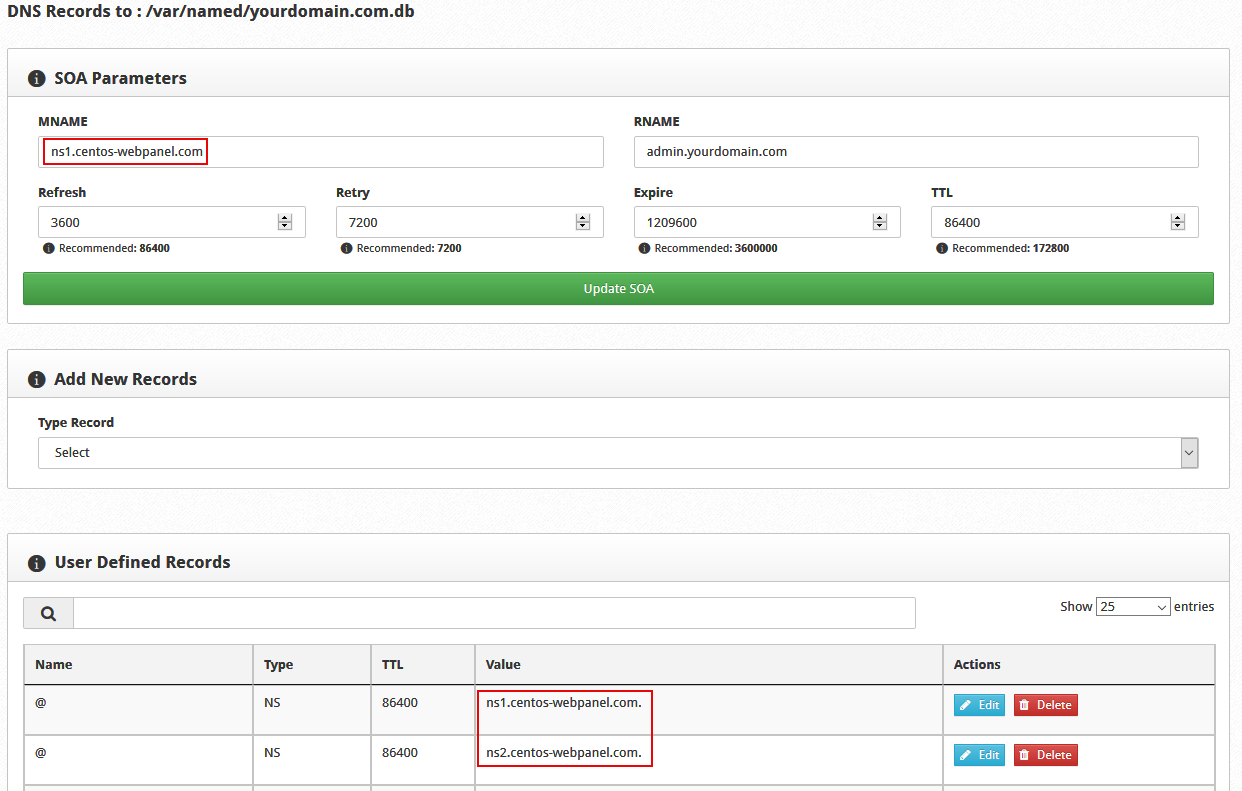
Step 2: Modify the record listed in the MNAME box shown within the SOA Parameters panel. You will set this to the ns1 version of the nameservers you created. Click Update SOA after modifying this record to commit the changes. A Success! notification will appear in the top right corner.

Step 3: Use the edit button next to the NS records below to change your ns1 and ns2 nameservers.

Clicking edit changes the record modification box above the User DNS Records panel. First, enter the nameservers you plan to use here. Then, click Add NS Record to commit the change.
If you do not include the final period (.) at the end of your nameserver entry, you will receive an invalid URL error when attempting to commit the changes. So be sure to include the final period (.)
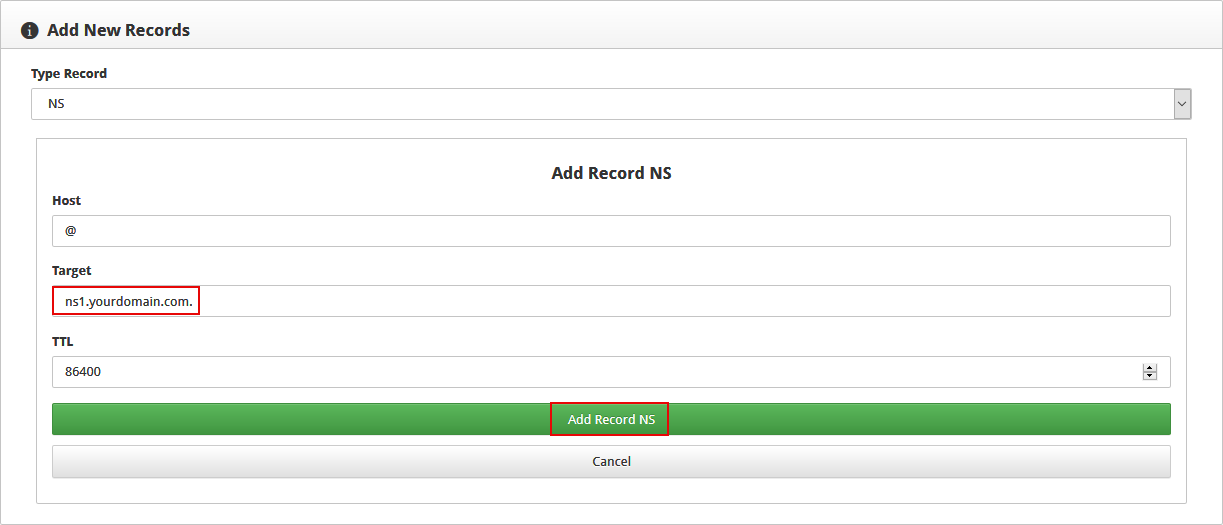
Repeat this process for the second nameserver record. Your nameservers will then be sent to the desired nameservers.
Note: DNS changes can take up to 24 hours to propagate fully. If it does not immediately update, please wait the recommended 24 hours before assuming your settings are incorrect.
Congratulations! You have successfully set up custom nameservers on your CentOS Web Panel server. Don't forget to add the A Name record for the hostname you gave your server if it needs to be created.
Written by Hostwinds Team / June 5, 2021