
Hostwinds Tutorials
Search results for:
Table of Contents
Guide to CentOS Web Panel Default DNS Setup
Tags: CentOS Web Panel
CentOS Web Panel (CWP) features a built-in DNS Management tool that controls the DNS without worrying about complex BIND server setup. It offers this through a tool called FreeDNS. The guide will go over the CentOS Web Panel Default DNS Setup process to help you get started with managing your DNS through CWP.
Prerequisites
CentOS Web Panel Installed – CentOS Web Panel Initial Setup Completed.
Enabling FreeDNS
By default, the nameservers on the CentOS Web panel are set to ns1.centos-webpanel.com and ns2.centos-webpanel.com. This is correct for this guide. We will need to perform a few steps to make this work for our domains.
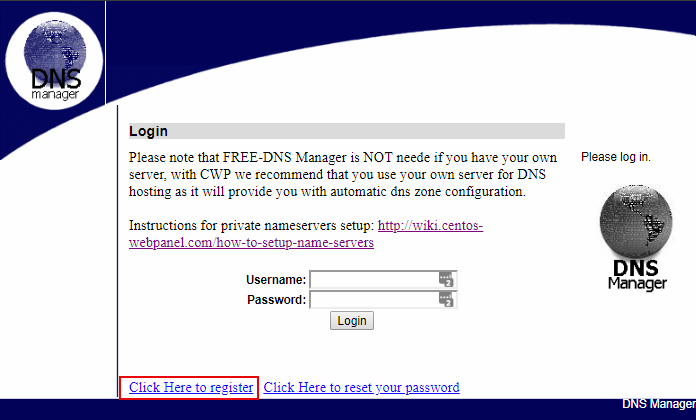
Step 1: Navigate to the FreeDNS management page and create an account. Use the Click Here to register link to set up an account if you do not already have one. If you already have an account set up, log in and skip to step 3.


Step 2: Fill in the details of your user account you wish to create.

When you successfully create an account, it will redirect you to the login page. If you arrive at a page that states the user exists already, click the back button on your browser and try a different username.
Adding your first Zone
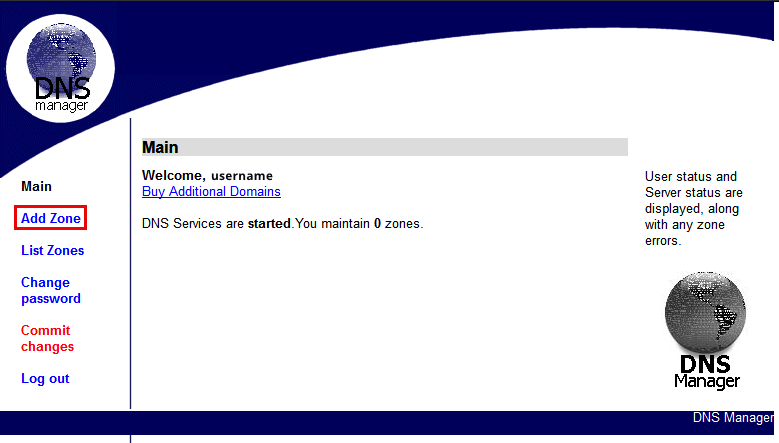
Step 1: Use the new username and password to log in to the FreeDNS Manager. It will take you to the DNS Manager home page.
Step 2: Click Add Zone on the left menu. This is where we will add the domain you wish to control.
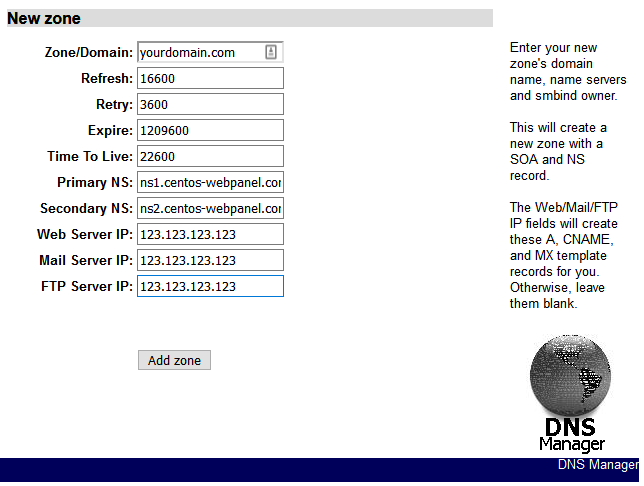
Step 5: Enter the details for the domain here. The default TTL times listed here will work for most uses. Feel free to modify them if you wish. Furthermore, you can fill in the IP address for the Web Server IP, Mail Server IP, and the FTP Server IP boxes. Filling in the boxes here creates the necessary DNS records for you, although it is not immediately necessary. You can do add these later if you do not add them now. Click Add zone when you are finished entering information to add the zone.
Step 6: Click the domain you just added. Afterward, it will take you to to the Viewing Zone page.
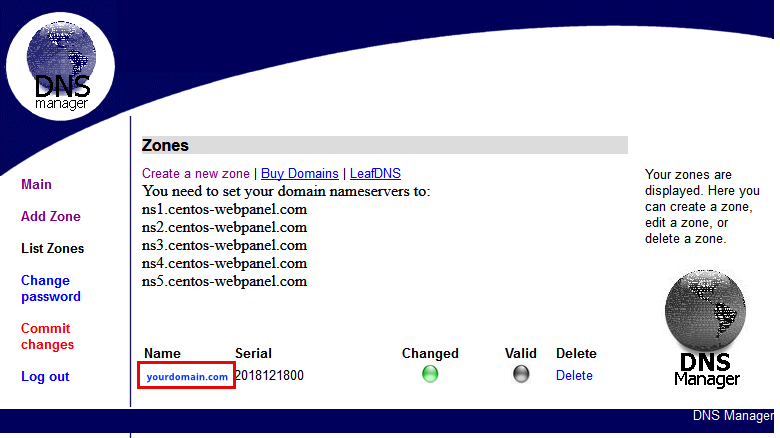
You will see a page that looks like the screenshot below.
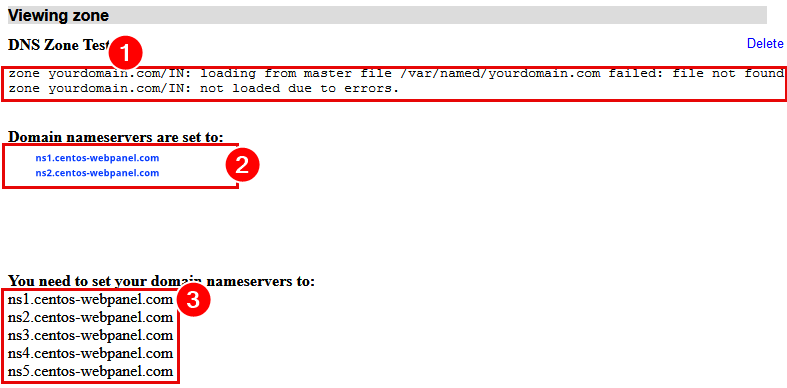
This page shows a few key pieces of information.
- DNS Zone Test: This section shows the status of the DNS Zone. When you first add the zone, it will show errors. It is normal and is caused by DNS propagation delays. When the domain finishes propagating, it will show an "OK" message.
- Domain name servers are set to: This area may be blank or contain outdated name servers. Name server changes can take up to 24 hours to fully propagate and be detected here.
- You need to set your domain name servers to These are the name servers to provide your Domains Registrar. They will allow you to let your registrar know where to point the domains.
Finishing Up and Future Domains
Step 1: You can add, delete, or modify any DNS Records you need in the spaces below. Click the Commit Changes link to finalize the changes. Edits made will be lost if you do not click Commit Changes before leaving this page.
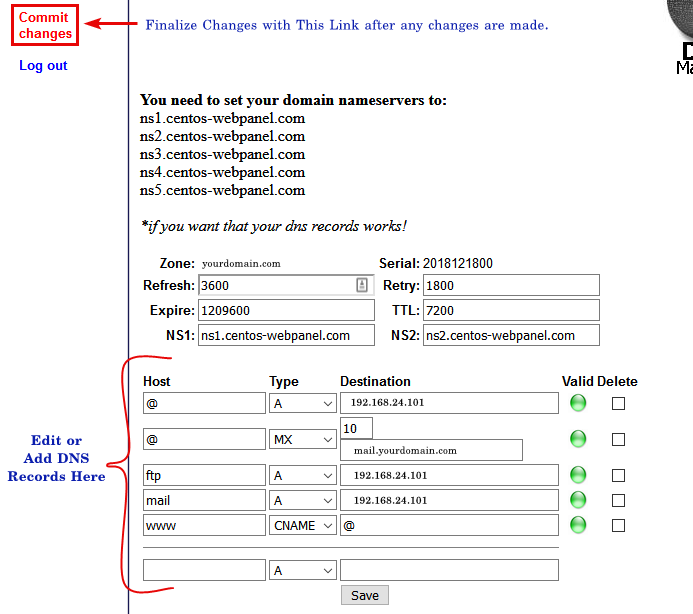
You have now set up DNS for your CentOS Web Panel. However, don't forget to create any DNS Records for your domain here. Remember, adding a new domain to your CentOS Web Panel requires performing the steps in this guide again for the new domain.
Written by Hostwinds Team / December 26, 2018