
Hostwinds Tutorials
Search results for:
You may find yourself needing to disable a Virtual Server at some point. Perhaps the server has been compromised somehow, or the client who uses the Virtual Server is behind on payment. Whatever the situation may be, being able to do this could come in handy, so this guide will show you how to disable a Virtual Server in Virtualmin. As always, you need to have already Virtualmin installed with Webmin access before proceeding any further. If you need help in doing so, check out these two guides:
Once you're ready to proceed, please refer to the following steps:
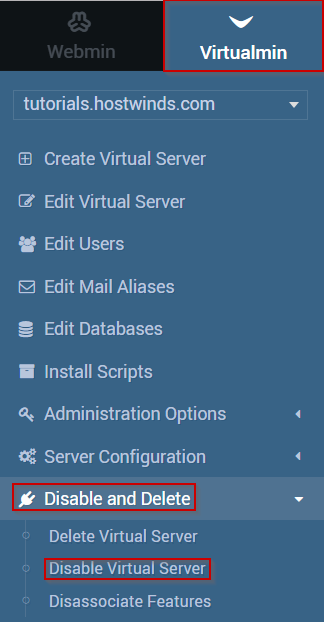
Step 1: Click on the Virtualmin section
Step 2: Select the Disable and Delete option
Step 3: Click on the Disable Virtual Server module
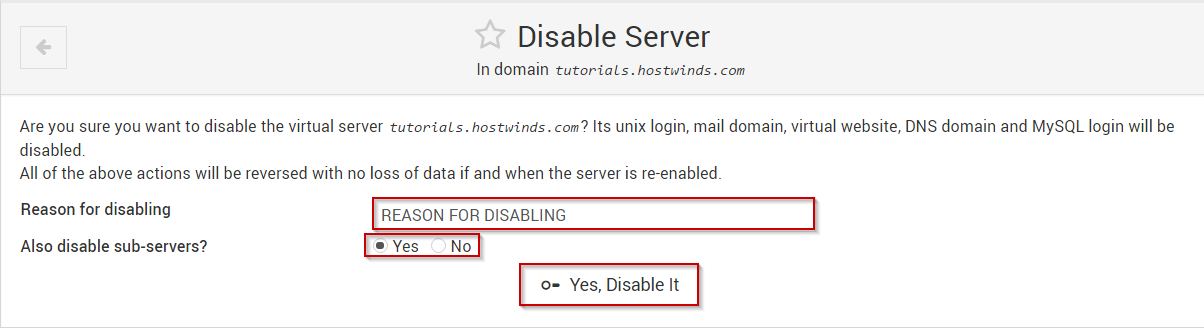
Step 4: Enter in a reason for disabling the server
Step 5: Select whether to disable any sub-servers
Step 6: When you're ready, click on the Yes, Disable It button
Once disabled, all virtual servers' associated logins will no longer work until the server is re-enabled. If you'd like to re-enable the server, you may refer to the following guide, which covers this process: How to Re-Enable a Disabled Virtual Server in Virtualmin.
Written by Michael Brower / June 21, 2017