
Hostwinds Tutorials
Search results for:
Table of Contents
How to Force HTTPS on WordPress Site
Tags: WordPress
When you have users visiting your site, you want to make sure they feel safe with the information they provide. That's why it's usually deemed necessary that your site has an SSL Certificate. The SSL Certificate allows your site to utilize the HTTPS protocol. Your users will still be able to visit the HTTP version of your site.
Check out this article for forcing HTTPS to be used on your site. With WordPress, there are a few ways that you can enable the SSL Certificate to be used. For more information on how to get an SSL Certificate, check out this article here.
Enable The Option When Installing WordPress
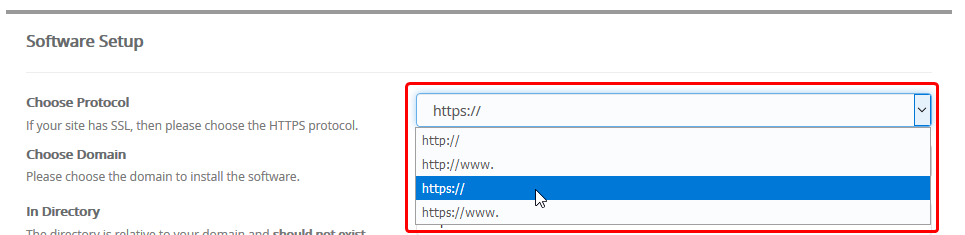
The easiest way to enable HTTPS is to set it up from the beginning. If you're installing WordPress using Softaculous, you can choose which protocol WordPress uses by default for your site. This option will be next to Choose Protocol in a drop-down menu. You'll want to make sure that you first have an SSL Certificate installed on your domain before selecting this option.
Change the URL if WordPress is already installed.
You can follow the rest of this guide to change the URL from http to https for your WordPress site if you have already installed WordPress using Softaculous.
Modify The URL Directly in the Database With phpMyAdmin
Aside from setting the Protocol to be HTTPS when WordPress is initially installed. The best way to make sure that this is updated for all the URLs on your site is to do this directly from the Database.
First, you will want to start by logging into your phpMyAdmin installation. This is available in the Databases section of cPanel.

Once inside phpMyAdmin, you will want to click on the database that your WordPress uses from the left options.
Clicking the database name will show you all the tables that currently exist in the database. You will want to look for and select the wp_options table. In this case, the database is suffixed with _wp864, and the tables have the prefix of wpr8_.
Note: This prefix of 'wp_' may differ depending on what was set when WordPress was installed.
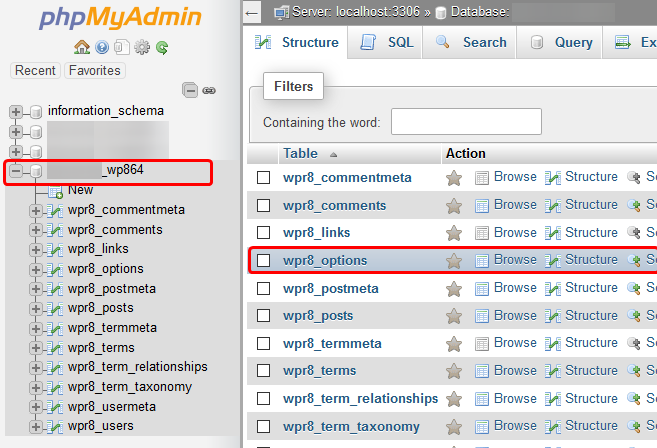
You will either want to click on the blue table name or click on the Browse button. This will let you view all the entries that are currently in the table.
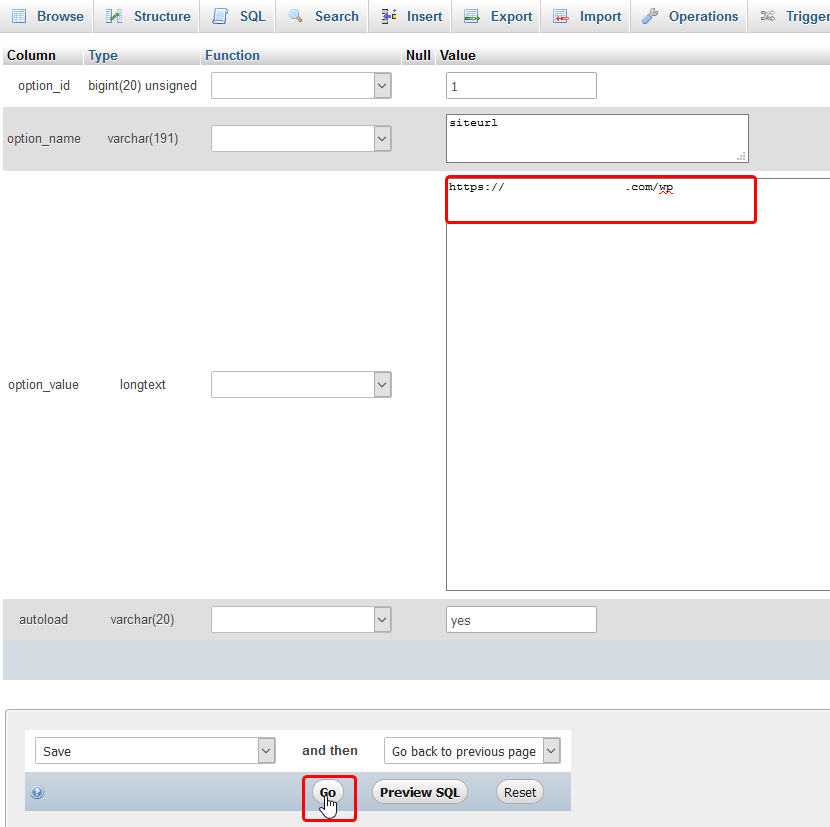
From the list of entries, you will want to find the option_name that matches both siteurl and home. You will click Edit next to these options and change it from HTTP to HTTPS.

Once you click edit, you will be brought to a new page where you can change the option_value from http:// to https:// for your site. Once you have done this, you will click on the Go option at the bottom to save the changes.
After this has been done for both the site URL and home options, WordPress should now be loading from HTTPS:// by default the next time you visit your website.
Modify Site URL Within Softaculous
Another way to enable this can be done through Softaculous as well. As long as you have used Softaculous to install your WordPress, this would be possible.
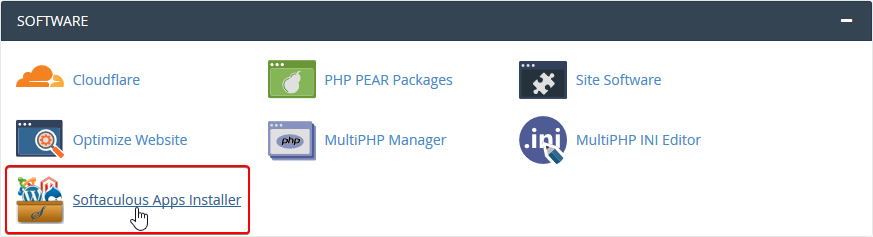
To start, you will want to navigate to your Softaculous Apps Installer once you are logged in to your cPanel.
Once there, find the Installations button towards the top. Click it to view your current installations (including your WordPress)
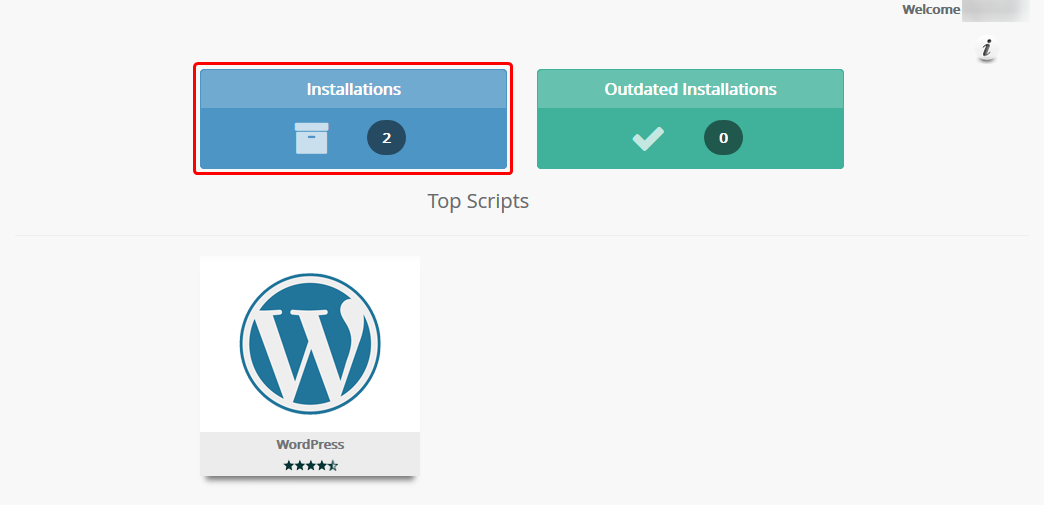
To the right of the WordPress installation you have installed, you will want to click on the Pencil Icon to edit the installation.

You should be brought to a new page where you can edit the various settings that you had installed WordPress with. You will want to find the Text Box for editing the URL of the site. This should be near the top of the page. You will want to make sure that the text in front of your site's name has HTTPS rather than HTTP.

After you have made the necessary changes, scroll down, and you will find the button that says Save Installation Details to Save the changes you just made towards the bottom of the page.

Modify Site URL In The WordPress Dashboard
If you've already installed WordPress but not through Softaculous, the above steps may not be of much help. Luckily there's a way to change this directly from within the WordPress Dashboard as well.
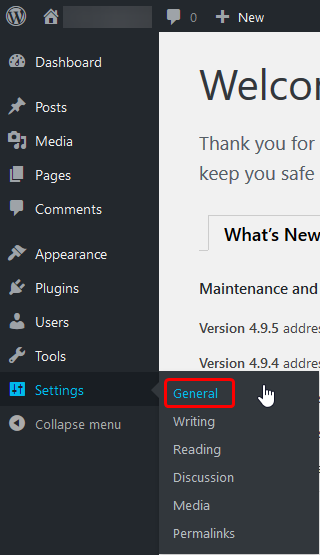
First, you'll want to log into your WordPress Dashboard.
Once logged in, along the Side Bar, you'll want to navigate to the Settings options and click on the General sub-option. This will open the General Settings for your WordPress installation.
Once you're at the page to edit the General Settings, you will want to change the HTTP to HTTPS on both the WordPress Address and the Site Address boxes.
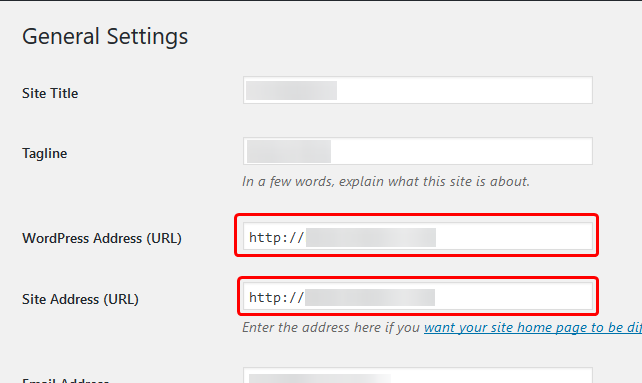
After you've made that change, you'll want to navigate to the bottom and click on the Save Changes button to save the changes you just made.

If you should have any questions or would like assistance, please contact us through Live Chat or by submitting a ticket with our Technical Support team.
Written by Hostwinds Team / April 19, 2018