
Hostwinds Tutorials
Search results for:
Table of Contents
Creating The Database and User
How to Add a Database in Plesk
Tags: Plesk
Creating The Database and User
The first step to adding a database is to log into Plesk from your Hostwinds VPS or Dedicated Server.
After logging in, there are a couple of options to access the databases for each domain.
The first method is to click Databases on the left-hand menu. The second method is from Plesk home, expand the domain section, then choose Databases.
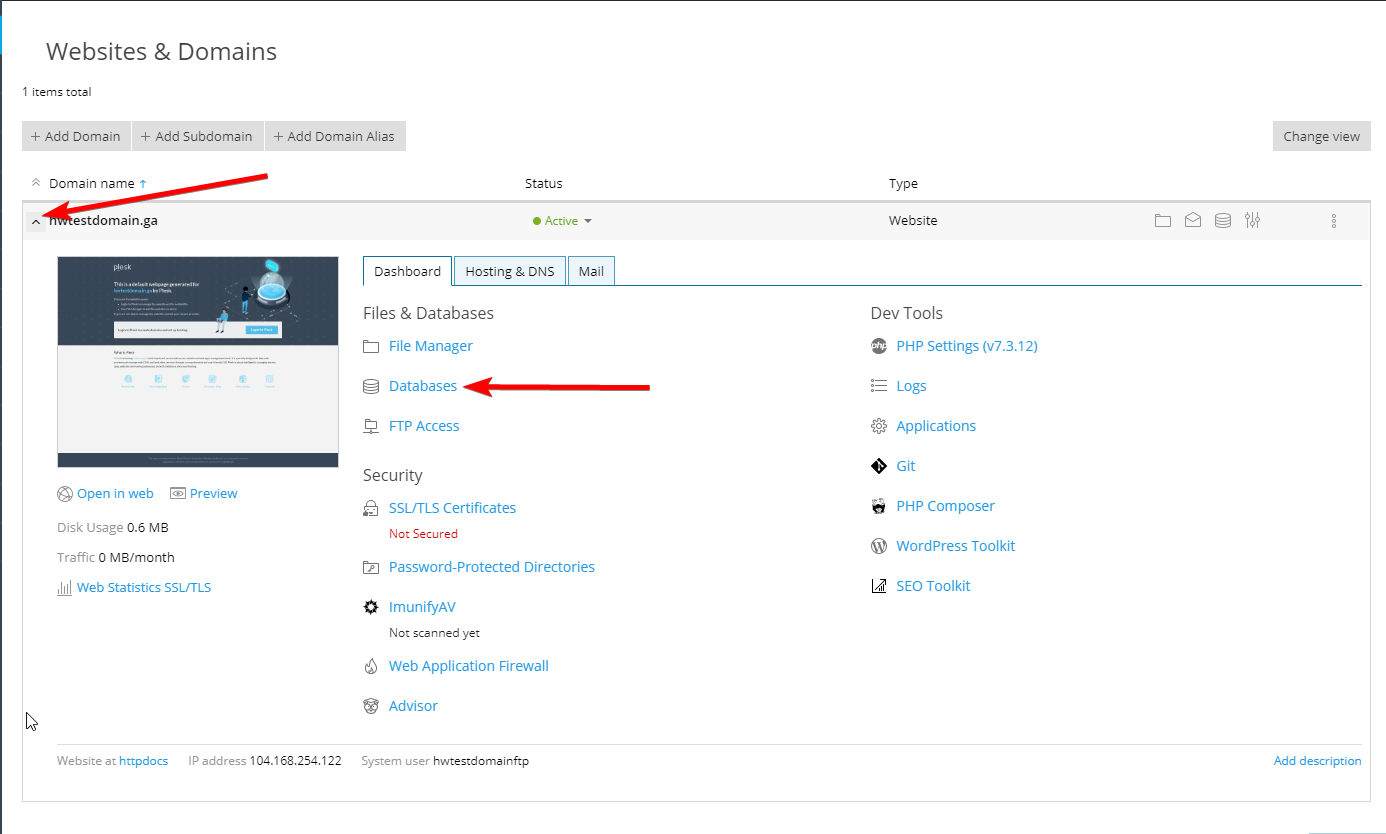
Next, click the Add Database button in the top left. This will bring you to the form to fill out to get the database created.
Creating The Database and User
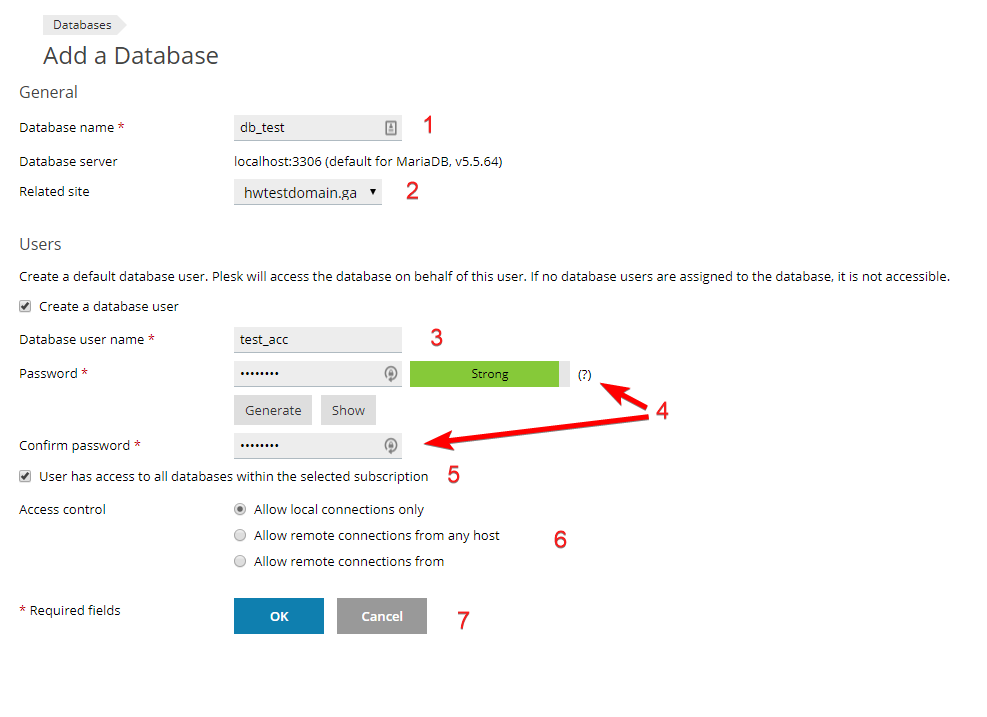
- Enter the desired database name.
- Choose to have the database related to a site in Plesk.
- (Optional) Create a database user.
- Assign the database using a password.
- Allow the user to access all databases in the subscription.
- Choose the level of remote access protection for the database
- Click OK to confirm and create the database, or cancel to return to the previous screen.
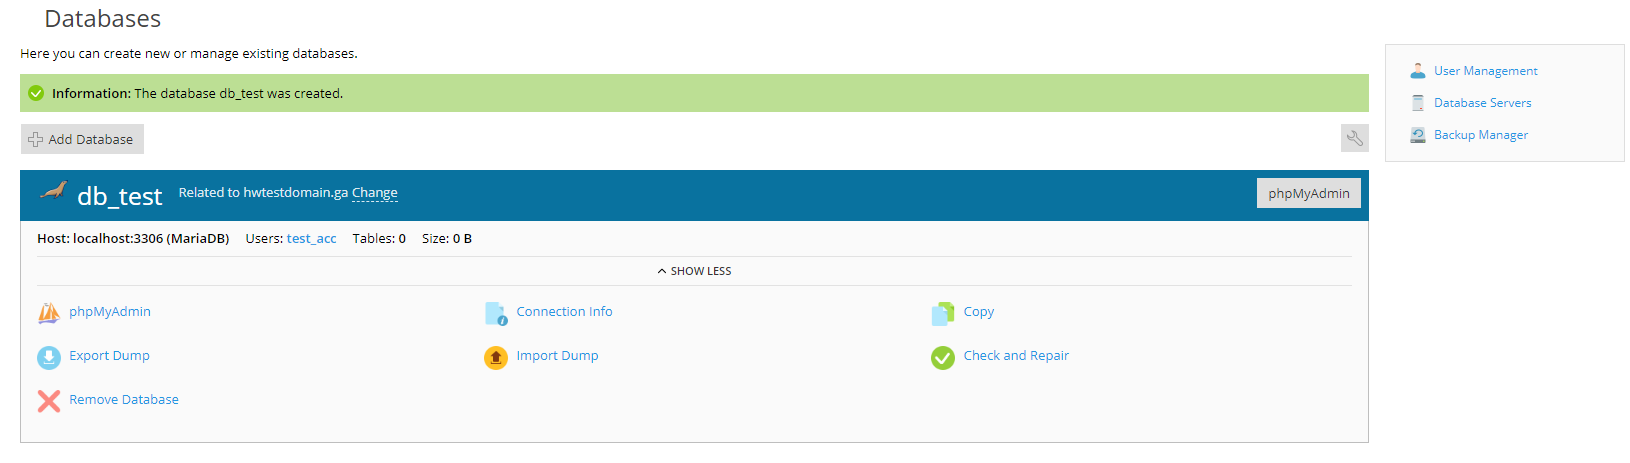
Congratulations! Your database has been created. You will be returned to the list of databases along with options for the database you just created.
Written by Hostwinds Team / December 28, 2019