
Hostwinds Tutorials
Search results for:
Either as an admin or a non-admin user, you can create website domains that will also optionally work for email.
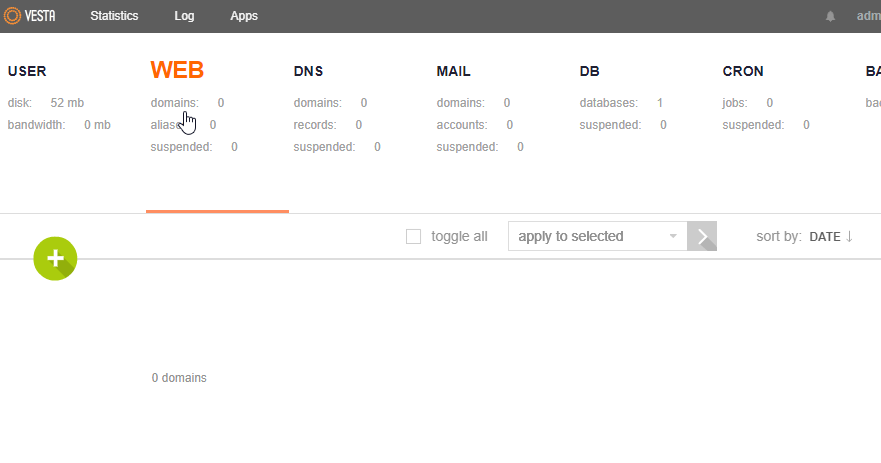
Step 1: Log into Vesta at YourServerIP:8083 on your server.
Step 2: Click the Web section of the header.
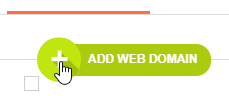
Step 3: Click the green + to add a Web Domain.
Step 4: Enter your domain name.
- The IP address should be populated with the main one for your server, but other options may be present if you have more than one.
- By default, Vesta will add DNS and Mail support for a domain when adding it as a Web domain.
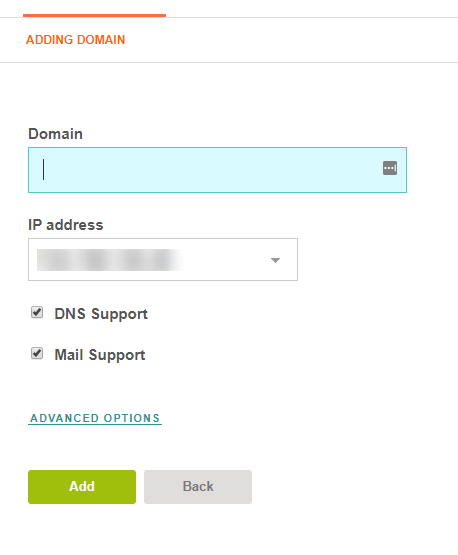
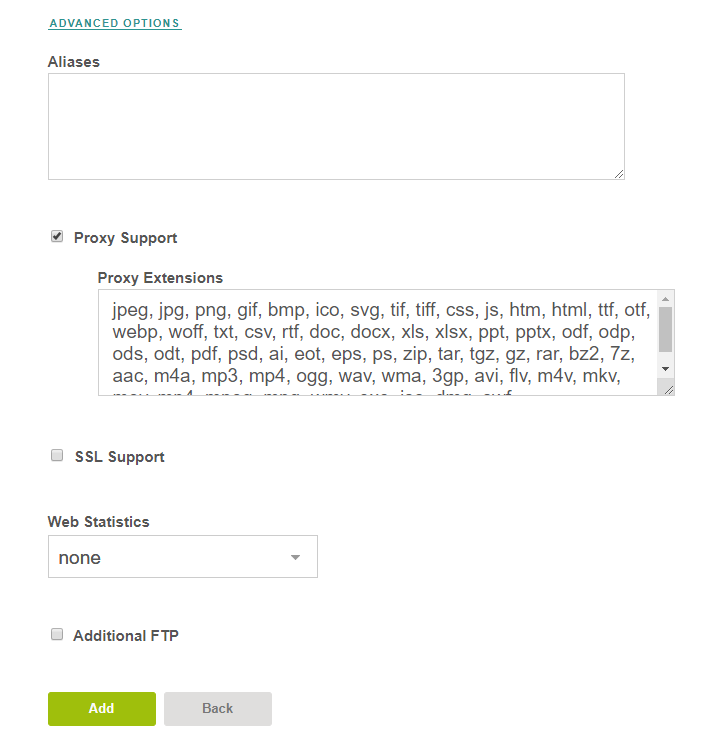
Advanced options:
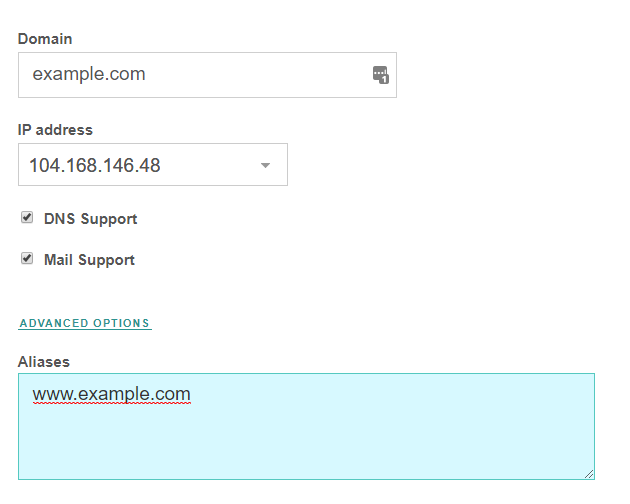
- Vesta will automatically add the www. alias for your domain. Enter any others you have in the Aliases box.
- Vesta comes with an Nginx proxy in front of the Apache webserver. Leaving Proxy Support checked should speed up websites hosted from the server.
- SSL support is available, including free certificates through Lets Encrypt. You can also use this section of Vesta to generate a Certificate Signing Request or manually enter the details of a certificate generated or purchased elsewhere.
- The two Web Statistics options are Webalizer and Awstats. Vesta will have links to these in the 'web' section on the domain if chosen here.
- You can also add extra FTP accounts for your domain at this time.
All of these settings can be changed later, as well.
Step 5: Once you are done entering information, click Add. There will be a notification across the top of the form if successful.

Step 6: Build your website. Use the Apps option at the top of Vesta to launch Softaculous and install a script on your domain. Or, you can FTP into the server and upload files manually. Your webroot will be at:
/home/[user]/web/[domain]/public_html
Written by Evan Winter / October 23, 2019