
Hostwinds Tutorials
Search results for:
Table of Contents
How to Start Building an E-commerce Site in Weebly
Tags: Weebly Website Builder
Weebly makes adding eCommerce to your website easily and effortlessly using the e-commerce option. If you are not familiar with accessing your Weebly service, please review How To Access Weebly Website Builder.
It is important to note that the information provided in this guide is for informational purposes only. The premium features and changes made after the time writing this guide may be different and will be displayed to you in your Weebly account when editing your site through Weebly. Please open a ticket with our Support Team if you have any questions to help.
Weebly E-commerce Section
Once you are logged in to your Weebly account, select the Build tab at the top of the page.

Now look for the E-commerce column. Each available option is available by dragging and dropping into the location you would like within your web page.
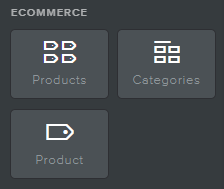
Products – Use this feature to start a products column on your webpage
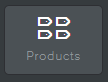
While dragging the Products element onto your web page, it will prompt you to enter a New Product if you have not done so already.
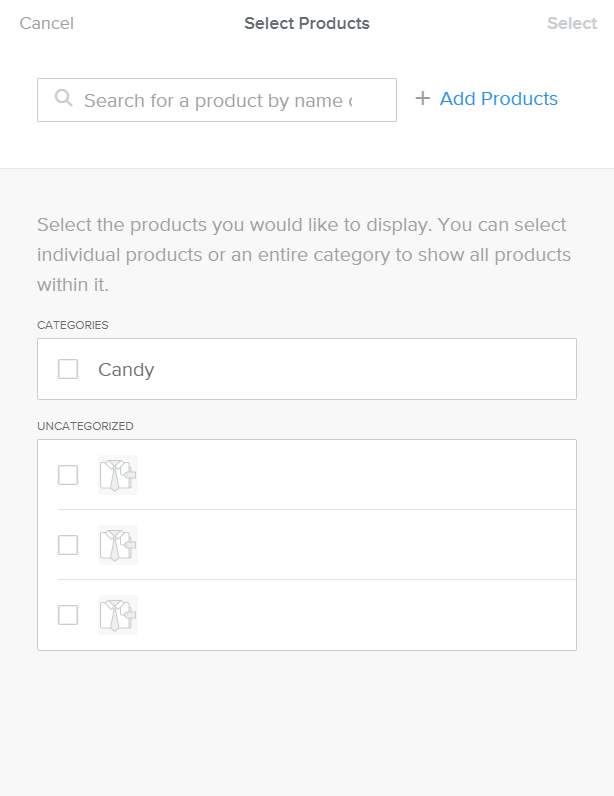
Selecting Add Products will take you to a separate product page to create your product(s), including imagery, pricing, and description. Once a product is created, your product availability will be available when selecting products. However, you can select an uncategorized box to insert a product with no current information if desired. When any checkboxes are selected, Add Products will change to "Select (insert number here) Products." Clicking on either of these options will produce the next step Choose Layout.
If you have already created or just created Products for your Storefront, these will show in the position you drag this element to and can be shown anywhere you choose on the page you are editing. Also, feel free to select Select the layout you would like your website to display, and your product(s) will be displayed as such.
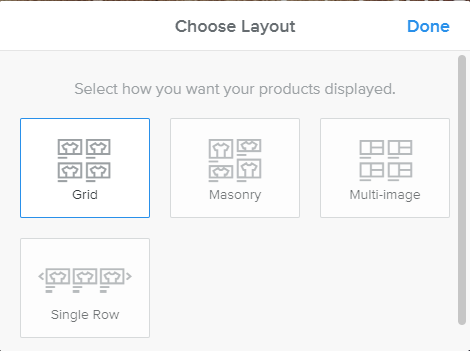
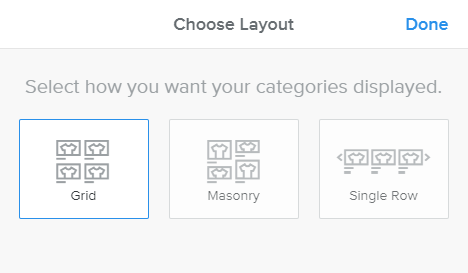
- Grid: Products displayed in rows and columns. All images are the same size.
- Masonry: The products are laid out based on the size of the image – usually alternating smaller and larger. Pagination displays at the bottom if needed.
- Multi-Image: All the images you've uploaded for a product are displayed.
- Single Row: The products are displayed in a single row, and the user can scroll to the left or right, similar to a slideshow.
Categories – Use this option to drag and place categorized products from your Weebly store
Unlike Products, which can include many generic items (belonging to many different categories), Categories allow you to promote your products. For example, you can use this feature to promote "candy" Items or "on-sale" type items you are trying to get rid of. While dragging the Categories element to your chosen position, this will be shown on that page. Each category you have created within your store will be an option to select and include within your website.
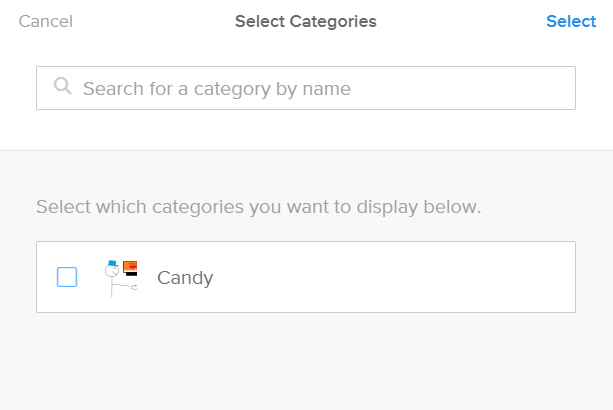
After selecting your categories, you will be prompted to choose your layout before applying.
For information on creating categories or editing current ones, please review our article Weebly Store Overview.
Product – Place individual products using this option.
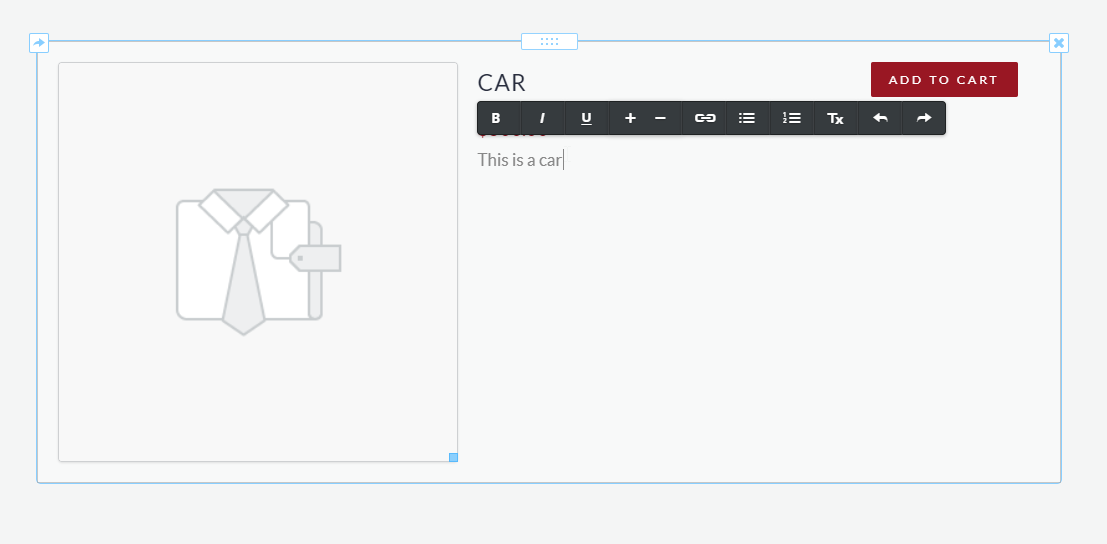
While dragging the Product element to the page location, this will prompt you to search for a current product that you have already created. For testing purposes, we have created a product within Weebly's Store called Car for $500.00. For more information about Weebly's Products, please review Managing Products With The Weebly Store.
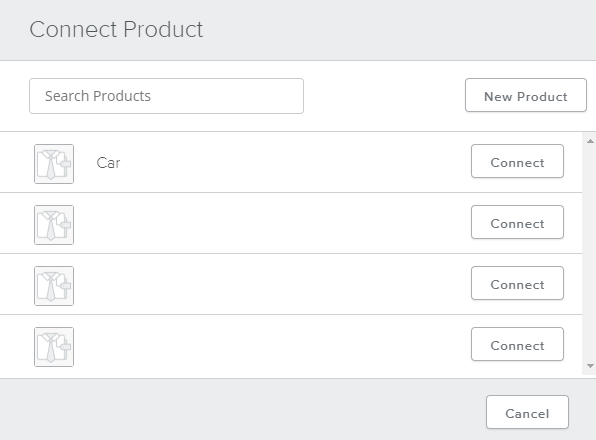
When selected, the individual product will be displayed where you dragged, along with the information describing the product and price.

Editing E-Commerce Options
You can edit the text within each Product or Categorie Box by selecting any text within. These options would include changing what is textually there, appearing as bold or italicized, adding links, etc.
You can also change advanced features from within these areas by clicking any area within. When done, an option similar to below will be displayed.
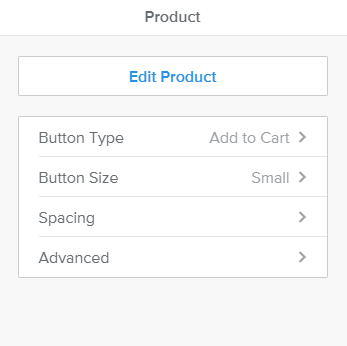
- Edit Product – Change the product or current product features within the Weebly Product interface.
- Button Type – Gives other textual options displayed on the button
- Button Size – Change the button size too small or large
- Spacing – Change the margins of the current category within the web-page
- Advanced – Choose to display or not to display certain properties of your product
Options within the advanced editing section may differ from which area you are attempting to edit.
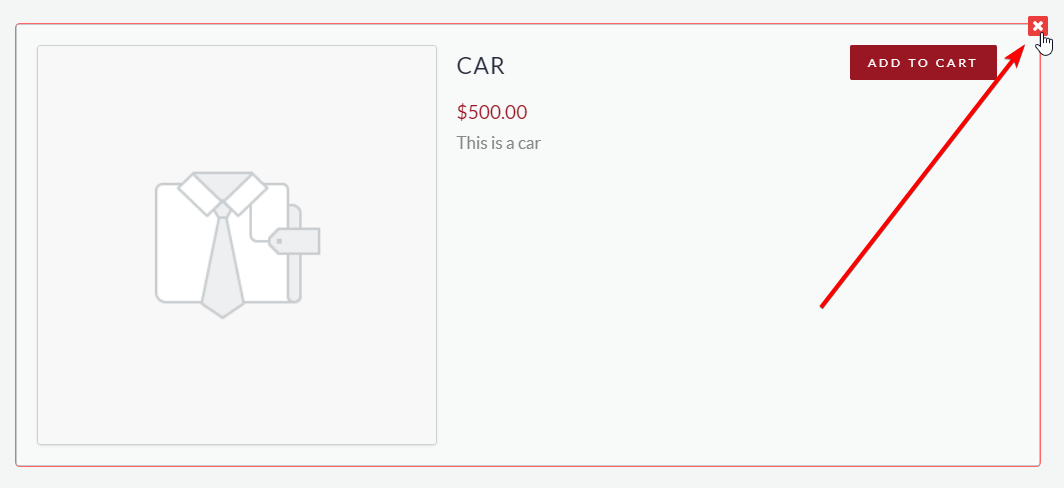
Deleting An E-Commerce Area
Deleting any section within Weebly is easy. Hover over the area you wish to delete and select the X icon in the top right. This will effectively delete the selected box.
Written by Hostwinds Team / August 2, 2018