
Hostwinds Tutorials
Search results for:
Table of Contents
How to Configure W3 Total Cache
Tags: WordPress
So you've set up your WordPress website, but it's slow, and you keep hearing about optimization. One of the most widely used and popular tools to help you with optimizing your site is from a third-party plugin called W3 Total Cache. There are other caching tools available, but none that do as much when properly configured. There are a lot of options, but the setup is really much simpler than it seems. As always, we highly recommend you have a backup of your account before making changes to your WordPress configuration and installing any plugins.
Install and Activate
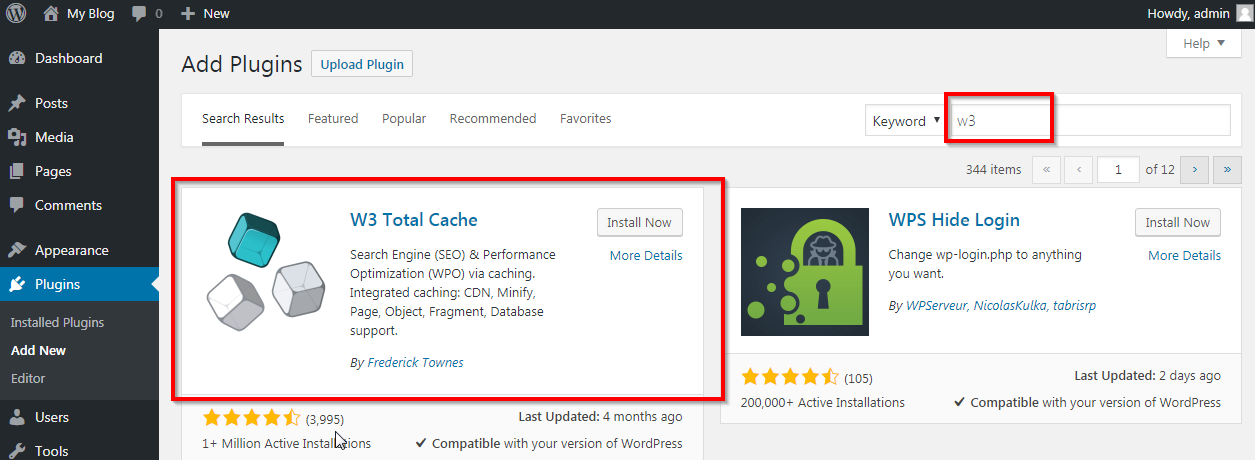
First things first, you need to go to your Plugins section and click Add New. From there, type W3 into the search bar, and W3 Total Cache should be the first option given:
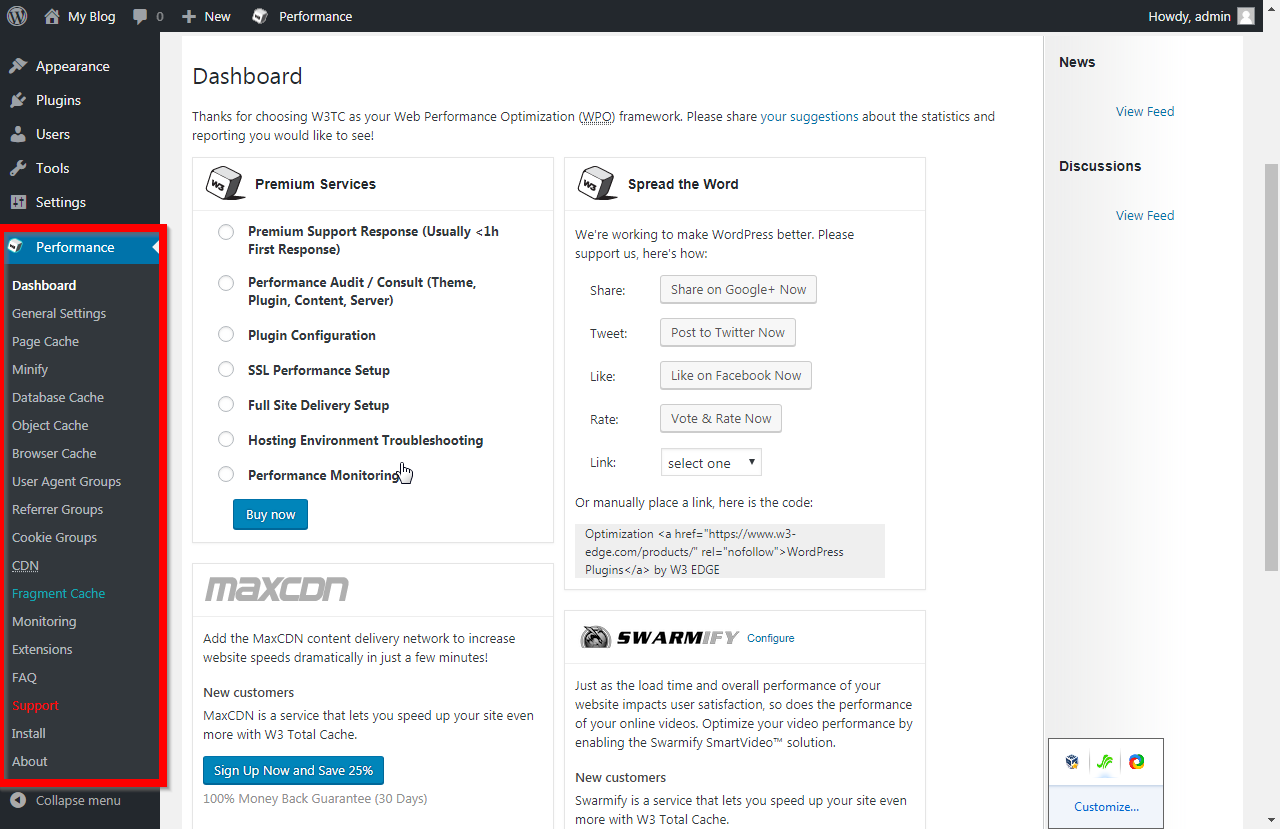
Once installed and activated, you'll have a new section in your sidebar, the Performance tab:
Configuration
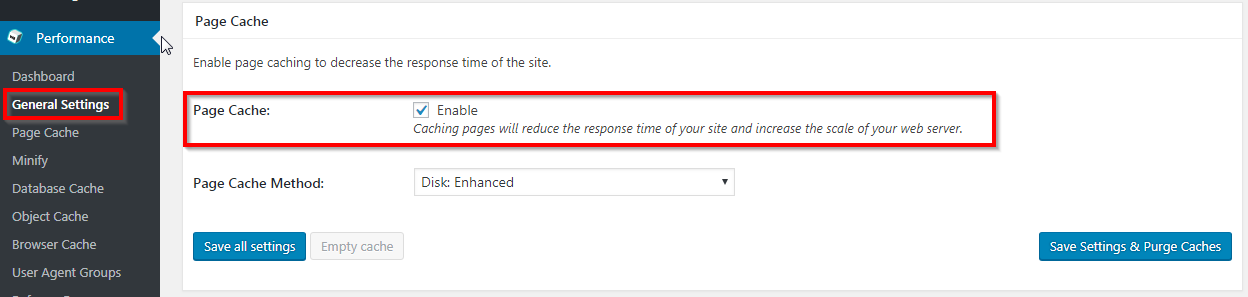
From here, you want to click on the General Settings tab first, and you'll only need to enable the following setting:
Scroll down further, and the Browser Cache setting should already be checked:

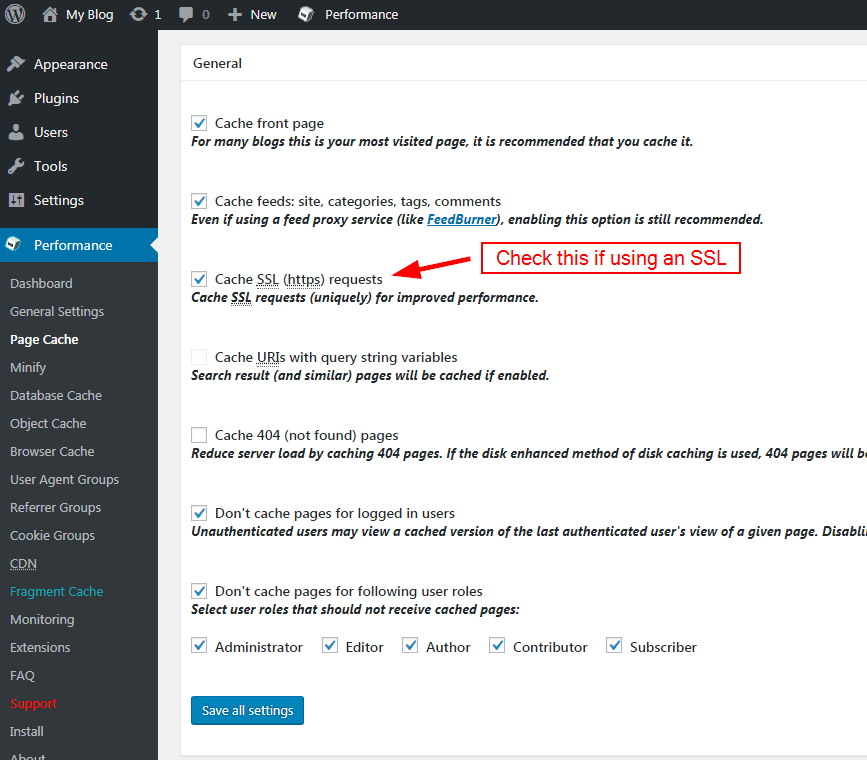
Now click Save All Settings and click on the Page Cache settings next. We will now note the sections in which you need to make changes, starting with the first section General:
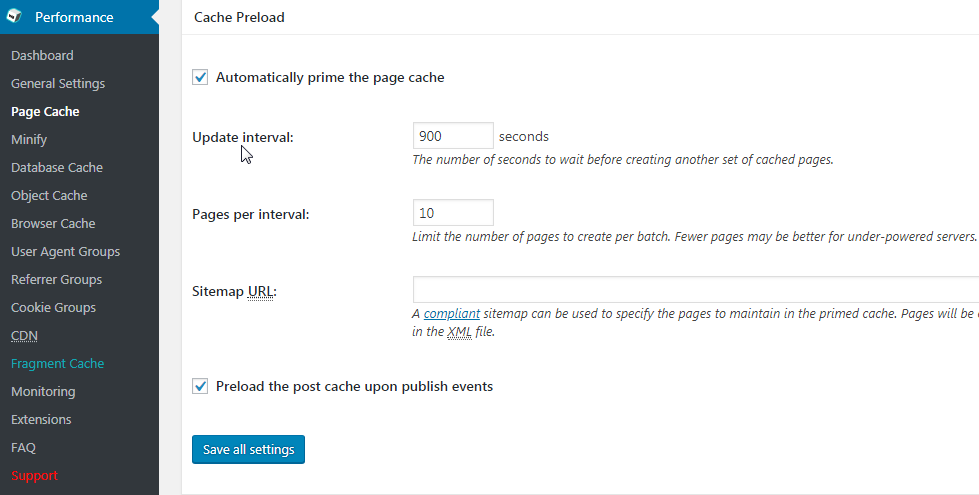
Then to the Cache Preload section:
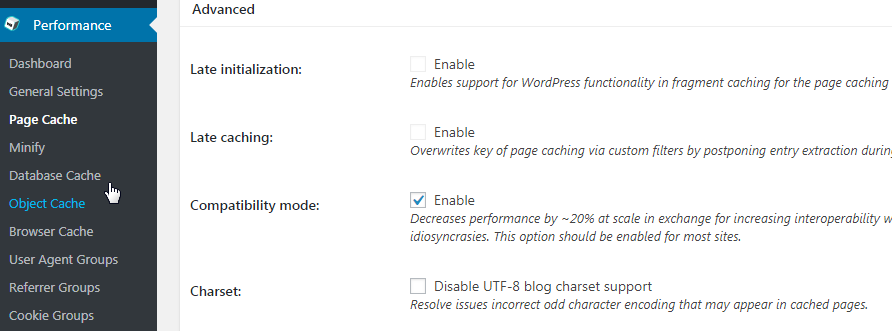
Lastly, locate the Advanced section and enable Compatibility Mode(recommended by the creator of the plugin):
Once again, click Save All Settings, and then move on to the Browser Cache section and set up as follows:

Now click to Save all settings, and you will have completed the basic W3 Total Cache installation and should be seeing much higher page grading at GTMetrix and other testing sites, as well as many improved speeds. There are other configurations possible if using an outside CDN service, but the settings detailed here will be all that you need for general usage.
Written by Hostwinds Team / April 28, 2018