
Hostwinds Tutorials
Search results for:
Drupal is one of the most popular content management systems in use for building websites today. Flexible, scalable, customizable, and secure, Drupal is used by colleges and universities, local and national governments, entertainment industries, and major research organizations worldwide. Hostwinds offers Drupal for installation via our Softaculous Apps Installer for all of our shared and business hosting plans and can be installed on VPS and dedicated server solutions to purchase the Softaculous license available.
In this article, we will walk you through how to install Drupal onto your website using Softaculous.
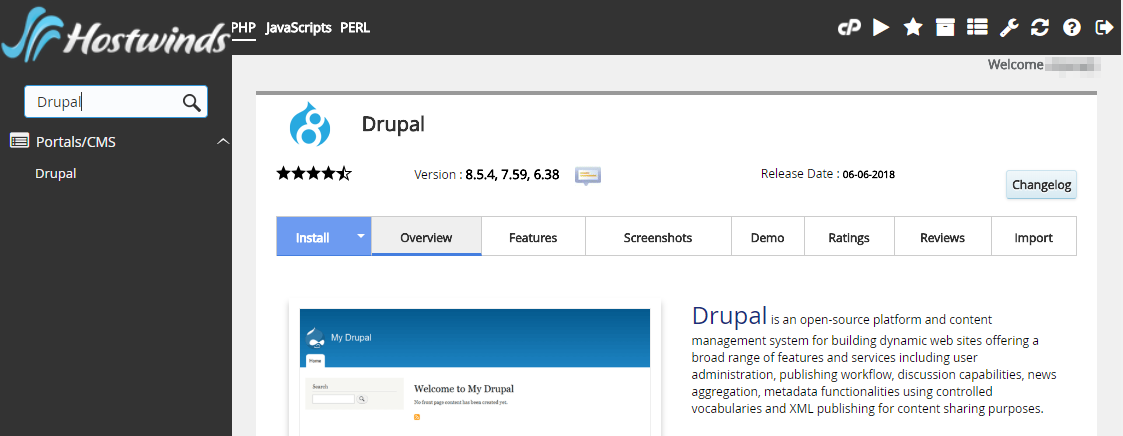
Step 1: Open your Softaculous Apps Installer. This can be found in your cPanel area as shown below:

Step 2: In the Softaculous search area, type in Drupal to narrow the list down to only the Drupal CMS.
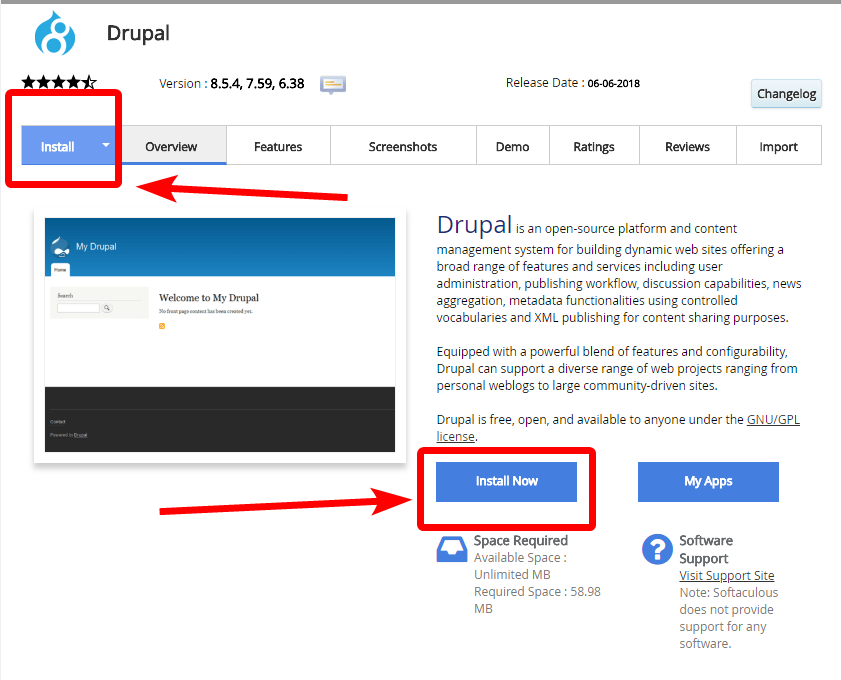
Step 3: There are two ways to install Drupal. Feel free to click either one, as highlighted:
Step 4: You will be shown a Software Setup page such as this one:
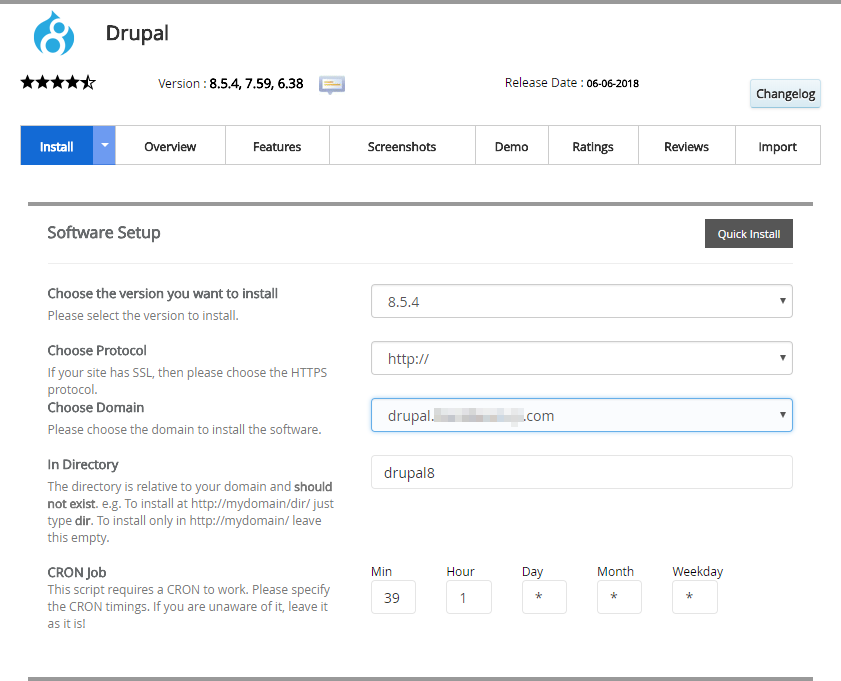
Let's go over each section of the Software Setup page in detail, so you know what each option means.
First, you can choose the version of Drupal you wish to install. Please note that Drupal version 6 is currently no longer supported, and Drupal 8 is currently the latest and most updated version available.

Next, you can choose the protocol you want the website to resolve with, including whether you want the www. to be included at the front of the domain or not.

Then you choose the domain or subdomain you want to install Drupal onto.

You also get to choose the directory you want Drupal installed in. By default, this is in the directory drupal#, with the number being the version you are installing.

Next, you can set the CRON timings for the CRON job that keeps Drupal functioning. Leave this by default unless otherwise told.

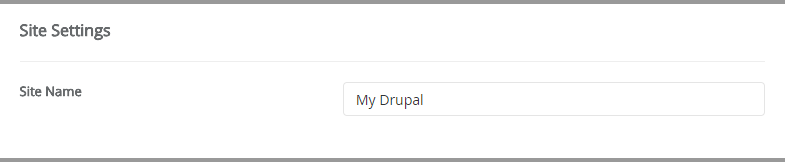
Afterward, you will set up the name of your website, which is what will display in the window or browser tab for anyone who visits your site, as well as in any headers or footers using the site name.
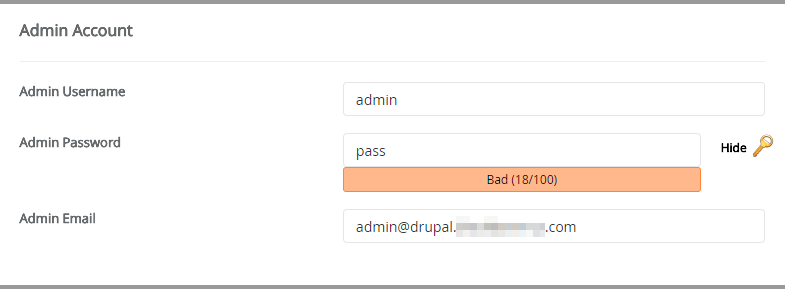
You will then need to create an admin account for the Drupal installation. The default values for this are very insecure, so be sure to change the password at the very least. Also, be sure to use an active email account if you forget the password in the future.
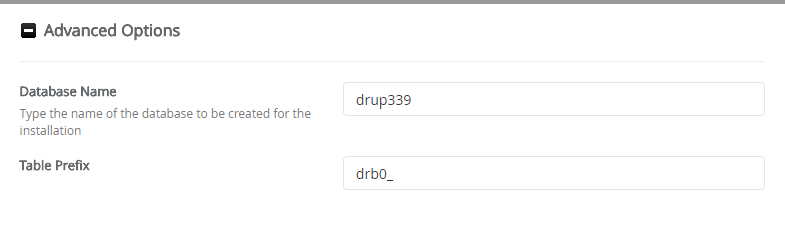
Finally, there is an advanced option to configure the database name and table prefixes manually. If you do not know what these do, feel free to leave them at the default values.
Step 5: Wait for the installation to complete. This can take some time, so be sure not to leave the page until the bar reaches 100% and the installation is completed.

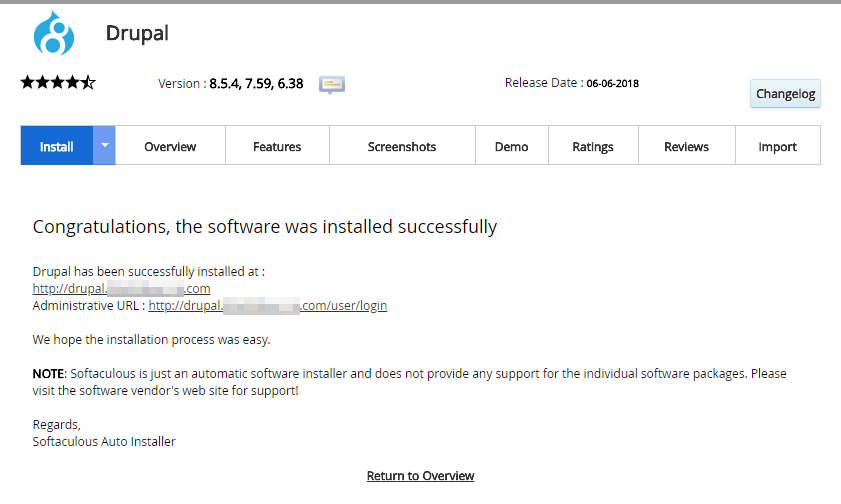
Once the progress bar hits 100%, you will be greeted with a congratulations page detailing the installation's success, the installed domain, and the administrative URL to log in to the admin panel.
Written by Hostwinds Team / June 15, 2018