
Hostwinds Tutorials
Search results for:
Table of Contents
How to Install Webmin on a Cloud VPS
Tags: Cloud Servers, VPS
Webmin is a system administration tool typically used on Linux operating systems. Webmin connects to a web browser offering multiple features, including managing users, tracking server usage, managing databases, setting up Linux Firewalls, configuring web servers for Apache, install packages, and more.
Webmin is open-source software with no upfront licensing fees. If you prefer a GUI (graphical user interface) and are not fond of or accustomed to a command line, Webadmin may be the software for you.
Webmin is a web-based UNIX system management software with a GUI for users unfamiliar with the Linux command-line interface. The user can perform most of Webmin's web-based interface to manage web applications and servers; it is similar to the popular Cpanel you get on when purchasing some web hosting plan. By integrating the Virtualmin host management plugin with Webmin, which is also free, you can replace some paid web management panel platforms such as Plesk or Cpanel.
Created to manage servers, it is now much more powerful and provides server maintenance capabilities in the same vein as Plesk or Cpanel.
Webadmin can have a perceived barrier to entry with its powerful features, intuitive interface, and the ability to configure server settings. They have created a robust Webmin Wiki page covering the scale of tasks possible and the modules available to address this.
Webmin Preparation
Before starting, you will want to make sure your CentOS8 System is up to date. From there, all you need is a server with root access, such as an SSH connection. The Webmin installer will install all of the prerequisites for you.
dnf makecache
dnf upgrade
Install Webmin
Step 1: Download the Webmin RPM Package
wget http://prdownloads.sourceforge.net/webadmin/webmin-1.970-1.noarch.rpm
dnf install perl perl-Net-SSLeay openssl perl-Encode-Detect
Step 2: Install Perl and type "y" when prompted to confirm the installation
dnf install perl perl-Net-SSLeay openssl perl-Encode-Detect
Step 3: Install Webmin using the RPM Package.
rpm -Uvh webmin-1.970-1.noarch.rpm
Step 4: Upgrade Webmin
dnf upgrade
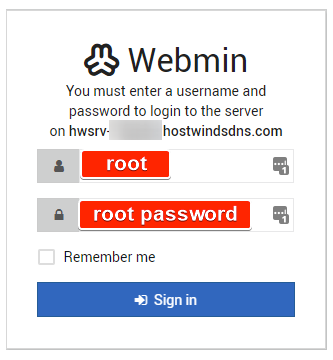
Step 5: Once you have done so, you can access Webmin. The URL is the hostname on port 10000, and the username and password are the root and the root password.
Written by Hostwinds Team / July 30, 2021