
Hostwinds Tutorials
Search results for:
Table of Contents
How to Manage Mail for Domain and Account Mail (Vesta Control Panel)
Vesta Control Panel offers several configurability options when adding and editing mail domains and accounts. The below guide will explore the options that Vesta provides.
Mail Domains
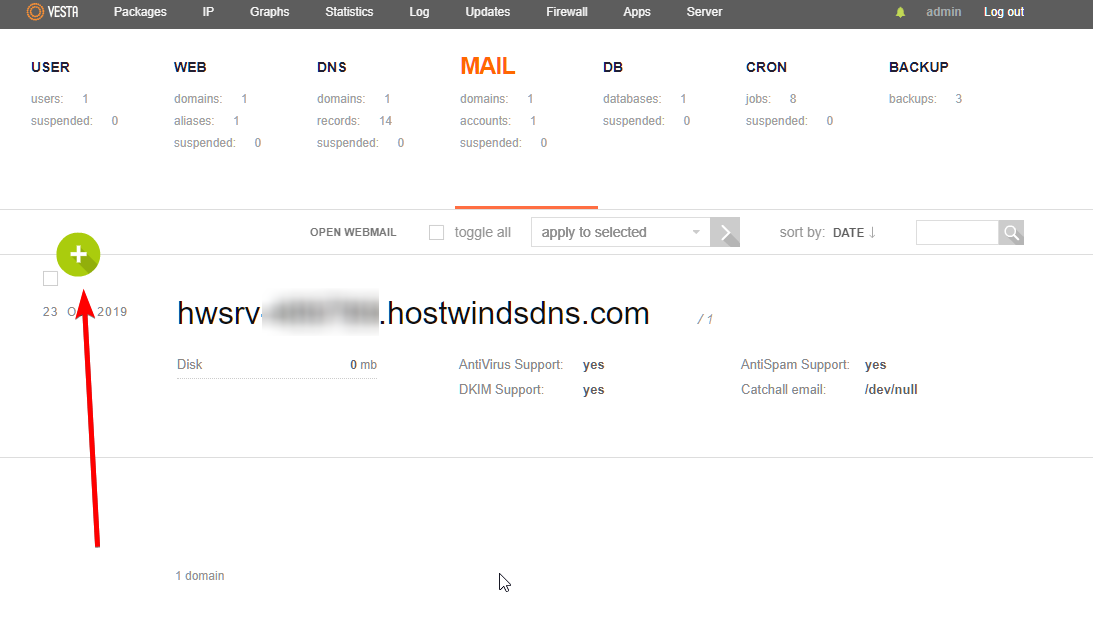
Step 1: Access your admin Vesta account at YourServerIP:8083. Select the Mail section from the menu, as seen below.

Step 2: You should find the server's hostname listed as a mail domain in this section. You may add domains that you want to create mail accounts for using the green plus sign icon, as seen below.
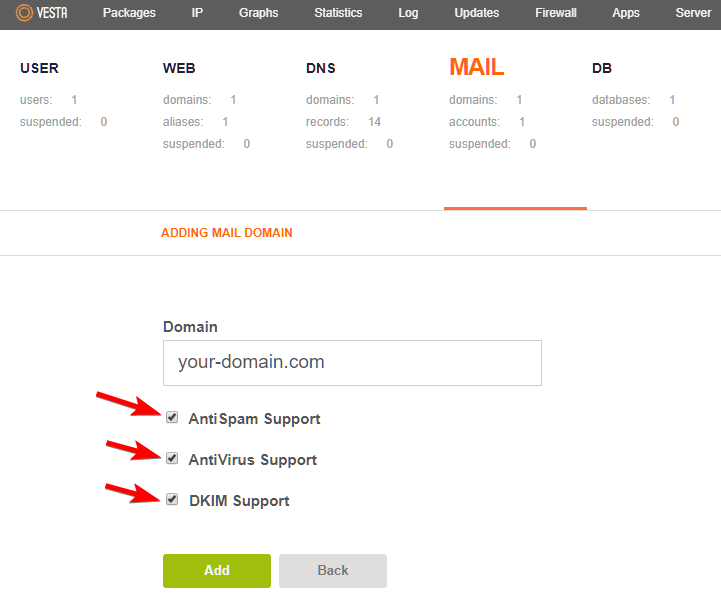
Step 3: The domain for which you plan to create mail accounts can now be added. It is recommended to select all boxes for AntiSpam Support, Antivirus Support, and DKIM Support. Then click the green "Add" button when finished.
Mail Accounts
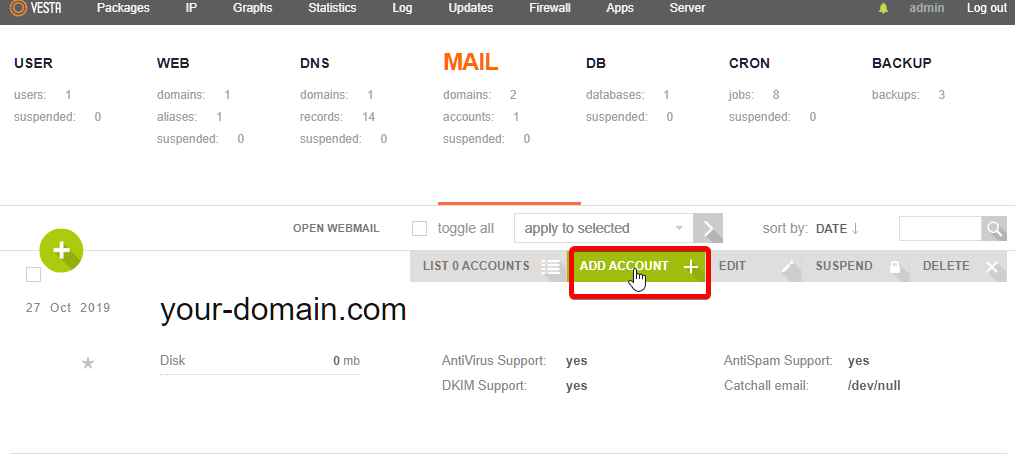
Step 1: Access your admin Vesta account at YourServerIP:8083. Select the Mail section from the menu, as seen below.
Step 2: You will find a list of all mail domains, and you may add accounts for a given domain by hovering over the desired domain. Click "Add Account," as seen below.
Step 3: From the "Adding Mail Account" tab, you may enter the account to be created on the mail domain and the password for the account. Optionally, select an email address to receive the login details for this new account. Click "Add" when finished.
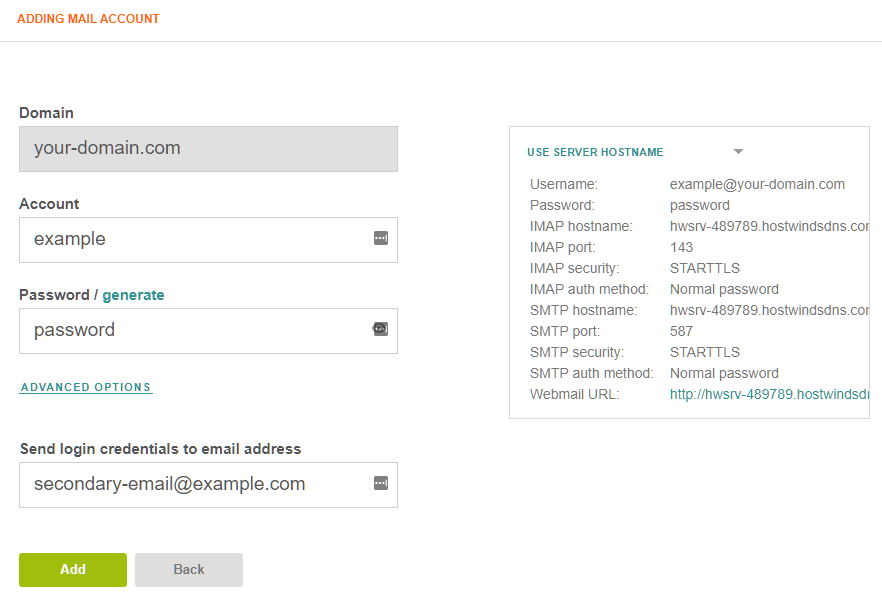
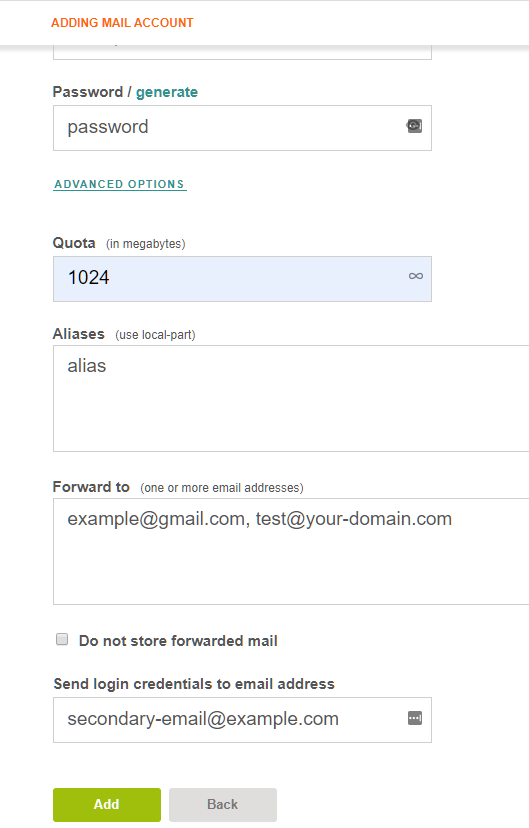
Step 4 (Optional): Under the Password field in the Adding Mail Account tab, you may select "Advanced Options." From there, you may set a quota (limit) for the account's disk use. You may also enter an alias account, which will forward (but not store) mail TO the created account. The alias account will not include a domain. In the example below, alias@your-domain.com will forward mail to the account being created.
Finally, you may enter email addresses for mail to be forwarded to FROM the account being created. These email addresses can be for any domain, and you may add more than one, separated by commas. Then decide whether to store mail that is also forwarded to your "Forward to" addresses. Leaving the "Do not store forwarded mail" box unchecked will result in potentially excessive disk use, but you may choose to store forwarded mail for redundancy.
Auto Reply
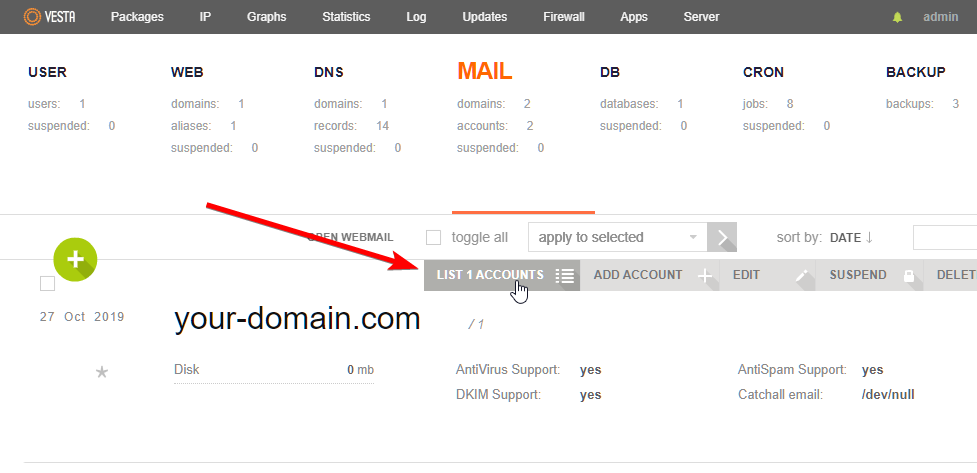
Step 1: You may create an Autoreply message for a specific mail account from the main Mail tab in Vesta. Hover over the mail domain for the account for which you will create an Autoreply message. Click "List "X" Accounts."
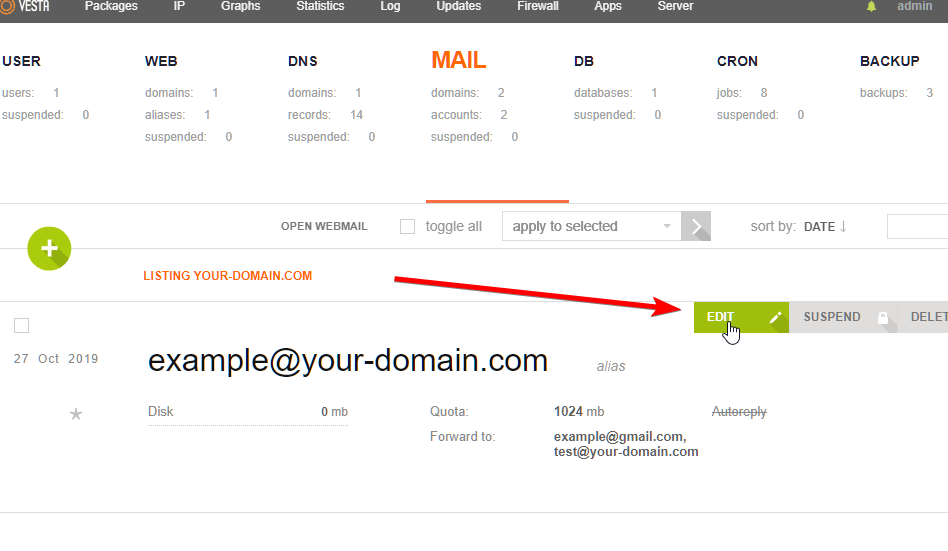
Step 2: Hover over the desired mail account and click "Edit," as seen below.
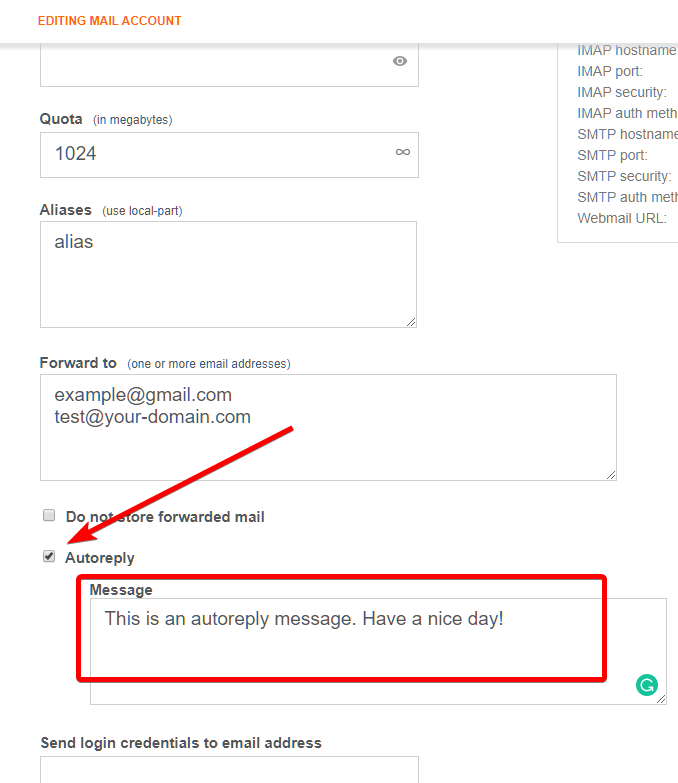
Step 3: Lastly, scroll down and check the Autoreply box. Enter your autoreply message for this mail account and then click "Save."
Written by Benjamin Bream / October 29, 2019