
Hostwinds Tutorials
Search results for:
Your clients can register their own accounts through WHMCS, although there may be a time when you need to create a new client account manually as an admin user. This guide is intended to go through how this can be done from within WHMCS.
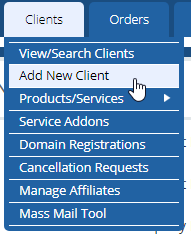
This form can be found under Clients -> Add New Client from your WHMCS admin panel as shown below:
This guide will go over the input fields and options associated with the Add New Client form.
Some of these fields may be optional. Which fields are optional are specified in the Other section of the WHMCS General Settings. More details on those settings can be found here.
- First Name: The first name of the client.
- Last Name: The last name of the client.
- Company Name: The name of the company the client represents.
- Email Address: The client's email address.
- Password: The client's password. A strong password should be generated using a tool such as this. After creating the new account, the password should be reset, and password reset instructions sent to the client.
- Security Question: The security question used by the client. To use this, at least one security question must be set under Setup -> Other -> Security Questions. If enabled, you should let the client set this themselves.
- Security Answer: The client's answer to their security question. It would help if you let the client set this themselves.
- Address 1-2: The first and second lines of the client's mailing address.
- City: The city of the client's mailing address.
- State/Region: The state/region of the client's mailing address.
- Postcode: The zip/postcode of the client's mailing address.
- Country: The country of the client's mailing address.
- Phone Number: The client's phone number.
- Late Fees: When enabled, the client is exempt from late fees.
- Overdue Notices: When enabled, the client does not receive overdue invoice notification emails.
- Tax Exempt: When enabled, taxes are not applied to the client's invoices.
- Separate Invoices: When enabled, the client will receive separate invoices for each of their services.
- Disable CC Processing: When enabled, Automatic Credit Card Processing is disabled for the client.
- Marketing Emails Opt-out: When enabled, marketing emails will not be sent to the client.
- Status Update: Enabling this will disable Automatic Status Updates for the client.
- Allow Single Sign-On: Enabling this will allow Single Sign-On for the client.
- Payment Method: The default payment method for the client.
- Billing Contact: The default billing contact for the client.
- Language: The default display language for the client.
- Status: The client's account status.
- Currency: The client's default currency.
- Client Group: The user group, the client, belongs to.
- Credit Balance: The credit amount for the client's account.
- Admin Notes: Textbox where admins may leave notes on the account. These notes are only viewable by admins.
Written by Hostwinds Team / August 29, 2018