
Hostwinds Tutorials
Search results for:
Table of Contents
How To Password Protect Folders In cPanel
Tags: cPanel
There may come a time when you have a directory that you want only certain people to access. This can be done in a variety of ways, such as through the .htaccess file. Or other methods depending on your control panel. This guide will be describing how this can be done through your cPanel interface.
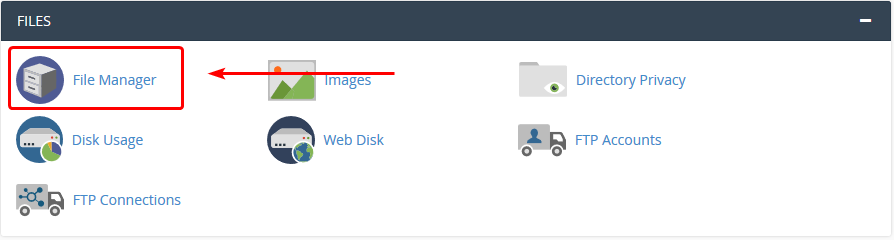
Where To Find The Option In cPanel's File Manager
The easiest way to locate the option to password protect your files or folders is within cPanel's File Manager.
Step 1. Log into your cPanel.
Step 2. Navigate to the File Manager icon within the cPanel interface. By default, this should be located near the top of the page.
Step 3. Once in the File Manager, navigate to the folder you want to password-protect, then Right Click on the file and choose Password Protect from the options.
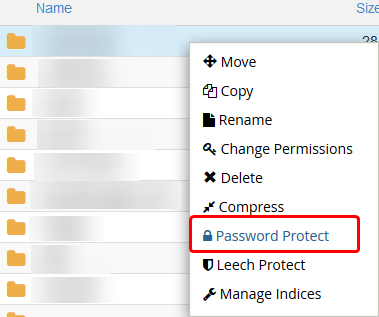
Step 4. After clicking that option, you'll be brought to the Directory Privacy page, from which you can proceed with the steps below.
Where To Find The Option Within cPanel's Interface
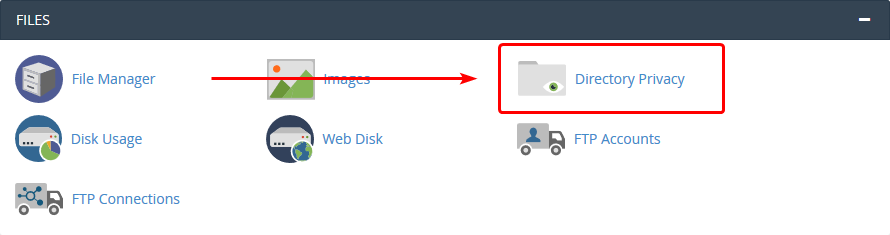
Another way to access the Directory Privacy page would be from the Directory Privacy icon within cPanel. This will be located within the Files section, which by default, should be near the top of your cPanel.
Clicking on that icon will take you to the necessary page to set up folder permissions for a directory. Once there, you can continue with the instructions below on setting up a password-protected folder.
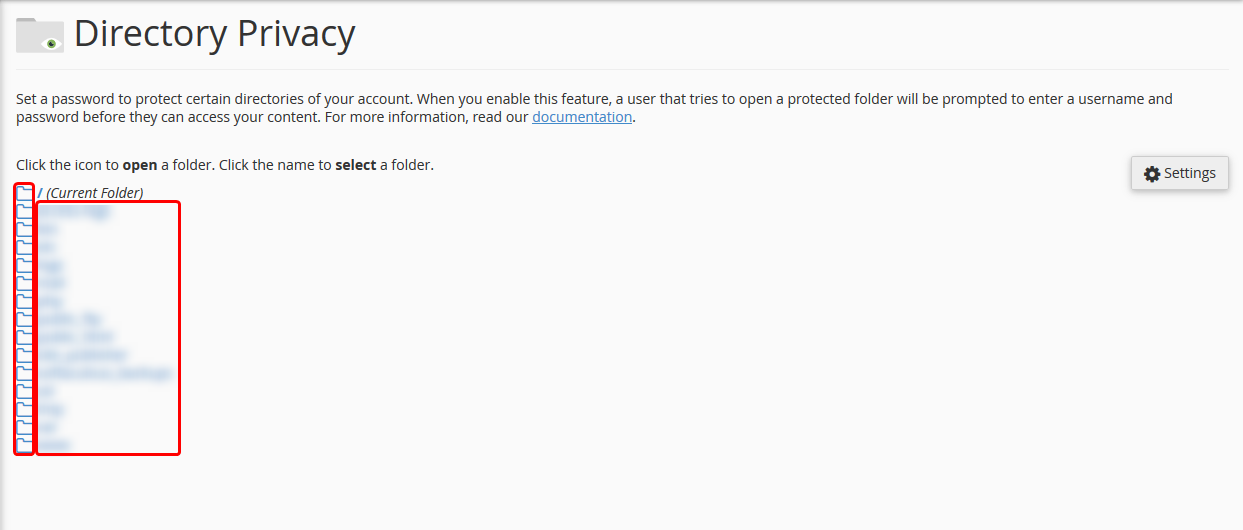
Password Protecting a Folder In cPanel.
If you had not selected a directory from within the File Manager, you would select one here. You can enter inside of folders by pressing the folder icon on the left of the folder name. Clicking the folder name itself will select it for password protecting.
Once you have selected the folder that you'll be password protected, you'll want to add it as a password-protected directory. And add a user to the directory for access.
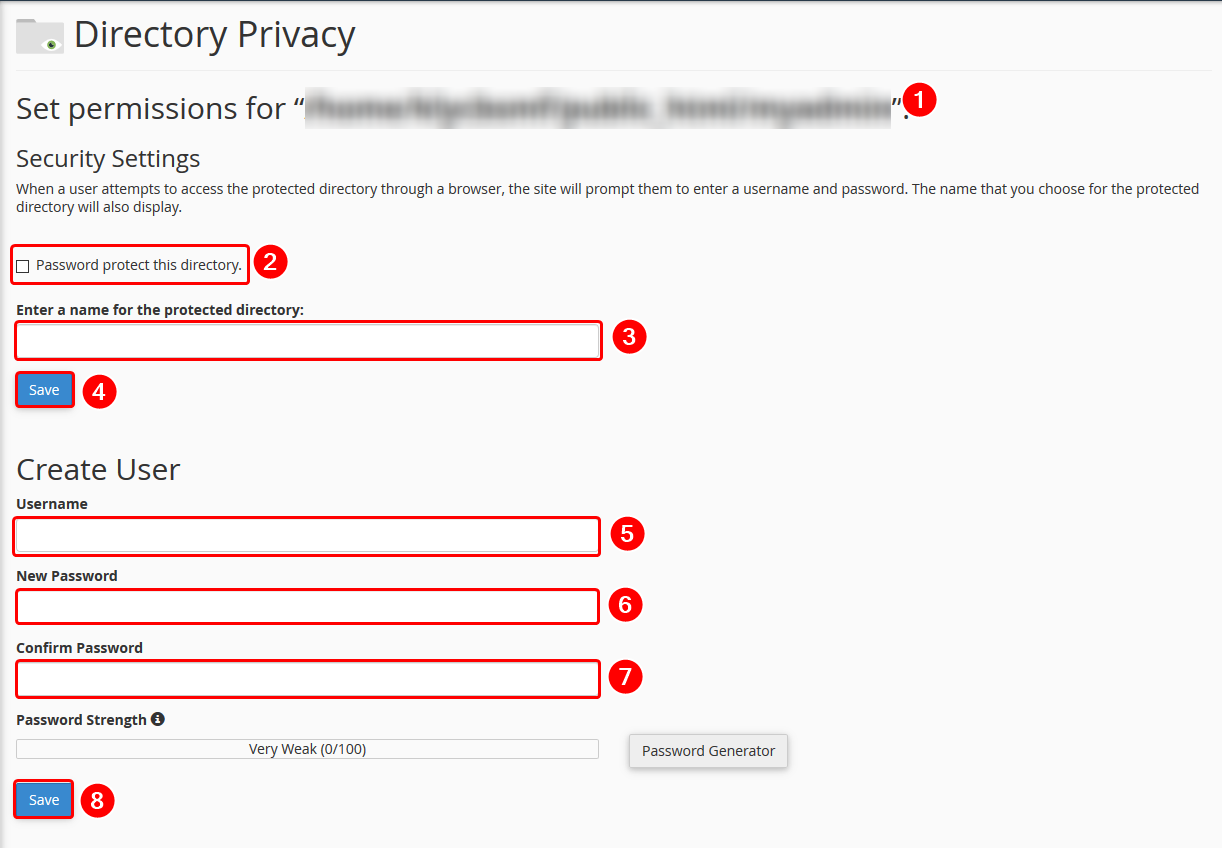
- Make sure that the directory you had selected is named here. That way, you don't block access to the wrong directory.
- Once you confirm the folder's name, you'll want to click this checkbox so that Password protection will be enabled for the folder above.
- Here you'll enter a user-friendly name that can be used to identify your folder. Such as "testing only" or "private access".
- Click the Save button to save this in cPanel. By default, now it will block all access (until a new user is created below)
- Now for creating the user that will have access. Put the username that you want them to log in with. (You can add more users to this folder later on as well, by repeating these steps)
- Input a password for the user to log in with for the directory.
- Confirm the password to be used by reentering the password here.
- Click the Save button, which will allow that user to log in to access that directory.
After that has been done, whenever anyone attempts to access the folder from their browser, they'll be prompted for a username and password. If correct, it'll allow them access to the files and site content you have there.
If you should have any questions or would like assistance, please contact us through Live Chat or by submitting a ticket with our Technical Support team.
Written by Hostwinds Team / May 3, 2018