
Hostwinds Tutorials
Search results for:
Table of Contents
How to Set Up a Secure Remote Desktop on a Linux VPS (X2Go)
Tags: Linux
While VNC is often used to connect to a Linux desktop environment remotely, X2Go is a secure alternative tunneled over SSH. X2Go supports sound by default using Pulseaudio, and file and printer sharing can be done from client to server.
X2Go supports XFCE, LXDE, and MATE desktops. This guide will walk through setting up XFCE with X2Go on Ubuntu, Debian, and CentOS (not yet supported on CentOS 8).
Prerequisites
- A Hostwinds Cloud VPS or Dedicated Server
- Create a sudo user if not already created (CentOS) (Ubuntu).
- Update your server.
Install a Desktop Environment
First, install a desktop environment. X2Go supports XFCE, LXDE, and MATE desktops. The steps below show how to install XFCE:
Ubuntu and Debian:
sudo apt-get install xfce4
CentOS (not yet supported on CentOS 8):
sudo yum install epel-release yum groupinstall -y "Xfce"
Install X2Go Server
After installing your desktop environment, install X2Go with the commands below:
Ubuntu and Debian:
sudo apt-get install x2goserver x2goserver-xsession
CentOS (not yet supported on CentOS 8):
yum install -y x2goserver-xsession
Install X2Go Client
Navigate here to install the X2Go client for Windows, OS X, and various Linux distributions like Ubuntu, Debian, Fedora, Redhat, Raspbian, and more.
After launching X2Go Client, select Session > New session …
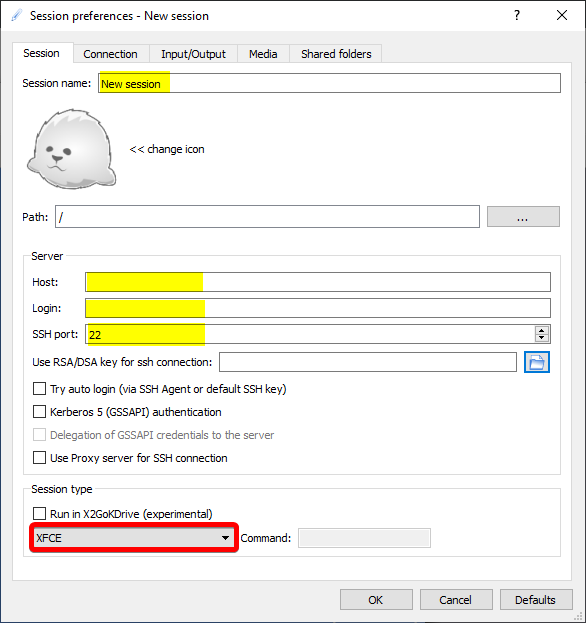
Here you can enter:
- a name for your session
- Host (your IP or hostname)
- Login (username)
- SSH port
- desktop environment (select XFCE for this guide)
Optionally, you can select your SSH key for connecting to the server.
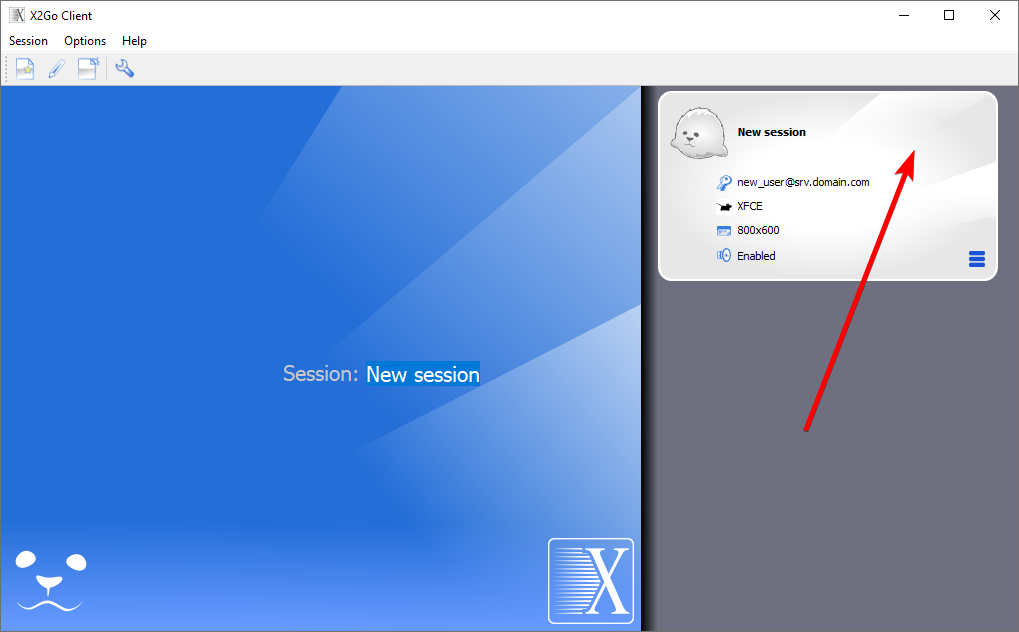
After clicking OK, select your new session, then enter your user password and connect!
Written by Benjamin Bream / June 10, 2020