
Hostwinds Tutorials
Search results for:
Table of Contents
How To Set Up Your Weebly Store
Tags: Weebly Website Builder
Before you can start using your Store through Weebly, some information will need to be set up with your Store. In this guide, you will find some general information about the Store, including Shipping and Tax address and Shipping and Tax Rates related to the Orders placed.
It is important to note that the information provided in this guide is for informational purposes only. The premium features and changes made after the time writing this guide may be different and will be displayed to you in your Weebly account when editing your site through Weebly. Please open a ticket with our Support Team if you have any questions to help.
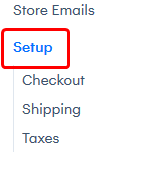
Where To Find The Weebly Store Setup
Step One: Begin by logging into your cPanel and navigating to your Weebly Website Editor.
Step Two: Select Edit next to the Site that you will be managing the Products for

Step Three: From the top, you will want to navigate to the Store tab.

Step Four: On the left, you will find the Setup tab available to click on.
Setting Store Information
The first thing you should set up with your Store is the information that pertains to your store. This includes your Company Name, Address, Email Address, and Phone Number.
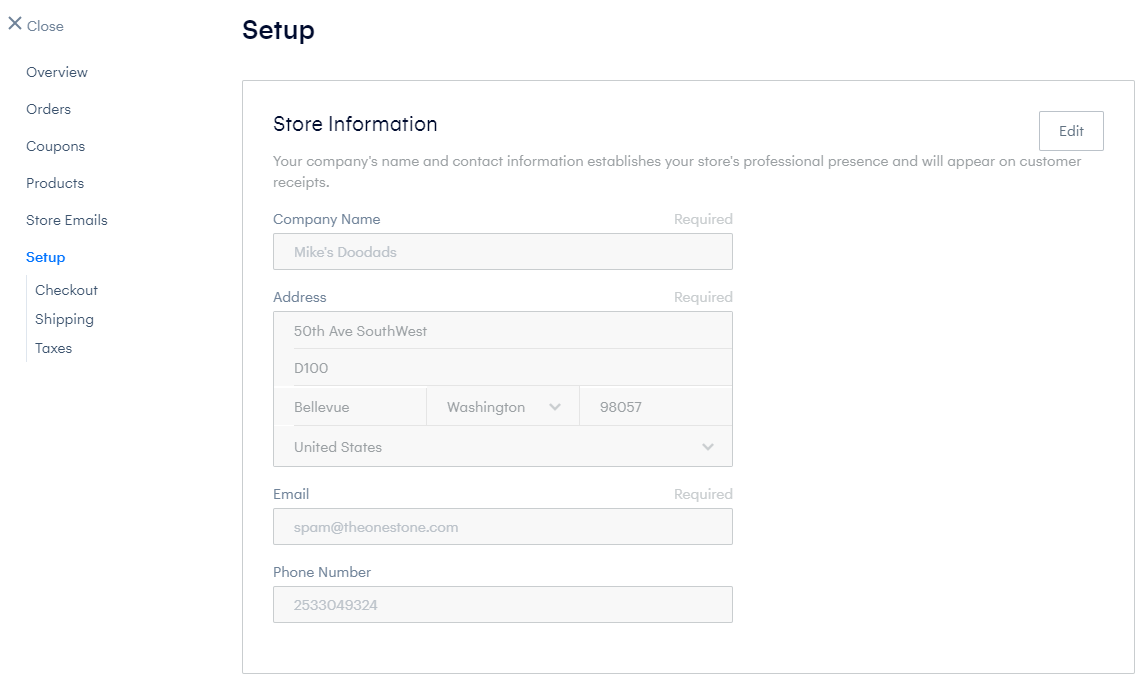
You can modify the information so that it properly reflects your store's location and contact information. This information will appear at the bottom of emails sent from your store, so make sure that this information is accurate. Your customers will be reaching out to this contact information for anything they might need.
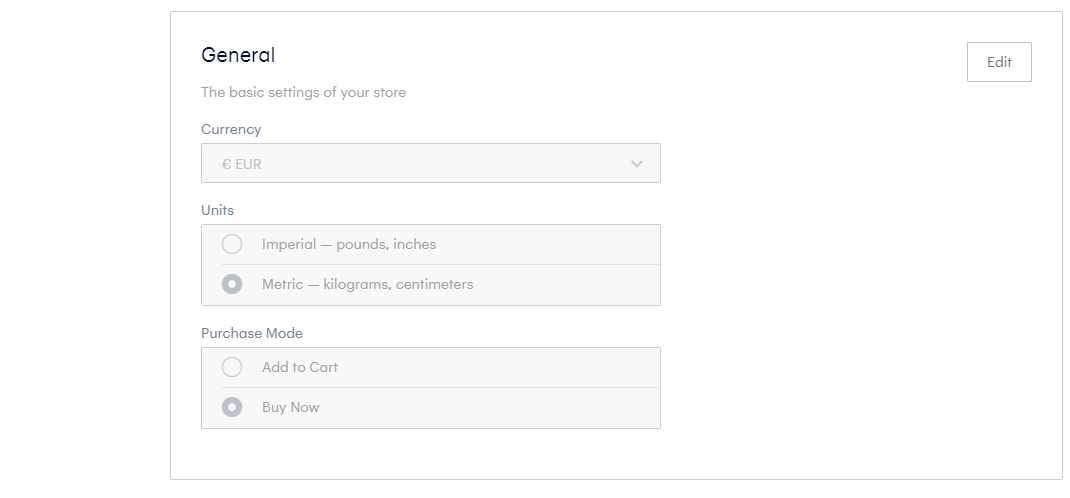
Setting General Information
The next thing you will want to set up in your Store settings would be the General Information. This would contain some options such as the Currency used in the store, the Units of Measurement for Shipping (Imperial or Metric), and the Purchase Mode. The available Purchase Modes would be the Add to Cart and Buy Now options. The Add to Cart allows you to have a cart allowing your Customers to purchase more than one product simultaneously. The Buy Now allows a one item per payment system.
Store Layout Settings
With the Weebly Store, default settings can be set up for the Layout of Products and Categories on your website. This allows for some ease of creation for pages created to showcase your products.
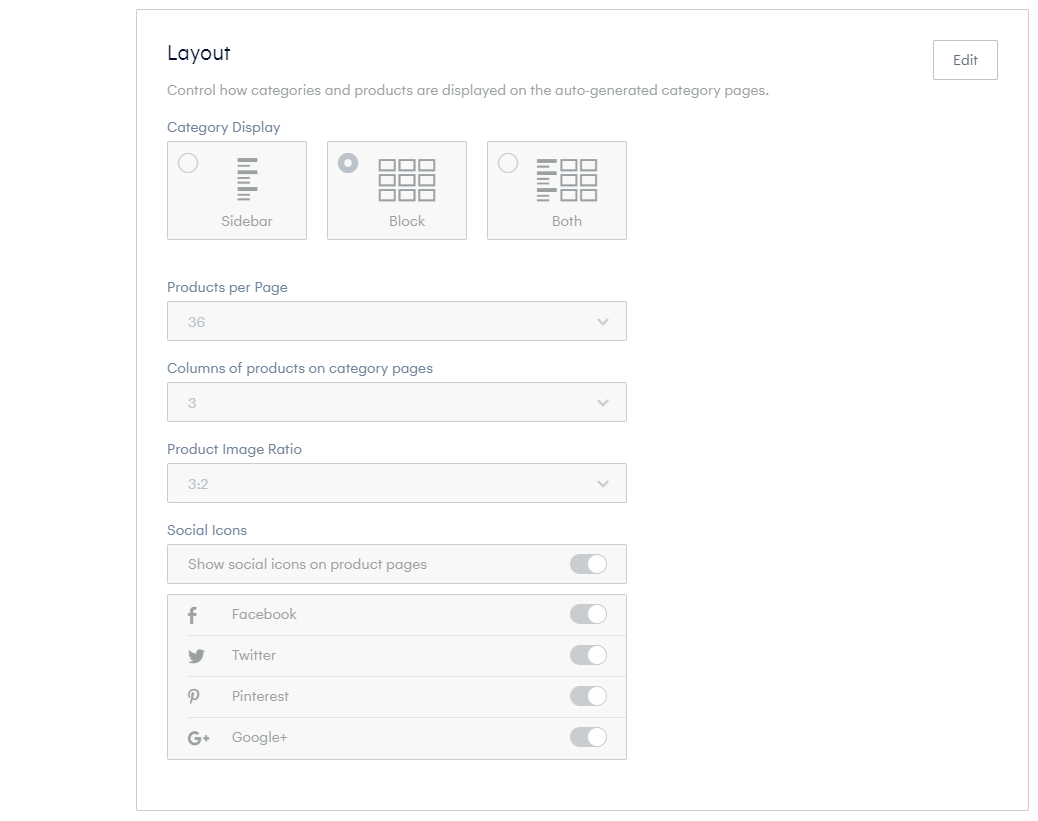
The Category Display will affect the default of how the Categories pages will show on your Website. Products per Page will affect the number of Products that will show per page by default. This can also be changed when adding it to your site as well. You can also set other visible factors that affect your Category and Product pages, such as the Columns of products on category pages and Product Image Ratio. Additionally, there are Social Icons that can be enabled for your Products. This will allow you to have a Share button for different social media platforms.
Accepting Credit Cards As Payment Methods
With the Free version of Weebly, there is the option to set up a couple of Payment Processors that will allow you to start accepting Credit Card payments for your products. The free Processors that are available from the start are stripe and Square. However, an upgrade allows you to use the Credit Card Payment Processor Authorize.net.

Clicking the Connect button will allow you to connect your account with the payment processor to your store.
Accepting PayPal as a Payment Processor
As a premium feature of Weebly, there is also the ability to set up the PayPal payment processor. This allows your customers to pay directly through PayPal.

Setting Your Store Policies
You may want to outline what your policy on Refunds and Shipping is to your clients. That way, this can help them to make an informed decision when ordering. Your Return Policy should contain information such as the length of time that can pass before a product can no longer be returned, as well as what condition they must be in. Shipping can pertain to how your company operates in regards to Shipping products to the customers.
Setting Checkout Options
During checkout for your products, you can enable certain information fields to be available for your Customer to enter. This can provide useful information that can assist in delivering your product to your customer.
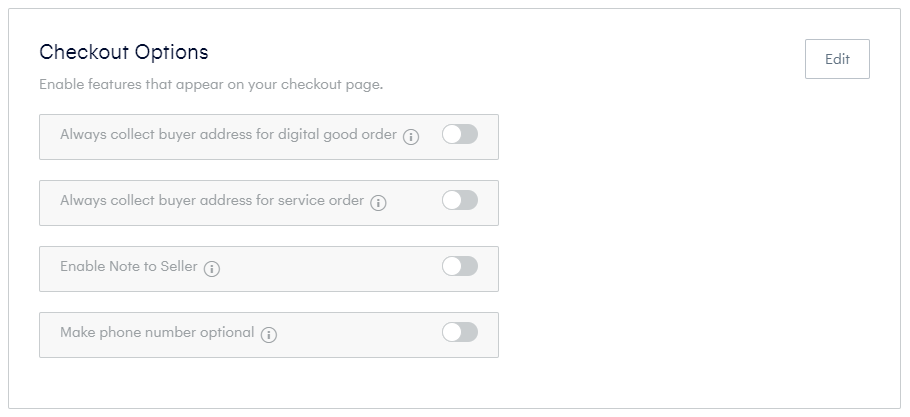
You can set the options to Always collect buyer address for digital good order, or Always collect buyer address for service order to allow your customer to input an address during checkout to help deliver the product. This is especially useful for Service orders. You can Enable Note to Seller to allow your Customer to type out a little note for you to see when processing the Order. For example, this can be used to add customized flair to your product, including engravings, lettering, or even an audio clip. With the Make phone number optional, you can present a phone number input field for your customers for an alternative way to contact them.
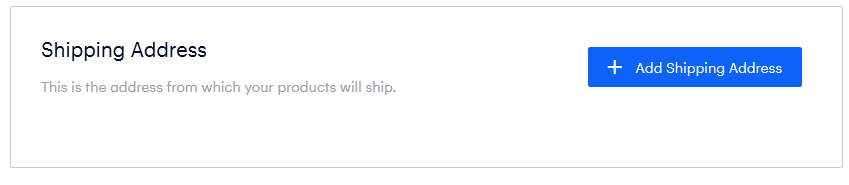
Setting Your Store's Shipping Address
In addition to your Store's main address, you will want to set up your Shipping address as well if you intend on shipping products to your customers. This will allow your customer an easy way to find the necessary information if they should need to send a return to you. It is also possible for this to be a different address from the main store address, as you may have a separate shipping warehouse.
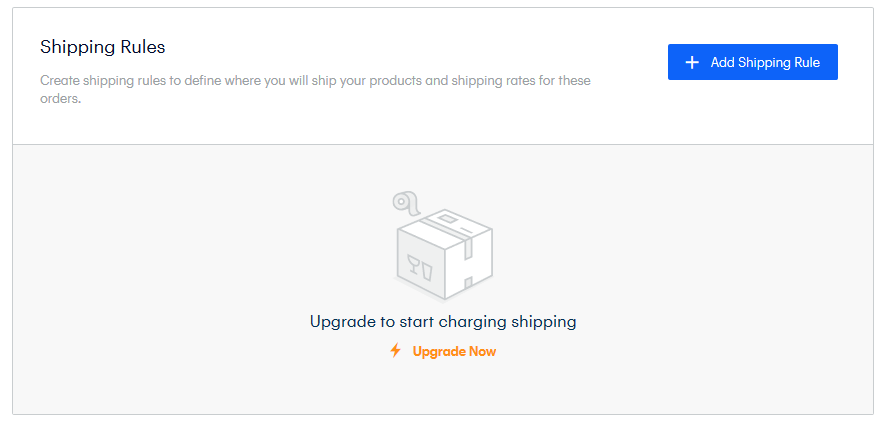
Adding a Shipping Rule
If your store has a separate shipping rate to different countries or even states within a Country, this can easily be set up through Shipping Rules in the Weebly Store. From the Shipping sub-menu in the Store setup tab, you will find the Add Shipping Rule button.
Clicking that button will show a dialog to input the country from where you would like to modify the Shipping rate. This can be changed later on as needed to include or exclude countries or regions.
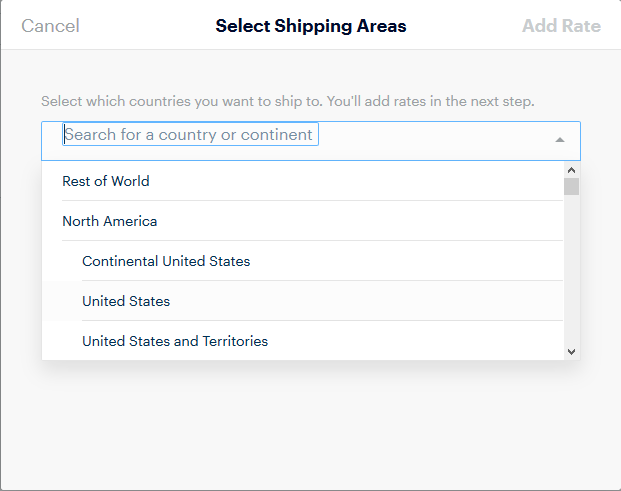
Once you select the Country, if there is a sub-region that can be selected, such as a State within the United States, these can be selected. Otherwise, you can proceed with the Add Rate button. Now you will be able to set how your shipping price will be determined.
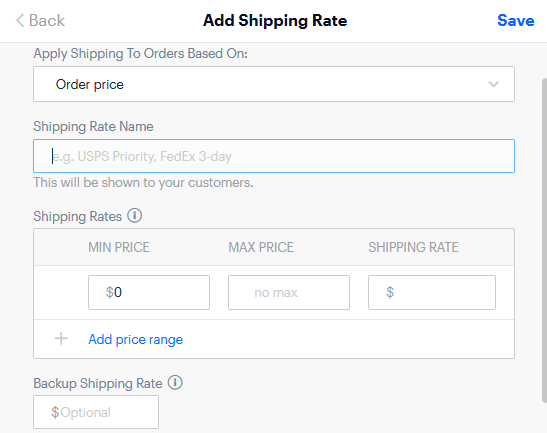
You can apply different shipping rates to your customers' carts depending on the Order price, Order Weight, Quantity, Flat Rate, or even Free Shipping. There is also an optional field to enter in the Backup Shipping Rate. This will apply to orders that do not fall within the guidelines of the rate you are defining.
Once you are done entering the corresponding information for how you would like the Shipping Rate to behave, you can click the Save button to save the rate. If you want to change these, later on, you can modify the rate's pricing by selecting the Edit button next to the particular rate.
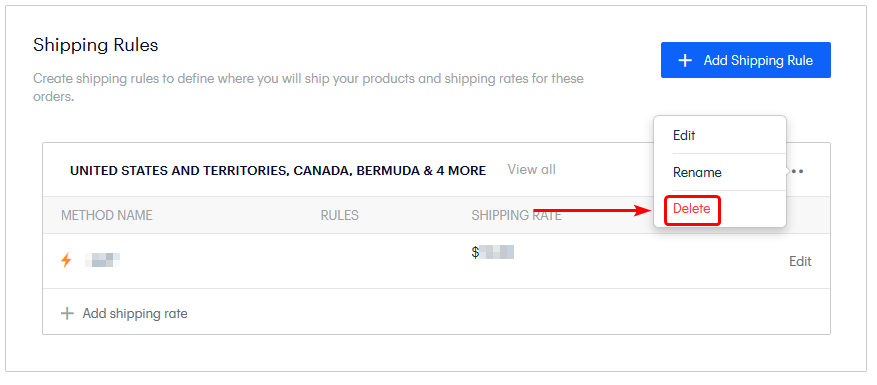
Deleting Shipping Rules and Rates
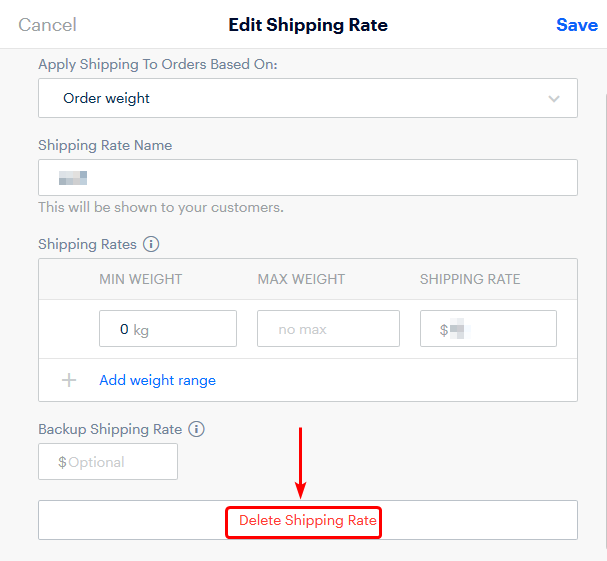
If you want to delete an existing Shipping Rule or rate, this can be done to Edit the Rule or Rate. For deleting the entire Shipping Rule (this will delete Rates defined under the rule), you can select from the 3 dots next to the Rule and select Delete.
For deleting the individual shipping rules, you will need to click the Edit button next to the particular Shipping Rule, and on the next dialog to open, click on Delete Shipping Rate towards the bottom.
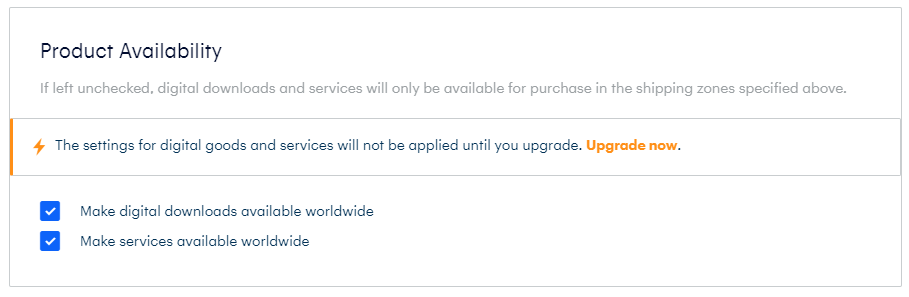
Setting Up Product Availability
In addition to the Shipping Rules, you can set whether to allow Worldwide orders to be made on your products. You may want to limit your products to a certain region or country. If both options are left unchecked, your products will only be available in the areas that you specified according to your Shipping Rules.
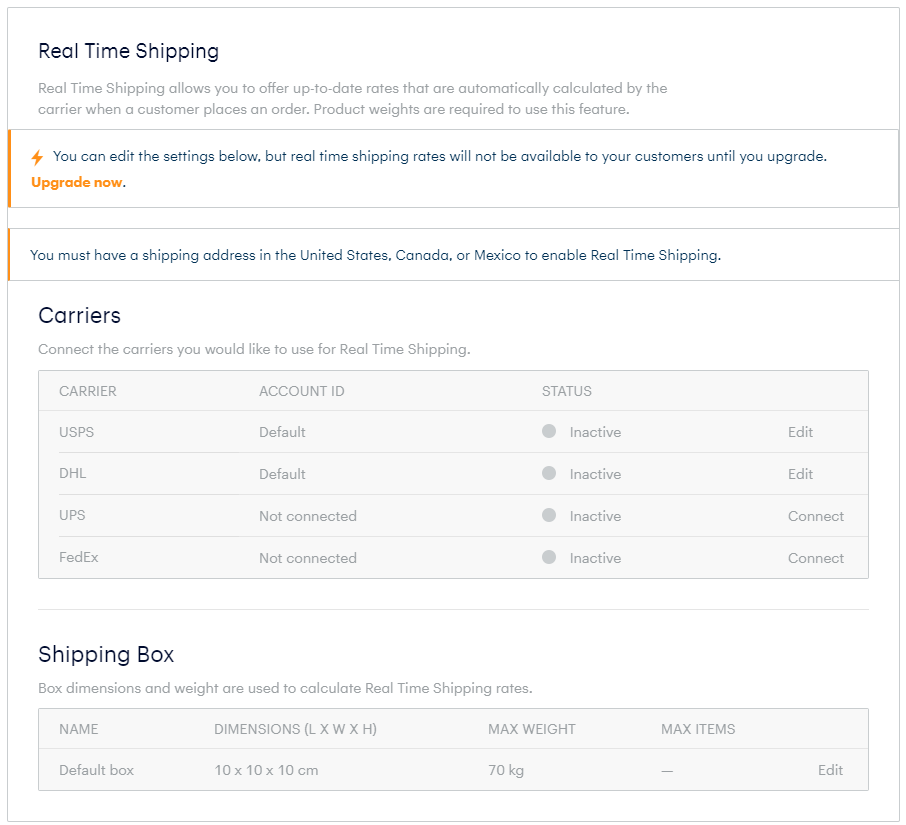
Real-Time Shipping
With the Real-Time Shipping feature through the Weebly store, you can get accurate pricing for the shipping of your products. This can be useful for the large fees that may come with large or heavier products. As this feature relies on the weight of the products being shipped, to use this feature, Product Weights are required to be set.
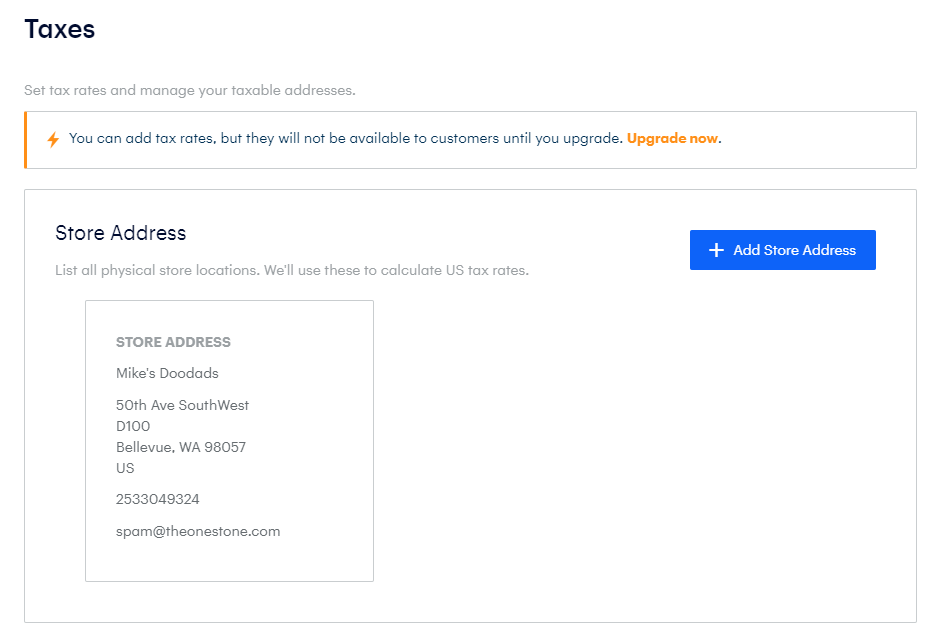
Setting Store Address For Taxes
The last page in the Setup menu for Weebly allows setting up tax-related information for your products. This can help automatically calculate Sales tax as needed for your Business. Setting the store address will allow Weebly to take this into account when calculating the tax rates.
How To Add A Tax Rate
To add a Tax rate to your Weebly store, you will want to select the Add Tax Rate button from the Taxes page in the Store setup.

After clicking that button, you will see a dialog that will allow you to select a Country (and, if available, a sub-region or State of that country) for the Tax rate. You can then enter the Tax Rate you would like applied to that region and give it a name to identify in your Weebly store setup page easily.
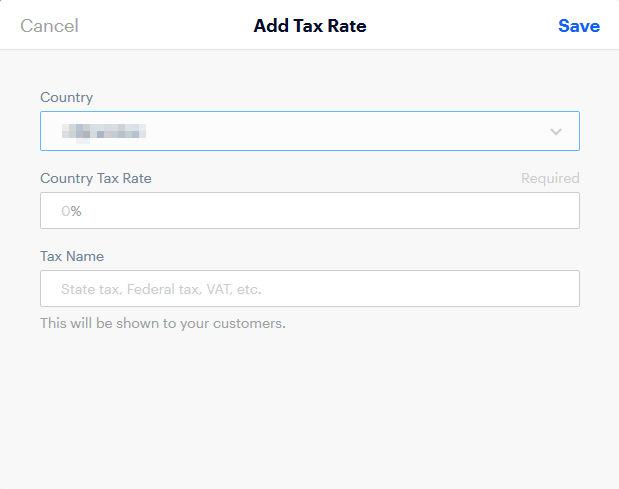
Once you have entered in all the relevant information, you would like the Tax Rate. You can select the Save button to save the system's tax rate.
How To Edit / Delete A Tax Rate
From the Taxes section in your Weebly store setup, you will see a list of the current Tax Rates on your store as well as some others that can be set up. On the right of the Tax Rate, there will be a button to Edit the rate.
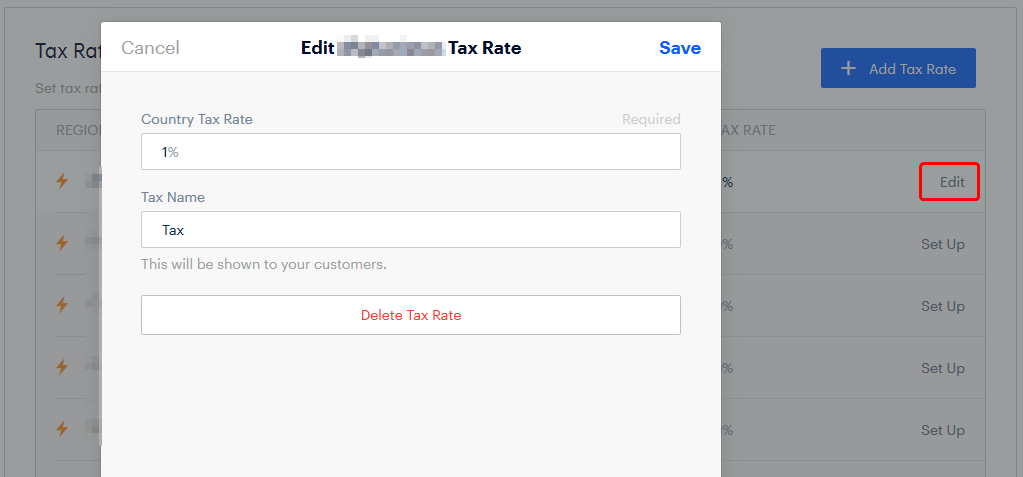
If you are making changes to the Tax Rate, you can select the Save after making the desired changes to the Tax Rate. To delete the Tax rate, you will want to select Delete Tax Rate to remove it from your Weebly store.
Tax Calculations Options
In the Weebly Store for the Taxes, there is the option to determine how the Tax rate rules that you created will be used. These are available to enable/disable from the bottom of the Taxes Section on the Store Setup page.
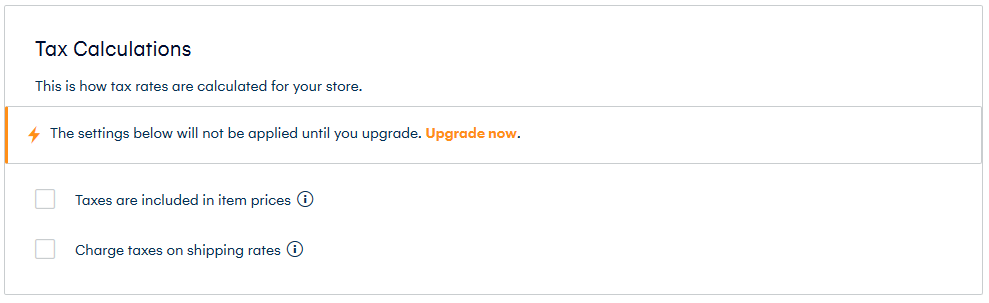
- Taxes are included in item prices – Selecting this option will set Weebly to automatically calculate Taxes (based on the Tax Rates you set) included in the price of what your customers will be paying and will be showing on their receipts as well.
- Charge taxes on shipping rates – This option allows you to set whether to factor in any shipping-related costs into the calculation of the Taxes.
If you should have any questions or would like assistance, please contact us through Live Chat or by submitting a ticket with our Technical Support team.
Written by Hostwinds Team / August 15, 2018