
Hostwinds Tutorials
Search results for:
Table of Contents
How To Setup Email Templates in WHMCS
Many aspects of the WHMCS system that result in an email being sent (whether to an admin, client, or elsewhere) utilize pre-made templates for the content of the mail. This guide goes over some of the default email templates and how to create a custom template.
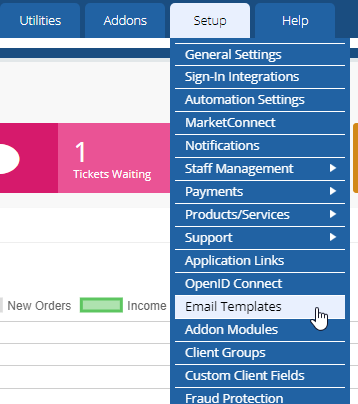
The Email Templates settings can be found under Setup -> Email Templates.
Overview
WHMCS breaks its email templates into categories based on what department or service the template will be used for. When choosing a template for use in those services, only the templates assigned to the appropriate category will be available as an option. Along with these categories, the name of each template should give you a general idea as to what it is used for or what triggers it. You can see the current status of the templates by the icon to the left of the template's name. A green check indicates the template is active and available for use, while a gray x means the template is currently disabled from use.
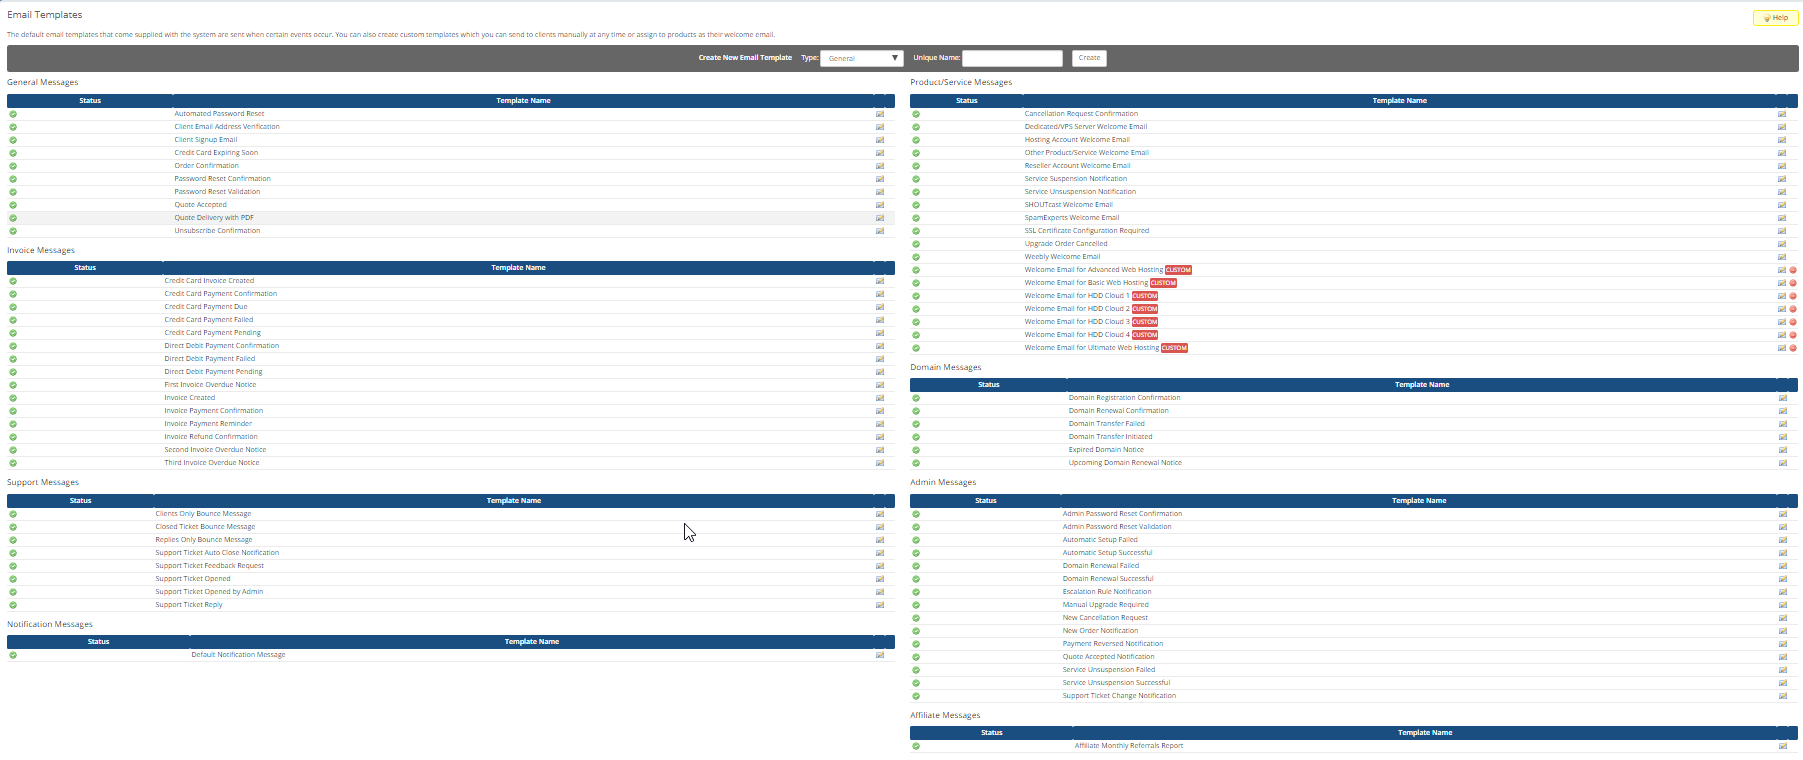
Default Templates
By default, WHMCS provides many template emails for use for every category. Each of them is generic but appropriate, responsible for various events or tasks associated with their assigned category, and you may consider customizing these to suit your needs.
You can view and edit these default templates into custom ones as you see fit. Click on their template name to be brought to the template editor with the default's content loaded into it, make your changes, and click 'Save.'
Custom Templates
WHMCS allows you to take the default templates and modify them into your own custom ones and design new templates from scratch for whatever purpose you may have.
You can start to create your own template by selecting the category and giving a unique and descriptive name to the template in the gray bar at the top.

After clicking Create, you will be brought to the following form:
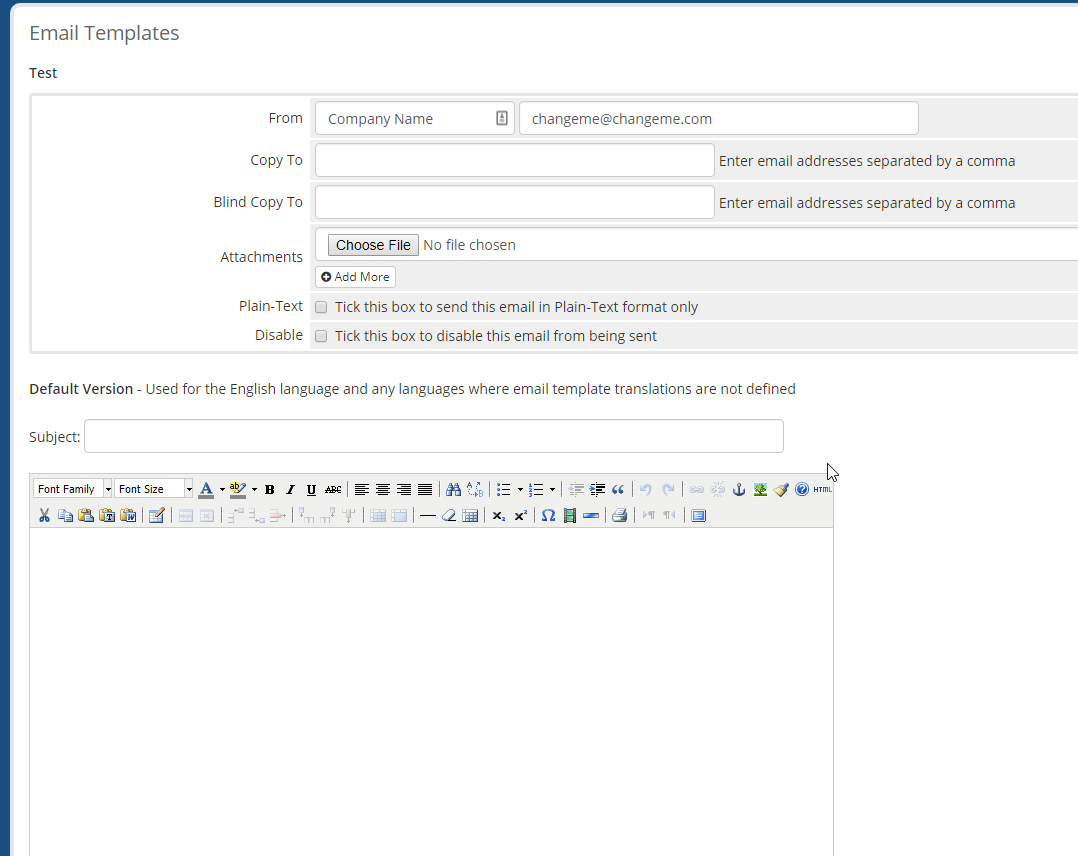
On this page, you will find the following options and fields to customize your email template:
- From: The name and email address that will appear as the email's sender to the recipient.
- Copy To: Email addresses you wish to CC on the email.
- Blind Copy To Email addresses you wish to BCC on the email.
- Attachments: Any file attachments you would like included in the email.
- Plain-Text: Enabling this displays and sends the email in plain-text form only, with no formatting.
- Disable: Enabling this disables the email template from the use by the system.
- Subject: The text you would like to appear as the subject line on the email.
Following those options will be a text editor with additional formatting options for you to compose and configure the style of the email as you wish.
In this editor, Merge Fields is available for use to inject non-static data into certain points of the email. You can think of these as variables that change for each client, invoice, etc. and inject their values into the final email.
To use a Merge Field in the text editor, put inside a set of curly braces ({}), a dollar sign ($) followed by the ID name for the field.
Example: {$merge_field_name}
The full list of available merge fields is as follows:
Client Related
ID {$client_id}
Client Name {$client_name}
First Name {$client_first_name}
Last Name {$client_last_name}
Company Name {$client_company_name}
Email Address {$client_email}
Address 1 {$client_address1}
Address 2 {$client_address2}
City {$client_city}
State/Region {$client_state}
Postcode {$client_postcode}
Country {$client_country}
Phone Number {$client_phonenumber}
Password {$client_password}
Signup Date {$client_signup_date}
Credit Balance {$client_credit}
Card Type {$client_cc_type}
Card Last 4 {$client_cc_number}
Expiry Date {$client_cc_expiry}
Remote Gateway Token {$client_gateway_id}
Client Group ID {$client_group_id}
Client Group Name {$client_group_name}
Total Due Invoices Balance {$client_due_invoices_balance}
Custom Fields (Array) {$client_custom_fields.1}
Custom Fields (Array) {$client_custom_fields_by_name.0.name}: {$client_custom_fields_by_name.0.value}}
Status {$client_status}
Other
Company Name {$company_name}
Domain {$company_domain}
Logo URL {$company_logo_url}
WHMCS URL {$whmcs_url}
WHMCS Link {$whmcs_link}
Marketing Unsubscribe URL {$unsubscribe_url}
Signature {$signature}
Full Sending Date {$date}
Full Sending Time {$time}
With these Merge Fields, you can also set them to inject contents conditionally by performing checks on their values:
Conditional Display
You can use conditionals to display text based on other values - for example:
{if $ticket_department eq "Sales"}
Sales only operates Monday-Friday 9am-5pm
{else}
Your ticket has been received and will be answered shortly
Looping through data
A foreach loop can be used to cycle through values like invoice items:
{foreach from=$array_data item=data}
{$data.option}: {$data.value}
Once finished with designing your email template, click Save Changes, and you will be brought back to the email template list with your new template created, activated, and ready for use.
Written by Hostwinds Team / August 30, 2018