
Hostwinds Tutorials
Search results for:
Table of Contents
How To Upload Your Files To A Shared Hosting Using An FTP Client
Tags: Web Hosting, FTP
There may come a time when you would like to build your site or preview your site before changing the DNS records to point to your Hostwinds account. This may be due to a site migration or just wanting to have everything ready before launching your online presence. This guide will cover previewing your site and getting started before pointing your DNS records to your Hostwinds account.
1. Find Your Dedicated IP:
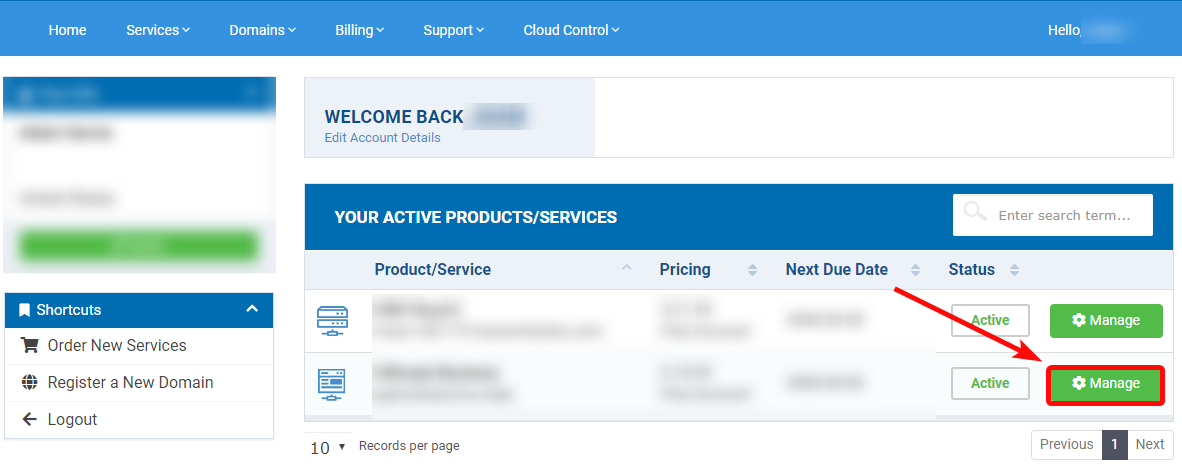
The first step to uploading your files to your hosting is to locate the dedicated IP for your service. You can do so by logging in to our website by clicking the "client login" on the top of our website. If you are already signed in, you can go here. From here, you would then click the green manage button on your service.
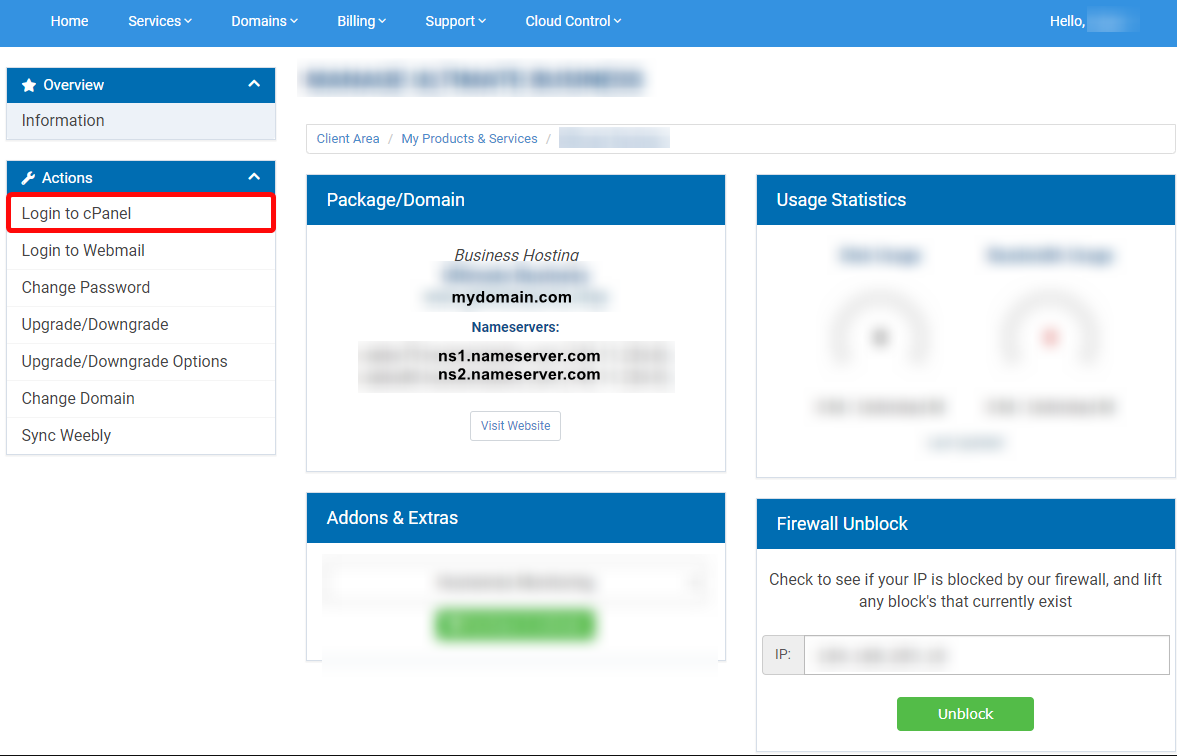
Here is an example of the Shared hosting information page. You may have noticed the shared hosting does not have the dedicated IP on the page. Currently, our website shows the dedicated IP for shared hosting inside the cPanel, and it also would have been emailed to the email account you registered with. So, first, we will check inside the cPanel. Then, click "Login to cPanel" from the Actions menu on the left side of the page to pull up the login page and enter in the credentials that were emailed to you.
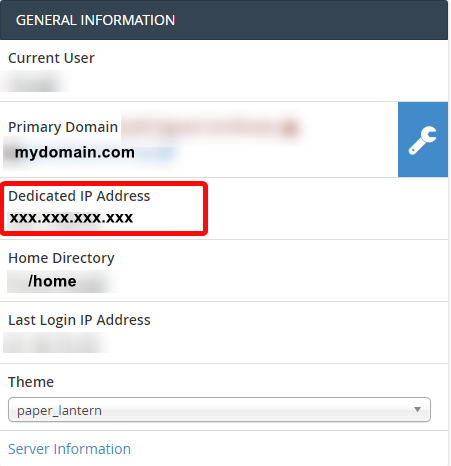
Then, upon logging in to the cPanel, you would see the dedicated IP for your hosting. It would be on the top right side of the page in your cPanel account under "General Information" as seen below. It can also be found by clicking on the "Server Information" below the theme in the same section.
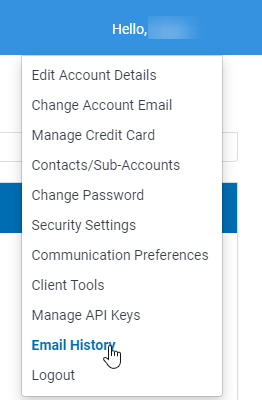
If you did not receive the email for your login credentials, you would be able to check the email history for your account by logging in to our website. You can then check your email history under the "Hello, User" near the page's top right and then locate the "Email History" section under the dropdown.
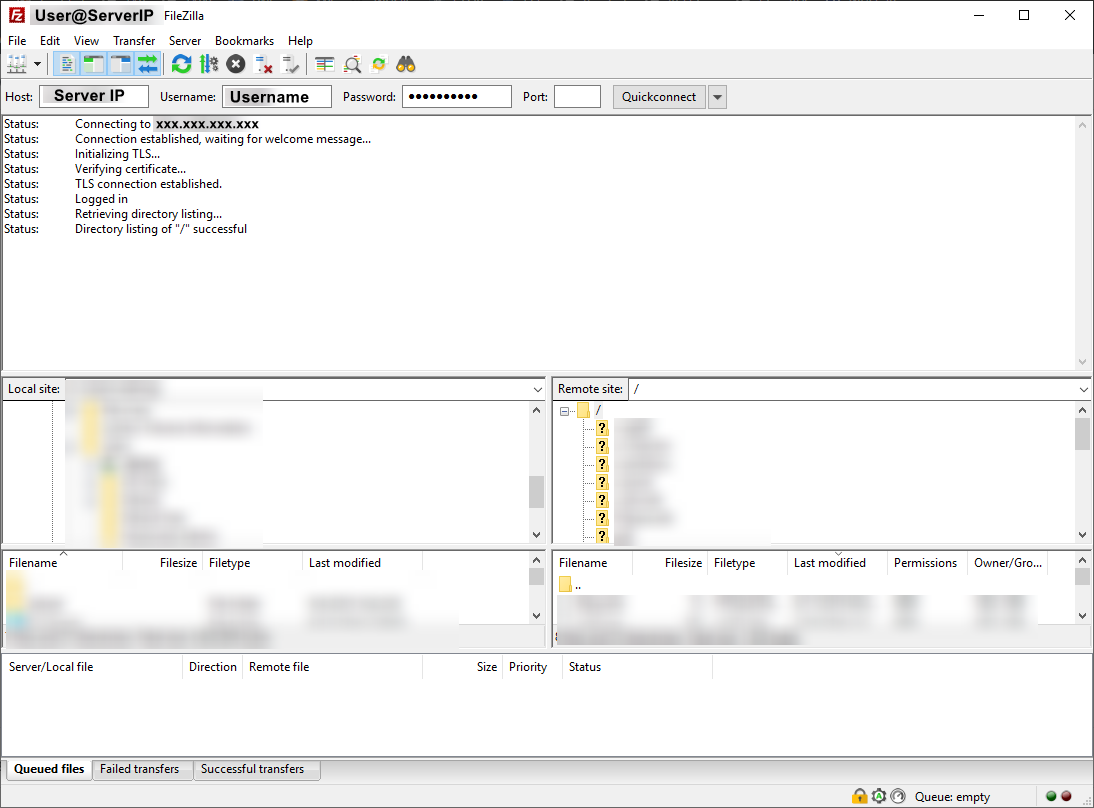
2. Upload Your Files Using an FTP Client:
You would then want to use the FTP client of choice. In this case, I will be using FileZilla. To access your server, you would need to enter the server's IP, the cPanel username, the cPanel password, and port 21.
After you have uploaded your files to the public_html folder or the document root for your site, you can view your files through your web browser. You would want to either enter the IP address in the address bar such as http://ServerIP.
For this to work, the dedicated IP located earlier would replace the "ServerIP" portion above.
You may also use the server name and the cPanel username to preview your site or enter http://yourservername/~cpanelusername. Your server name above would need to be replaced by your actual server name, and you would also replace the part after the ~ with your cPanel username. You can then enter this into your web browser, and your files would appear.
Written by Hostwinds Team / June 5, 2021