
Hostwinds Tutorials
Search results for:
Table of Contents
How to Use Add Roles and Features Wizard
Tags: Windows
So you're ready to start configuring your Windows Server 2016 system, but you don't know where to start? A good place to start would be the Add Roles and Features Wizard. The Add Roles and Features Wizard is a powerful tool that allows you to install and initialize the features and roles that the OS provides and "snap-in" functions to the server that would normally take a long series of commands in a terminal or powershell.
The Add Roles and Features Wizard was first introduced in Windows Server 2008 R2 and has since become the main OS feature, allowing most users to install roles and features easily.
This guide will go into the steps on how to use this feature on Windows Server 2016.
Installing a Role and/or Feature
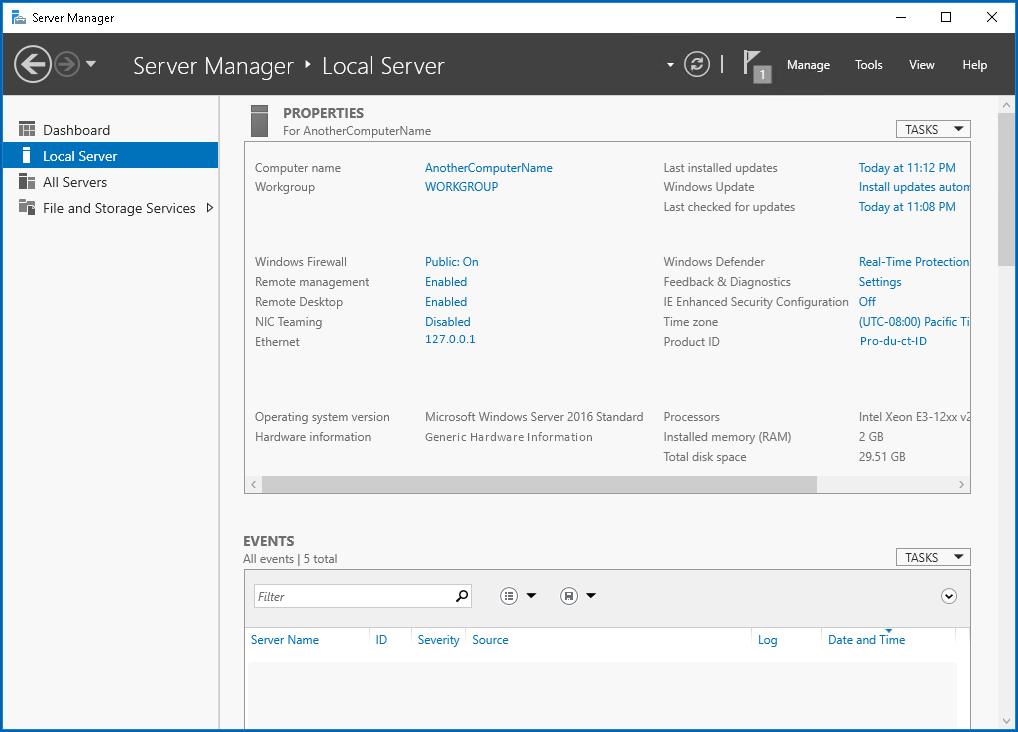
1. Open the Server Manager if it's not already open
2. Click Manage and then Add Roles and Features

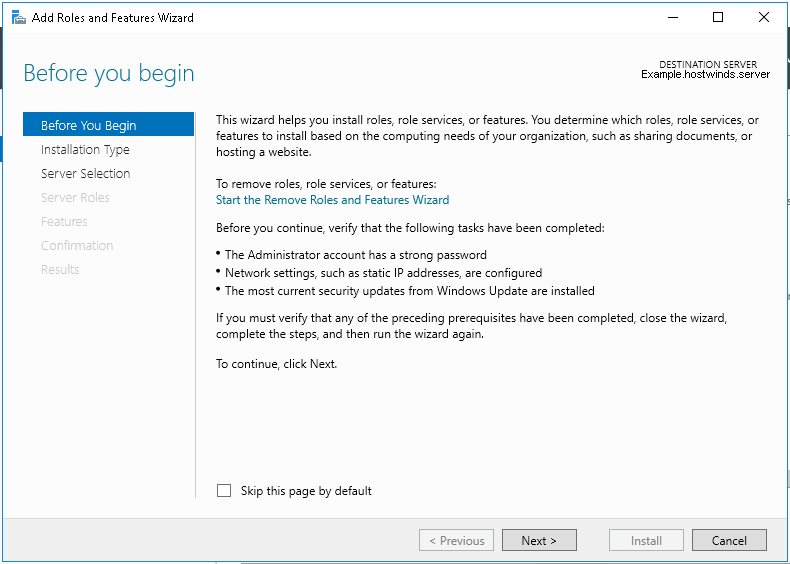
3. Review "Before you Begin" if necessary. Then click next
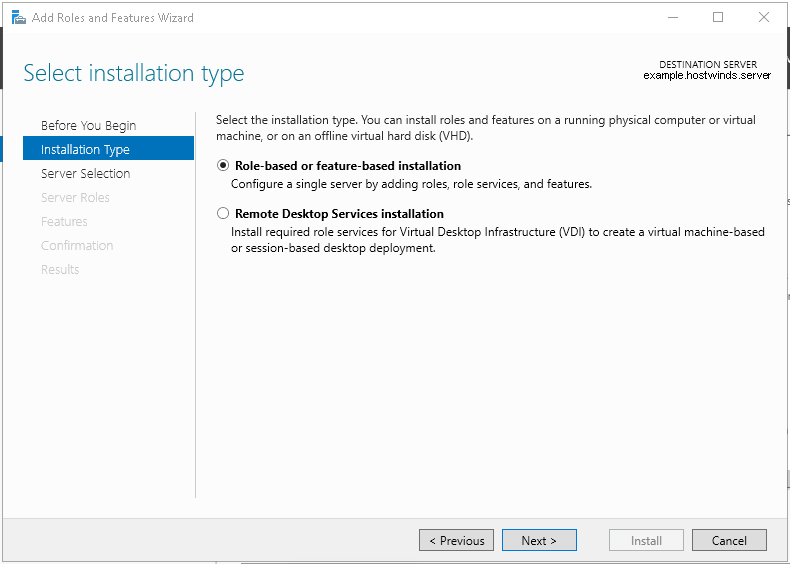
4. Select Role-based or Feature-based Installation if it is not already selected. Then click next
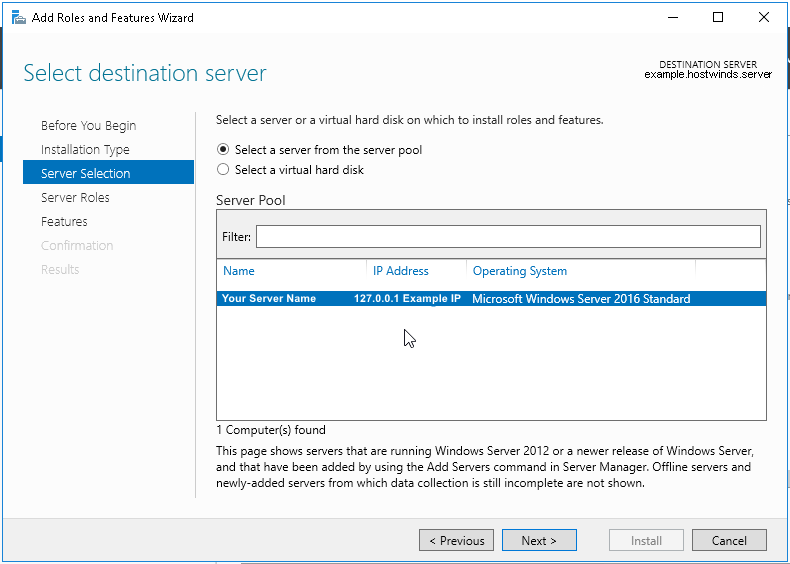
5. Select the server you wish to use if you have more than one, and then click Next. It is recommended to delegate roles to other servers if one already has 3 or more
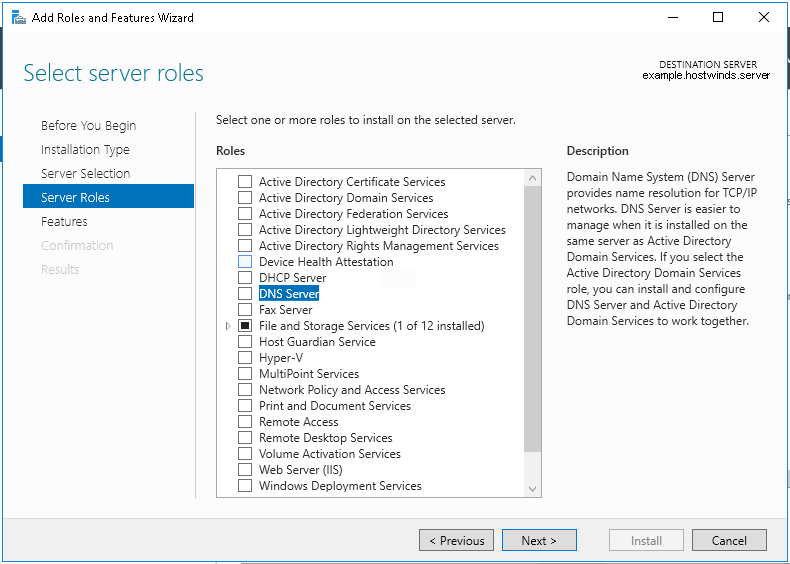
6. Select the role/s you wish to add to the server and click next
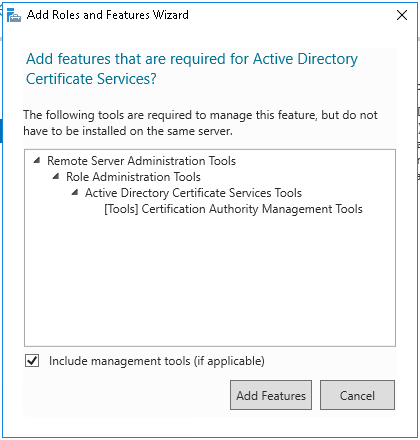
7. Confirm that these are the roles you wish to install and select if you wish to include management tools. (Recommended) Then click Add Features
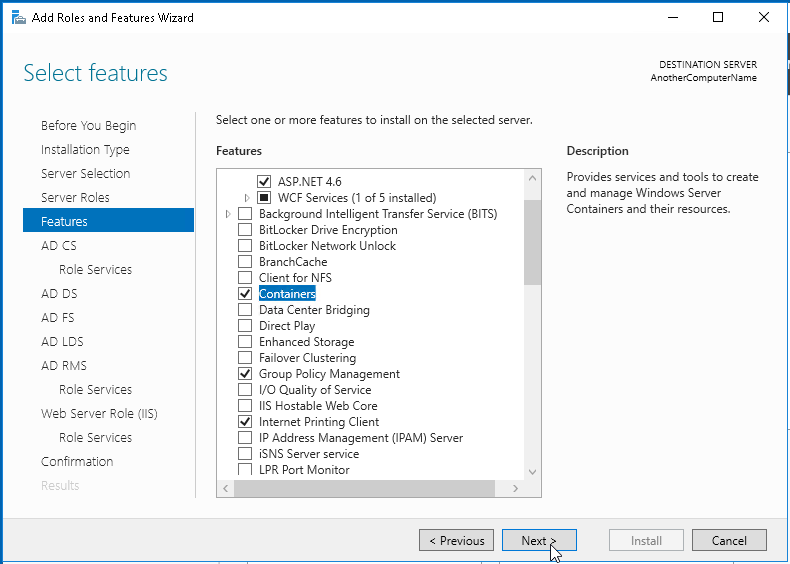
8. Proceed to the Features window. Select the features you wish to include
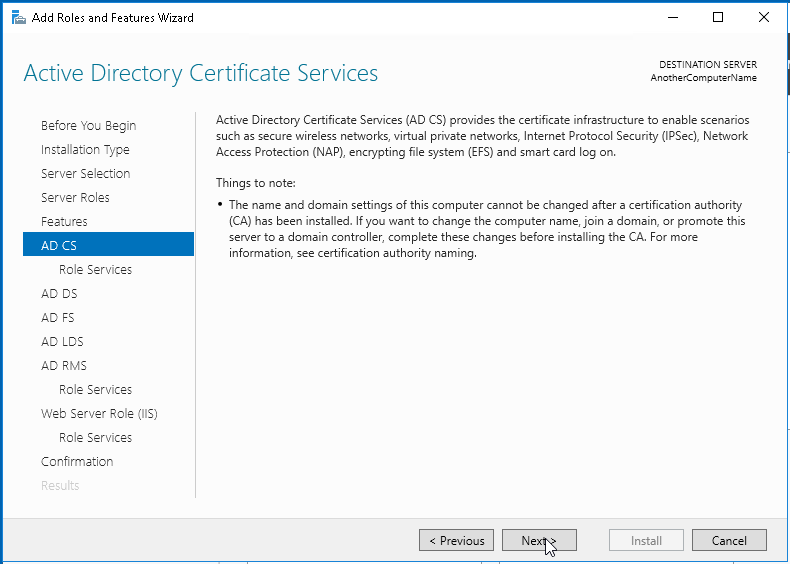
9. Click next to move forward, confirming the details and taking a moment to read any important details
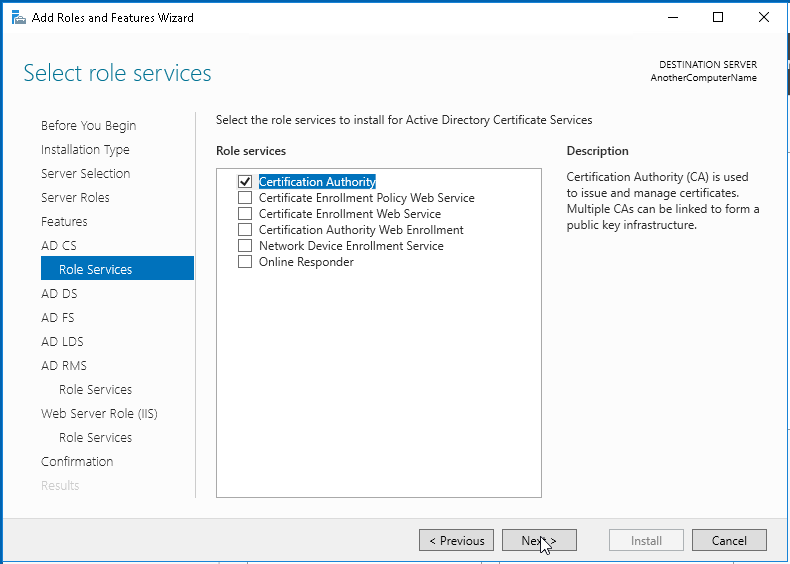
10. In the context of Active Directory, an additional screen will populate, presenting the services for Active Directory. Select the services you wish to include, and then click next
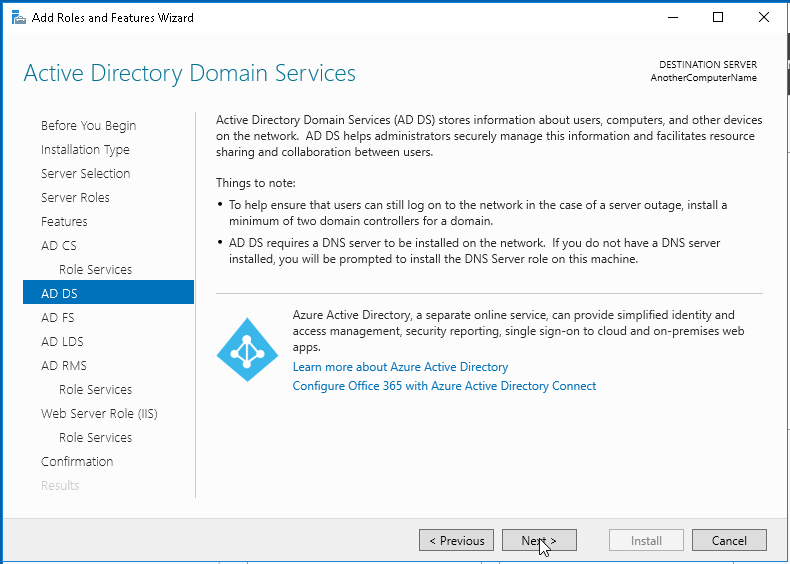
11. Review further details about additional features it will include, as well as alternatives that can be used
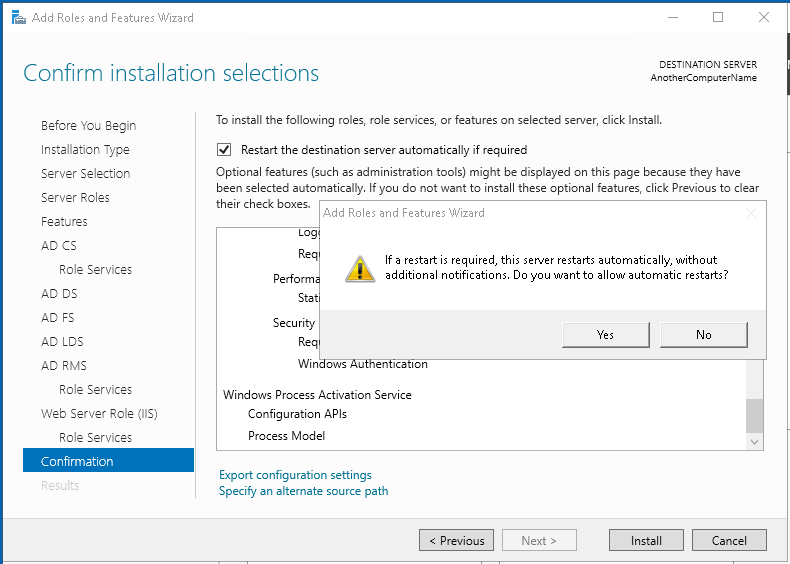
12. After clicking next through the further features, confirm what is being installed, and select if you wish to restart your server for this. This is highly recommended if you are installing more than one feature or role
13. Click Install, and the installation will proceed
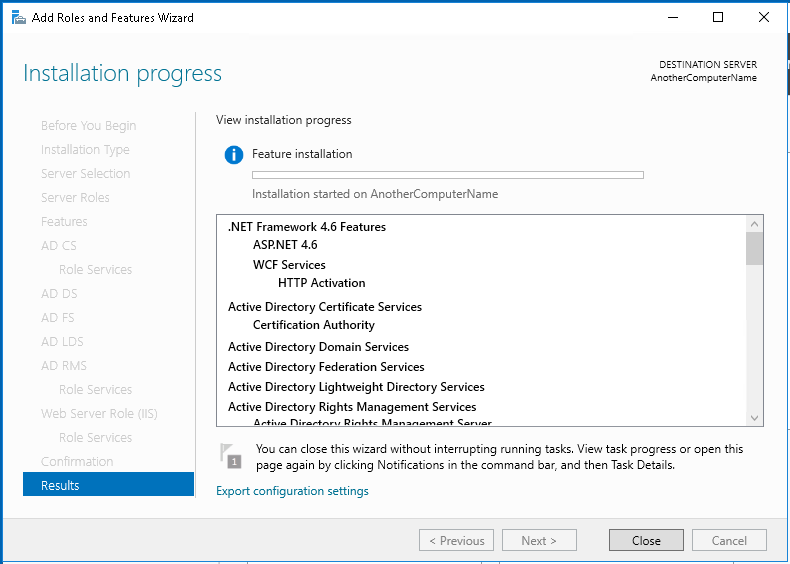
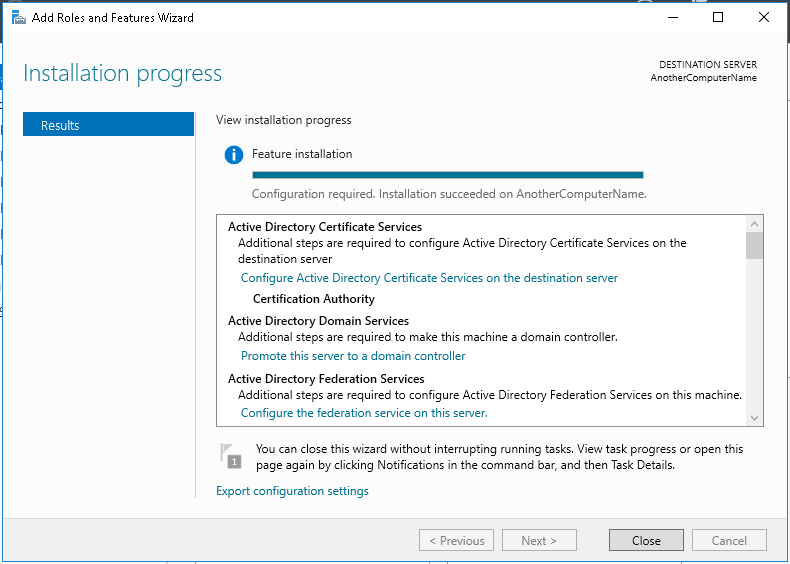
14. Once completed, the window will indicate what is completed or if there were any errors. Additionally, it will provide links to configuring the services and roles
Written by Hostwinds Team / November 15, 2018