Hostwinds Tutorials
Search results for:
Table of Contents
How To Use Tracking Links With WHMCS
Tags: WHMCS
With WHMCS, it allows you to track link conversions and clicks through an easy-to-use interface. With the Link Tracking in WHMCS, you can craft personal links that you can use to track where your visitors are coming from and how successful the link is in converting to clients.
Where to Find the Link Tracking In WHMCS
Step One: Log into your WHMCS Administrator Dashboard.
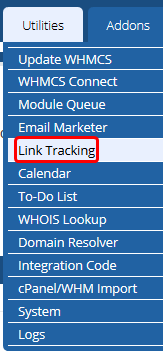
Step Two: From the menu at the top, navigate to Utilities -> Link Tracking. This will take you to the page where you can manage and add Tracking Links.

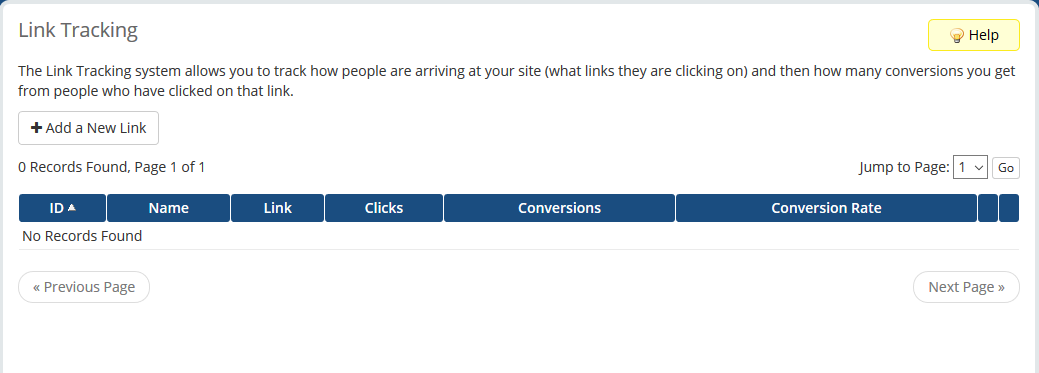
On this page, you may see that there are no records or Links that are tracking by default. It will be like that until you add some Tracking Links. The ID is the ID of the Tracking Link that exists in the database for WHMCS. The Name will be the internal name set during the creation of the link to identify the purpose of the link easily. The Link column will show where the tracking link redirects to after being clicked. As for the Clicks column, this shows how many visitors have clicked through that link to your site. Conversions being how many visitors clicked through the link and purchased a product from you. Both the Clicks and Conversions are used to calculate the Conversion Rate, as displayed in the next column.

How To Add A Tracking Link In WHMCS
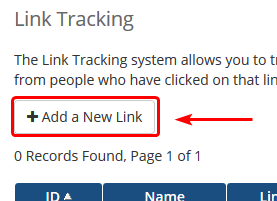
Step One: From the Link Tracking page in WHMCS, you will first want to click on Add a New Link in the upper left.

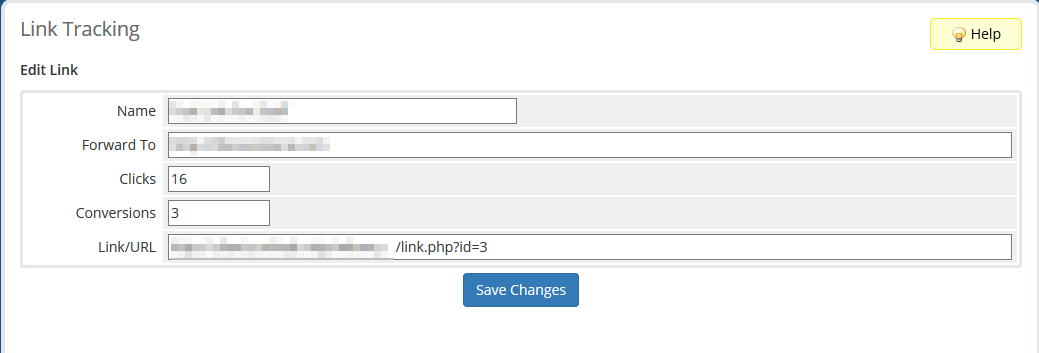
Step Two: Clicking will take you to a page where you can input some data. It will look similar to the following,

Edit the values of the Link to how you would like for the Link that you are going to be tracking clicks to.
- Name – This will be the internal name of the Tracking link for your personal identification.
- Forward To – This is where you want the link to send your visitors. The visitors will first be sent to the link on your WHMCS, then will proceed to the link in this field.
- Clicks – You can set an initial value for how many clicks the link has received. Recommended to start this at 0.
- Conversions – This is how many visitors have traveled through the link and purchased a product. You can set an initial starting value here. However, for the most accurate representation, it is recommended to leave this at 0.
Step Three: Once you have finished inputting the link and name, you can click the Save Changes button, and it will generate a link and add it to the list of active links.

Step Four: To view the new link generated, you will need to proceed with acting as if you were modifying the link, and it will be displayed as a field.
Modifying A Tracking Link and Getting The Tracking URL
Step One: On the main Link Tracking page within WHMCS, there will be an icon to the right of each entry to edit the link in the list of current tracking links. This icon will be similar to a Pencil and Paper. Click this link to proceed to the modification page.

Step Two: After clicking that, you will be brought to a very similar page to creating a new Tracking Link. However, now there will be a new field that contains the tracking link. This is what you have your visitors click on to track their visits and conversions.

Removing A Tracking Link
Step One: If you no longer have a specific promotion going on or want to remove a tracking link from your site, it can be removed from the WHMCS Link Tracking main page. Next to each Link displayed, a red icon can be clicked to remove the tracking link permanently. There will be a confirmation dialog that pops up when this is done.

Written by Hostwinds Team / September 5, 2018
