
Hostwinds Tutorials
Search results for:
Table of Contents
How To Use WHMCS Todo List
If you have multiple staff working through your WHMCS installation, it may not be easy to distribute tasks and let everyone know what they are working on. Usually, this may be done through a third-party application. However, in WHMCS, there is the option to make Tasks for administrators. These tasks will show up in the WHMCS Calendar and can have their statuses set to whichever best fits the moment.
Where To Find The WHMCS Todo List
Step One: Log into your WHMCS Administrator Dashboard.
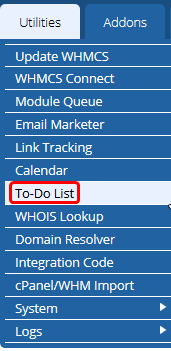
Step Two: From the menu at the top, navigate to find, Utilities -> To-Do List.
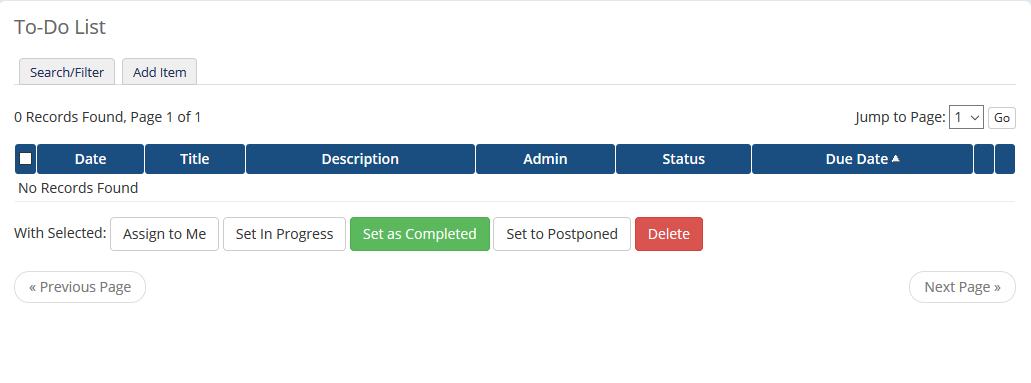
From there, you will be able to search/filter through and create new Tasks for the administrators on your WHMCS installation.
Adding A Task Item
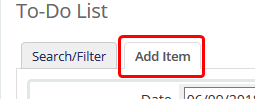
Step One: From the WHMCS To-Do List page, select the Add Item tab.
Step Two: From the new form made visible, fill out the information as it should pertain to the new task you are looking to create.
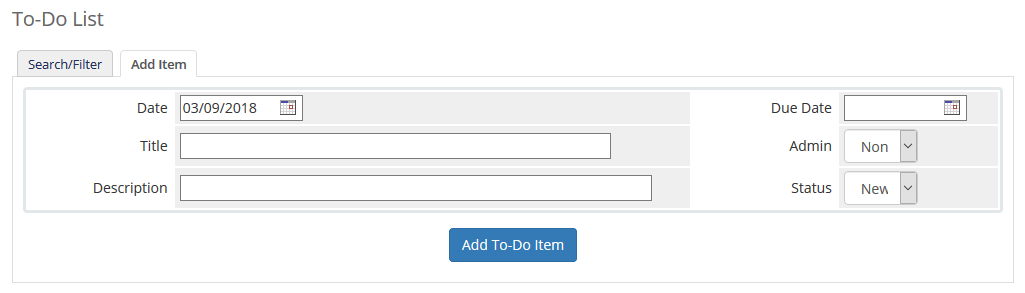
- Date – This is the date that the task is created. WHMCS will automatically populate that field with the current date.
- Title – You can set the general title of the task in this field here. Usually, this will be a small description that briefly gives an overview of the task's point.
- Description – Here, you will be able to input the description of the task. This is where you can provide more information about the task that is not in the Title.
- Due Date – This is the date that you want the task to be due. This can be left blank for the task not to have a due date.
- Admin – If you want to assign the task to a certain administrator with access to the WHMCS, you can specify that from this dropdown here.
- Status – This will be the starting status of the task. By default, it will populate as New. Options can be New, Pending, In Progress, Completed, and Postponed.
Step Three: When you have finished filling out the information, you can proceed by clicking on the Add To-Do Item button.

Searching Through Todo Tasks
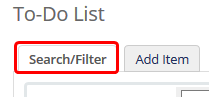
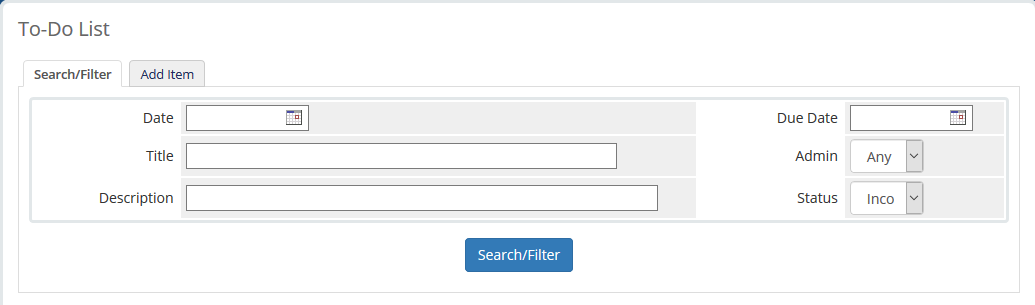
Step One: From the WHMCS To-Do List page, select the Search/Filter tab.
Step Two: Similar to creating the task, you will be presented with the same fields to fill out. To better search for tasks, you can search based on the Date it was created, the Due Date, and if the Title or the Description contains a specific keyword. You can also search based on the Admin the task is assigned to and the current Status as well. The I**complete** status will show any Tasks with a status other than Complete.
Editing A Todo Task
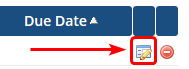
Step One: From the WHMCS To-Do List page, you will be able to search through all the tasks that exist on the WHMCS currently. After finding the task that you want to edit, you will want to select the Edit button next to the line item. This will display as a Pencil Icon and Paper by default.
Step Two: It will display fields that can be edited similar to when Adding a new Todo Item. You can change anything about the task, including the Admin it is assigned to and the Status or Due Date.
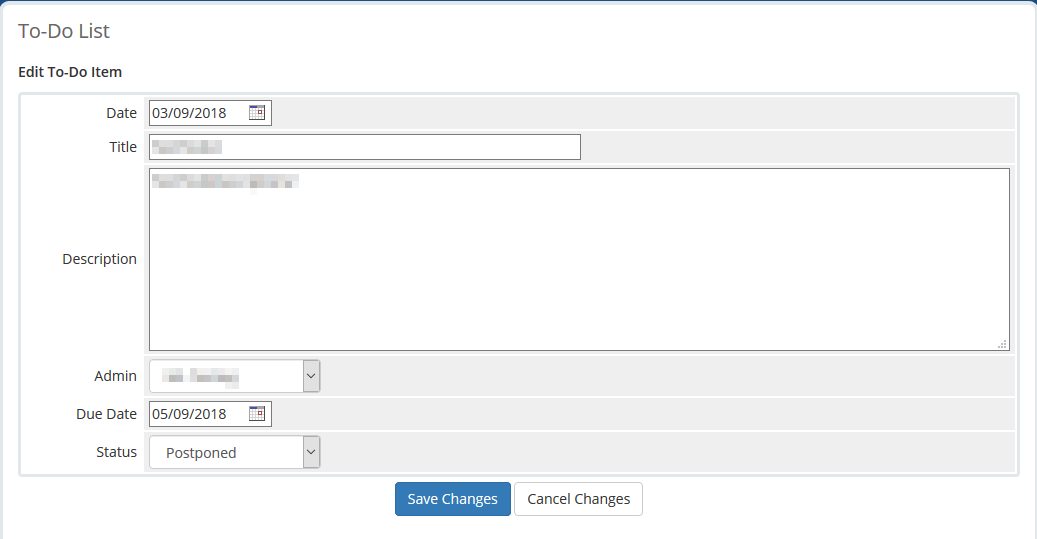
Step Three: Once done changing all the necessary fields, select the Save Changes button. If you do not want to make any changes to the task, you can select the Cancel Changes button.
Removing A Todo Task
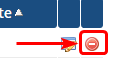
If you should remove a Todo task for any reason, there will be a Delete option to the right of each Task listed on the WHMCS To-Do List page. It will look similar to a red circle with a horizontal white stripe through it. After searching through and finding the task you want to delete, you can click on that button. This will ask for confirmation before it proceeds with the deletion.
Changing Multiple Todo Task's Status Easily
Step One: From the WHMCS To-Do List page, you should notice a white empty checkbox to the left of each item displayed. Select that box for each one that you want to change the status for. You can select the checkbox at the top of the column to select all underneath it.

Step Two: From the bottom of the list of currently displayed tasks, there will be options to Assign to Me, Set In Progress, Set as Completed, Set to Postponed, and Delete. You can mass assign a task to yourself or change the status to In Progress, Completed, or Postponed. You can also Delete all the tasks as well.

Written by Hostwinds Team / September 18, 2018