
Hostwinds Tutorials
Search results for:
Table of Contents
Install SMTP on Windows Server 2012
Tags: Windows
When installing a Windows Server 2012 Instance at Hostwinds, you may want to extend the Operating System features. A common feature you may want is to have the ability to send emails from your Windows Instance. Let's go over that in this guide once you have gained access to your VPS using RDP and are logged in as the Administrator user.
Install IIS web server with SMTP on Windows Server 2012
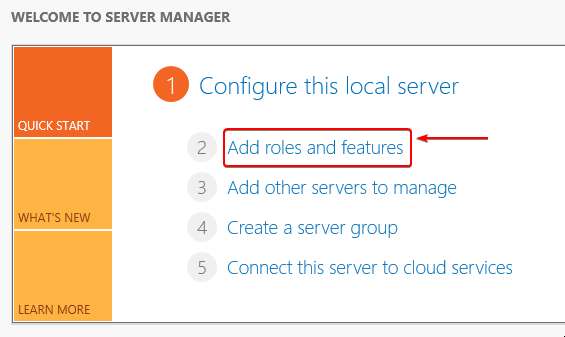
Step One: Click on Server Manager on the lower left side of the screen:

Step Two: Click on Add Roles and Features in the middle of the page.
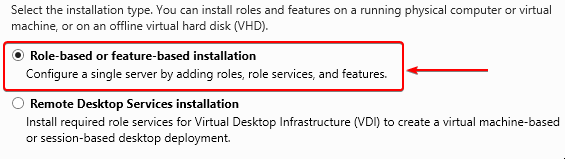
Step Three: Click on Next until you see the screen to select Role-based or feature-based installation and click on next:
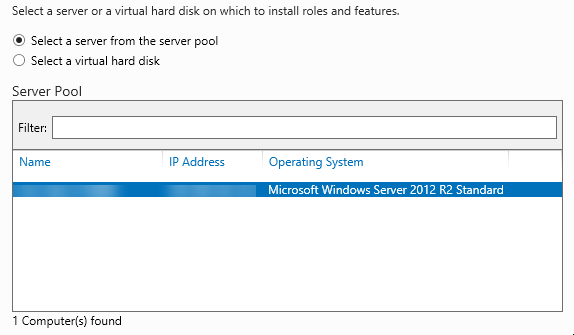
Step Four: Ensure your server is in the pool and selected. Click on Next
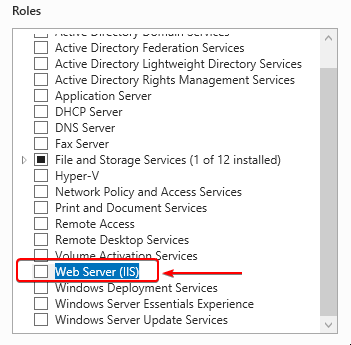
Step Five: Check the box by Web Server (IIS)
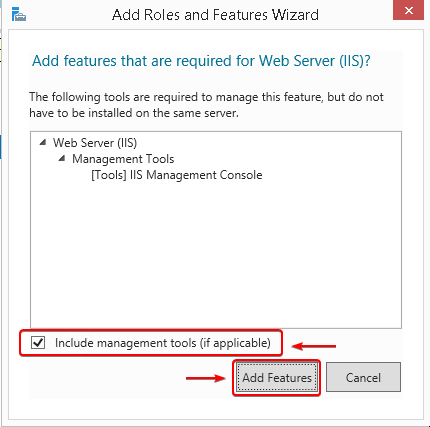
Step Six: A pop-up box will appear. Ensure the box for Include management tools (if applicable) is checked and click on the Add Features button
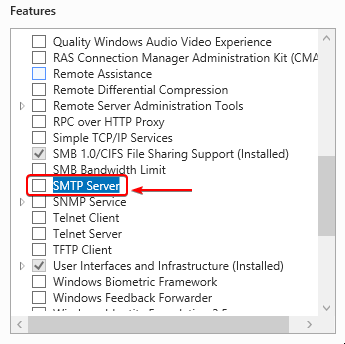
Step Seven: Select SMTP Server in the feature list by checking this box to allow your SMTP Server to support the transfer or e-mail messages between e-mail systems
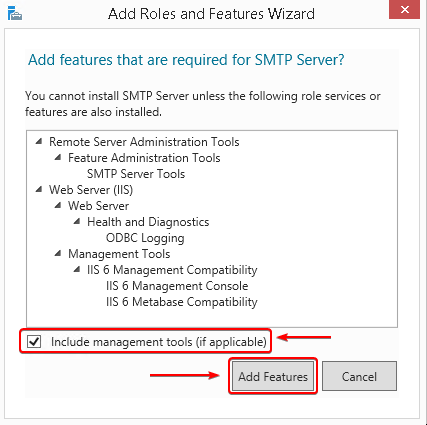
Step Eight: Ensure the Include management tools (if applicable) check box is checked and click on the Add Features button. This will also install other role services or features.
Step Nine: Click the Next button.
Step Ten: Review the information on the screen and press the next button once again.
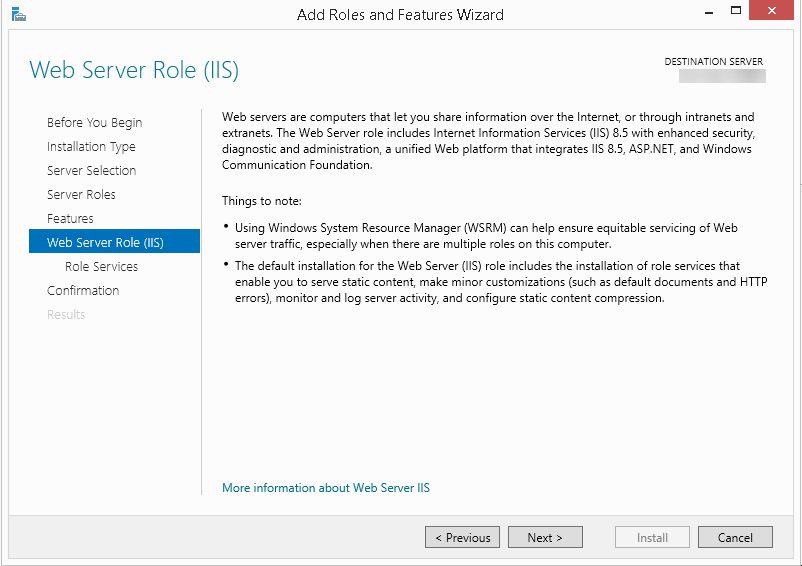
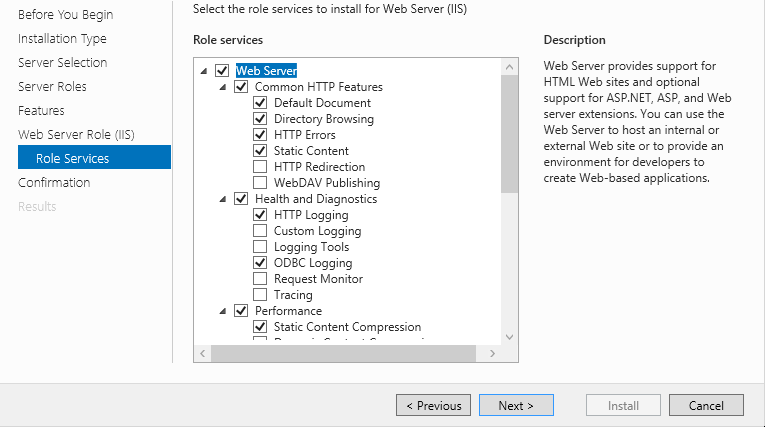
Step Eleven: Select the role services to install for Web Server (IIS) and click on next.
Step Twelve: Review the installation details and click on the Install button to begin.
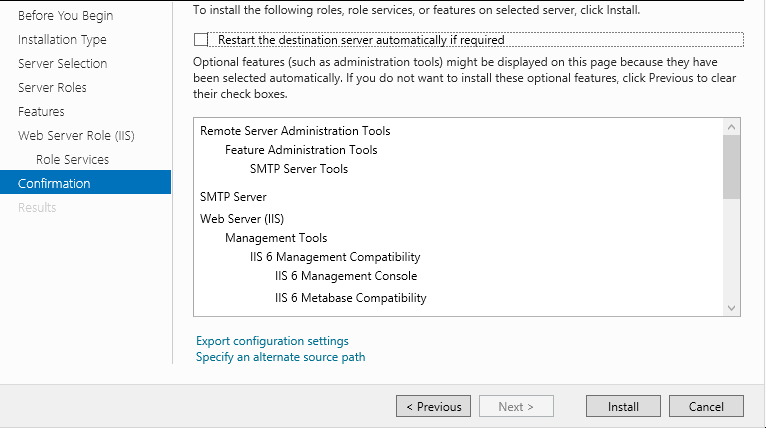
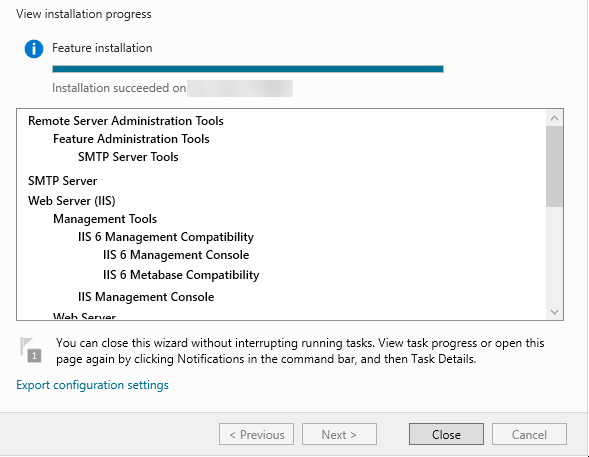
You can close the wizard without interrupting running tasks and also export the configuration settings. Once you have received an installation completed message, you can close the window.
Written by Hostwinds Team / August 16, 2018