
Hostwinds Tutorials
Search results for:
So you've just installed WordPress on your site and didn't realize that Softaculous defaults to /wp — or maybe you've had it installed on /blog for a long time and want to make it your main landing page.
If it's a fresh installation, deleting it and re-installing it in the document root by blanking the "In Directory" field may be the easiest way to change this. However, it can be moved once installed.
These instructions assume a medium comfort level with cPanel and phpMyAdmin. If you get stuck at any point or don't understand something, please join us in LiveChat or open a technical support ticket for our technicians to help.
Step 1: Of course, before doing any major work like this, it is recommended to take a backup of everything. If you don't have our Cloud Backups service or a plugin inside WordPress itself, you can make a tech support ticket or contact us in LiveChat to have a full cPanel backup made of your account.
Step 2: Modify the directory and URL information in Softaculous
Open cPanel and scroll to the bottom. Click the WordPress icon. Click the pencil on the right of the line for your installation.

Remove the 'wp' or other subdirectories from the end of both the Directory and URL, then scroll to the bottom and click Save Installation Details.

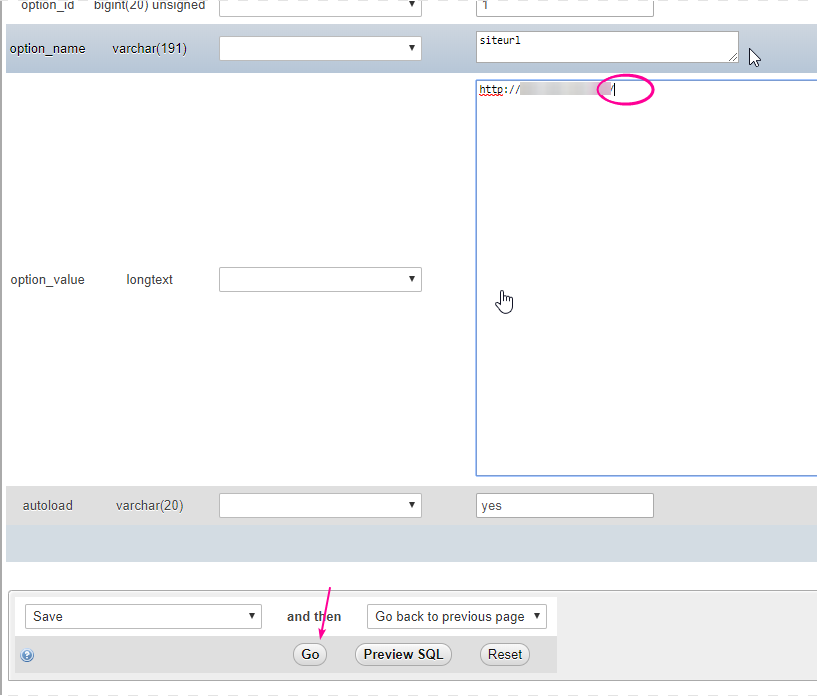
Step 3: Change the 'siteurl' and 'home' fields in the database.
Open phpMyAdmin and locate your WordPress install's database. It's typically named [user]_wp[number]. Expand the list of tables and find wp[xx]_options.

Click Edit next to the site URL, remove the 'wp' or another subdirectory from the URL, and click 'go.' Do the same for the 'home' field.
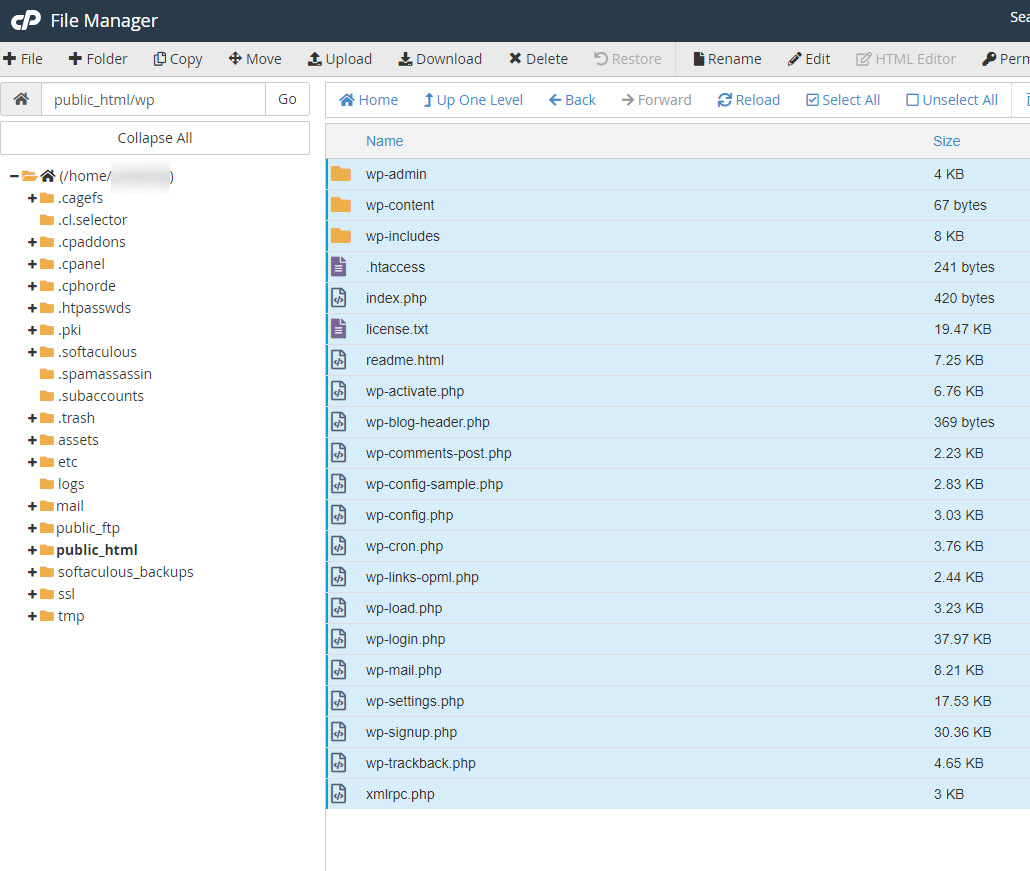
Step 4: Finally, move the files from the subdirectory to the root.
Back in cPanel, go to the File Manager and click the Settings button in the top right. Make sure that 'Show Hidden Files (dotfiles)' is checked. Click Save.

Navigate to the public_html directory, then the 'wp' (or other) subdirectory. Click the top directory, hold shift, then click the bottom file in the list. They should all highlight in pale blue:
Click 'copy' at the top left, and remove the 'wp' from the end of the file path.
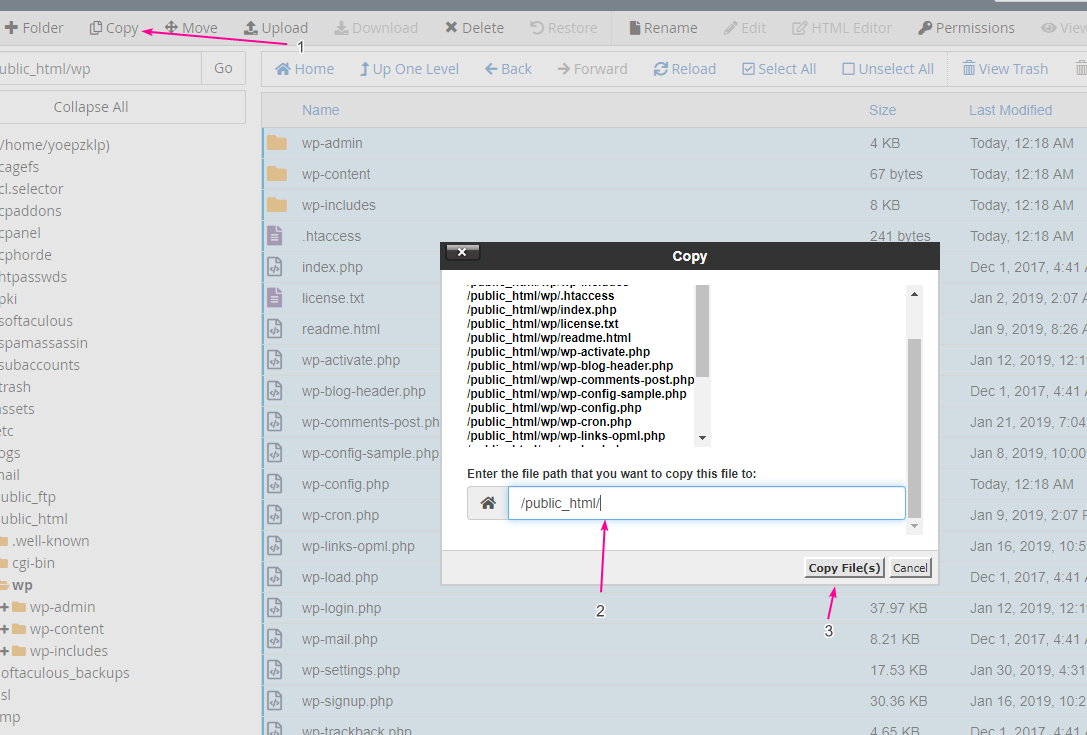
It will copy the files (which will be quick on a fresh install and take quite some time if there's lots of content) to the public_html or addon domain root.
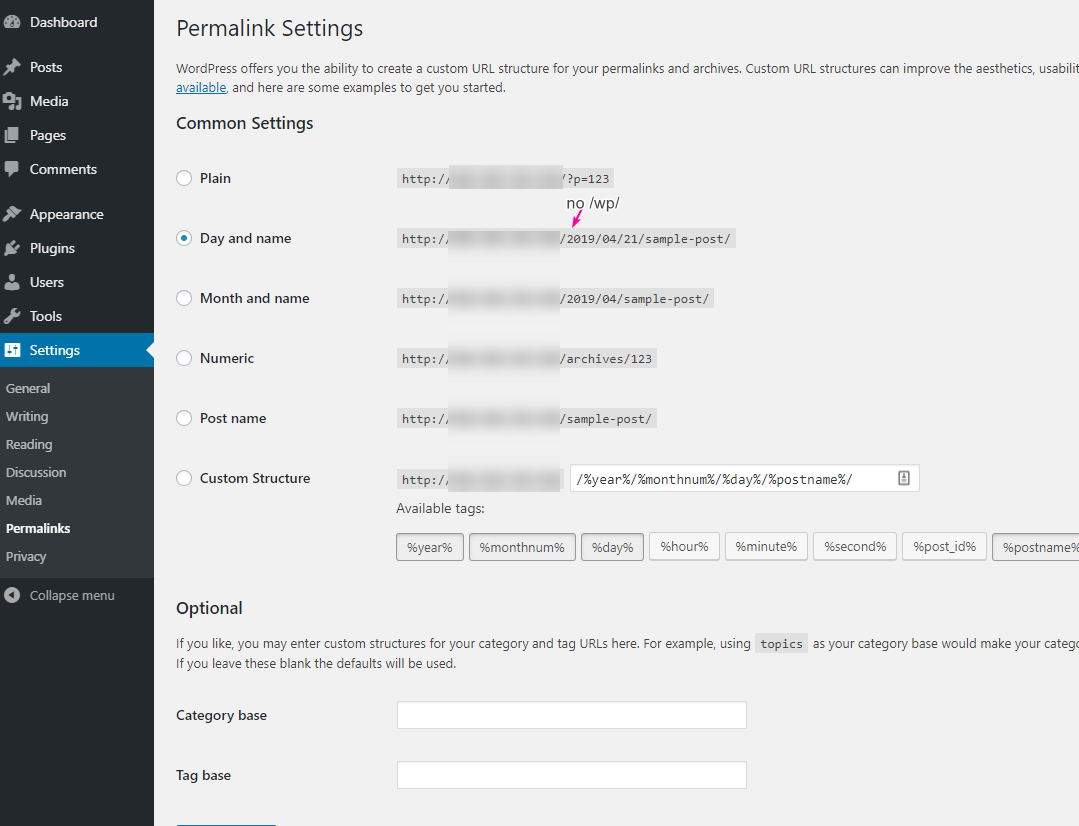
Step 5: Log in to wp-admin and make sure everything is copied right. Observe the Settings -> General and Settings -> Permalinks specifically to make sure it all looks right.
Step 5: Navigate to your website at its new location. Click around and make sure all the links work.
Step 6: Delete the old /wp (or other) directory in cPanel File Manager. Once you are satisfied, everything is functional.
Written by Hostwinds Team / April 22, 2019