
Hostwinds Tutorials
Search results for:
Table of Contents
Create Private Nameservers with NameCheap
Tags: Nameservers
NameCheap is one of the most popular domain registrars. This guide will go over how to create private nameservers with NameCheap, and it is intended to help Hostwinds clients point their domain name to their web hosting services with Hostwinds.
NameCheap Nameserver Creation
At NameCheap, they refer to this type of record as a Personal DNS Server. Here's how to create one.
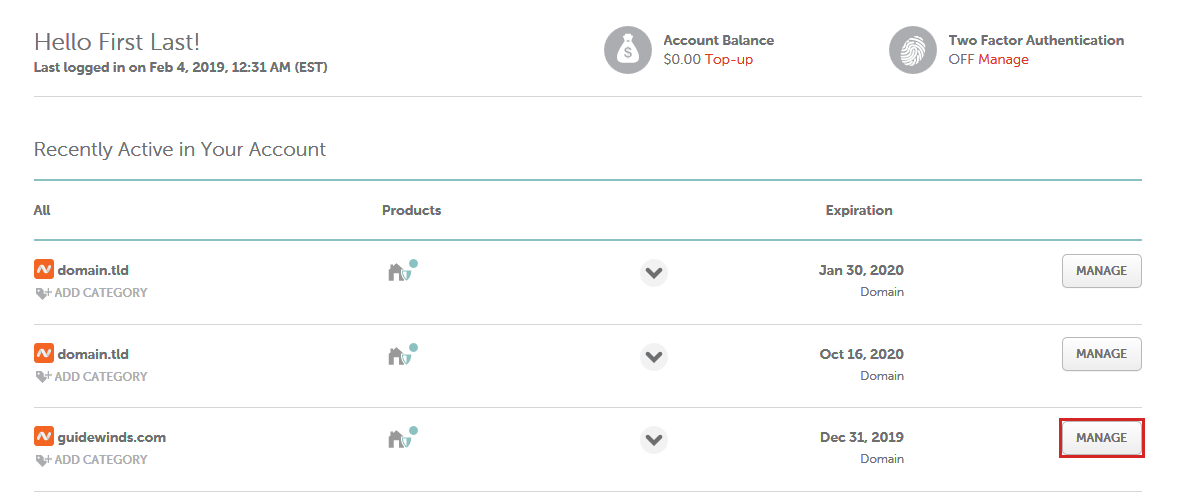
Step 1: Once logged into your NameCheap account, click Manage next to the domain you wish to use for your private nameservers.
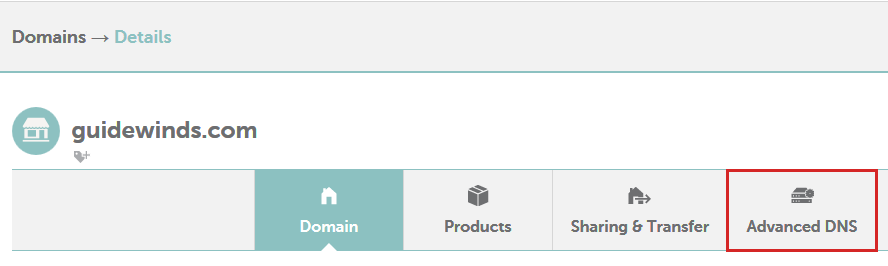
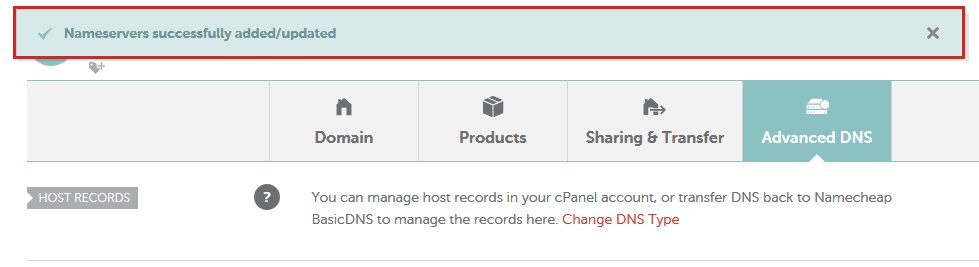
Step 2: Next, click on the Advanced DNS tab. This will reveal a series of advanced options for your domain.
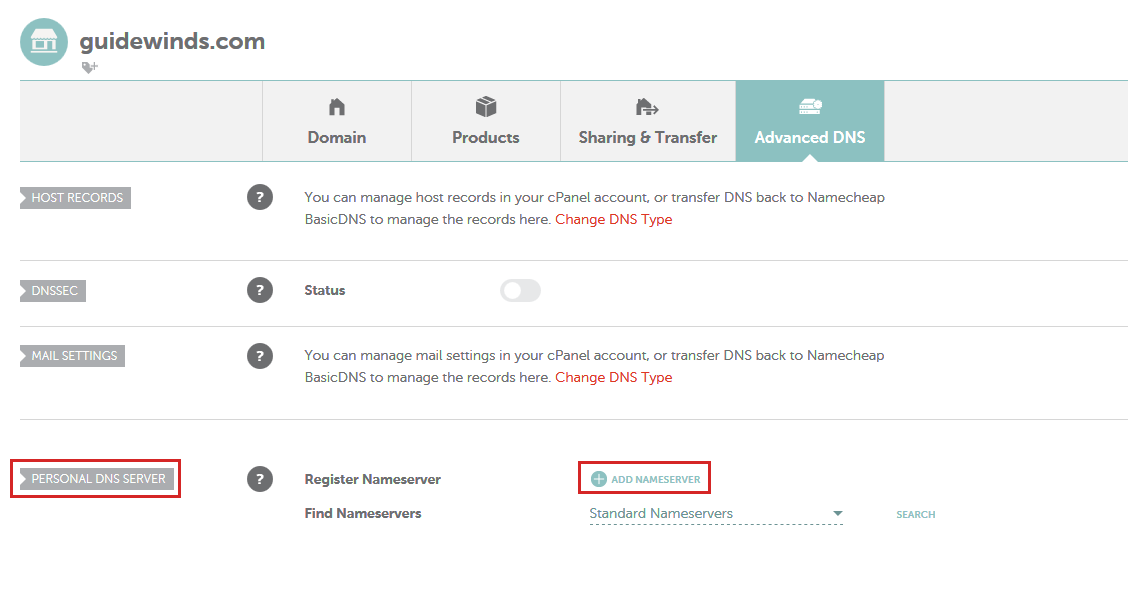
Step 3: Scroll down to the Personal DNS Server section. Once there, click the "Add Nameserver" link.
Step 4: Now, a dropdown should pop up with the standard list of nameserver prefixes in a small overlay just below the link. You can choose one of these or simply type the nameserver you want to create.
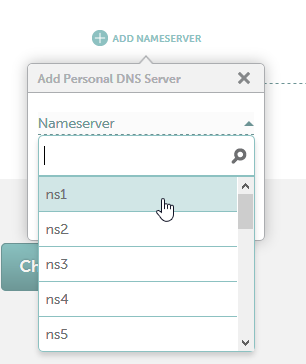
Select the prefix from the dropdown.
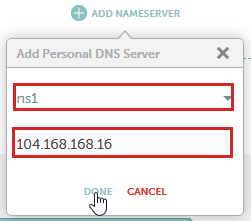
Enter the IP address desired, Click Done.
Assuming no errors or incorrect inputs, you will receive a notification that the Nameservers were updated successfully:
Repeat steps 3 and 4 for each nameserver you want to create. Typically, two nameservers are sufficient for most registrars.
As with all DNS records, global propagation can take up to 24 hours to finish.
Written by Hostwinds Team / February 14, 2019