
Hostwinds Tutorials
Search results for:
Table of Contents
How to Restore Backups in WHM
Tags: cPanel
By following these directions, you can easily restore backups in WHM if you're on one of our VPS or Dedicated servers with a WHM/cPanel license by following the steps in this guide.
Backup Restoration Option
Step 1: Go to WHM (These login details were provided in your welcome email when purchasing your cPanel license)
Step 2: Go to the Backup section, either by finding in the column on the left-hand side or selecting Backup among the available options in the WHM menu.
This can be done by searching for the word "backup" in the search bar.
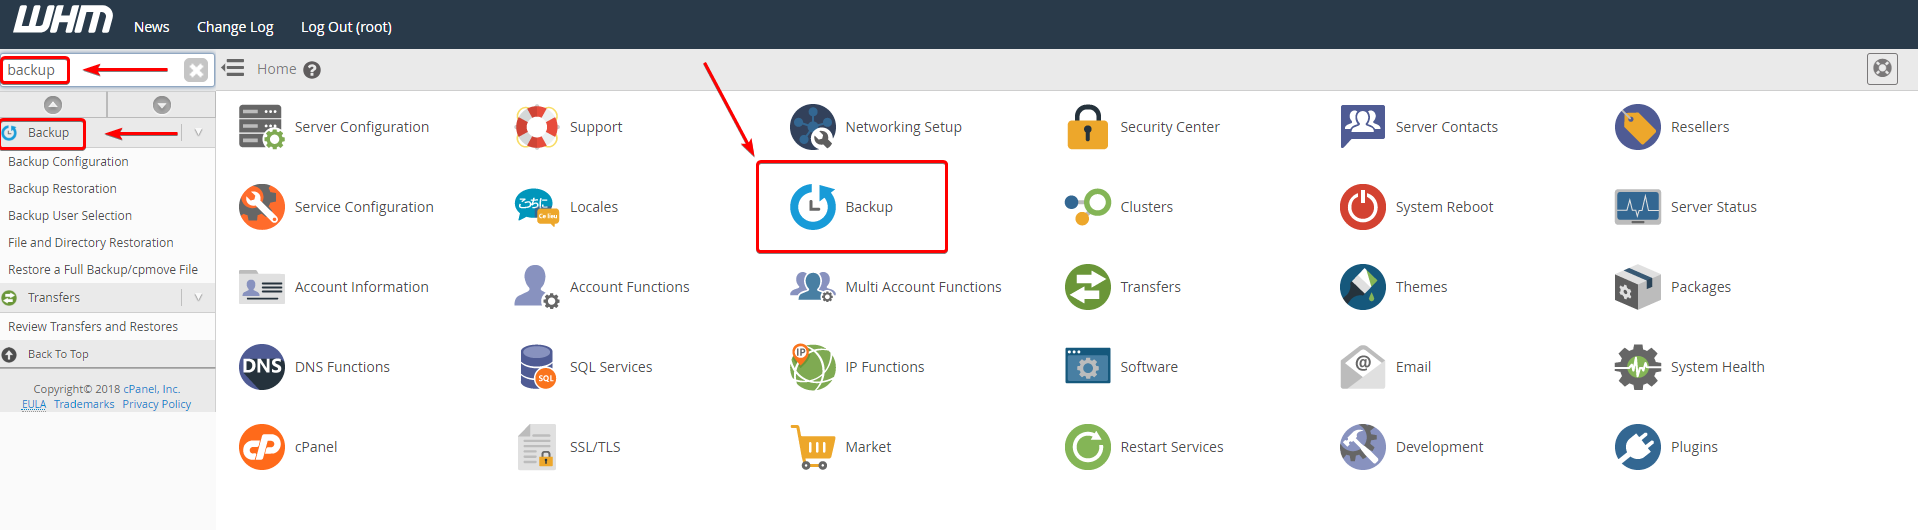
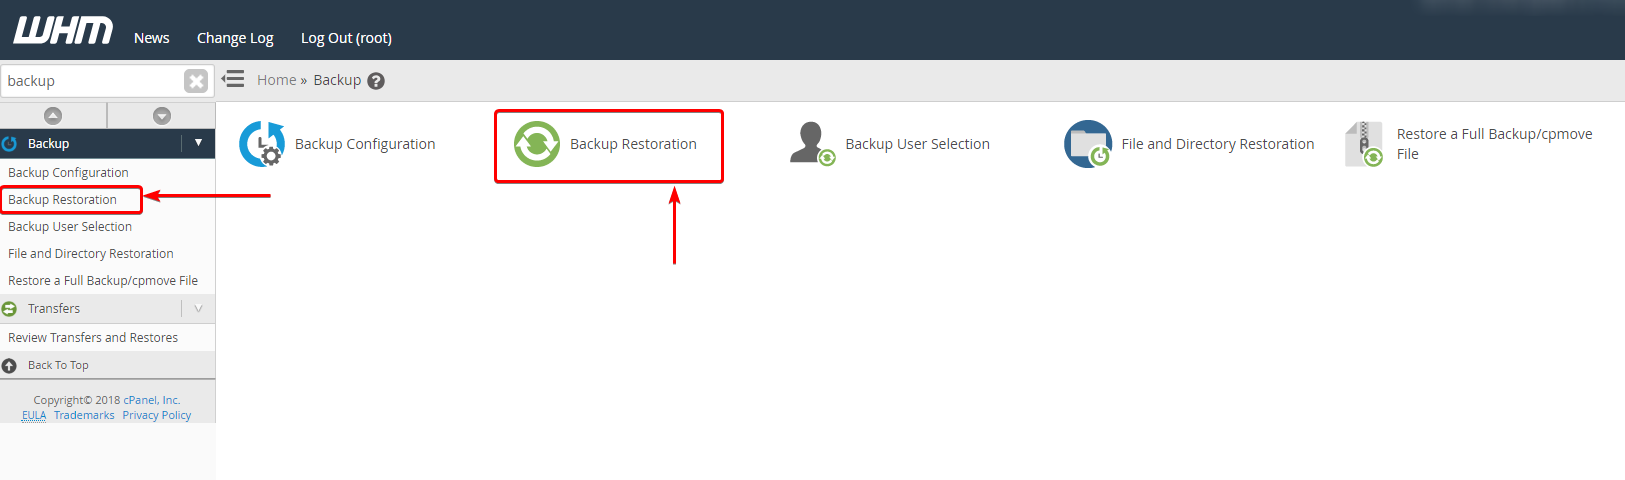
Step 3: Select the Backup Restoration option.
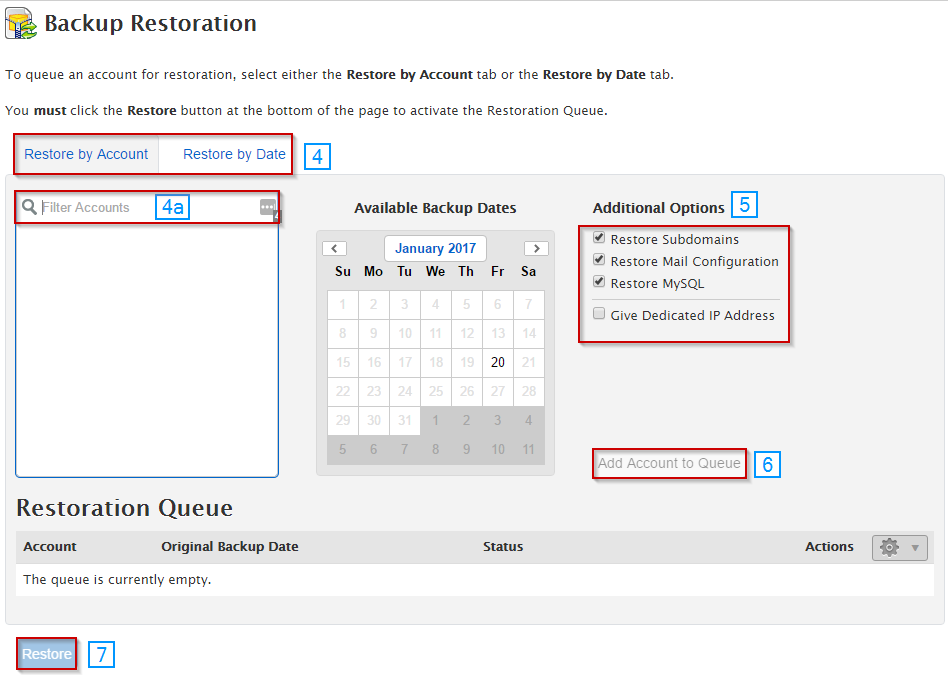
Step 4: Choose whether you want to restore a backup for a specific user or a specific date
4a: Note that you can do more than one user, but you need to select them individually
Step 5: Choose if you want any additional options (subdomains are not automatically restored if specifically chosen here)
Step 6: Click Add Account to Queue
Step 7: Click Restore
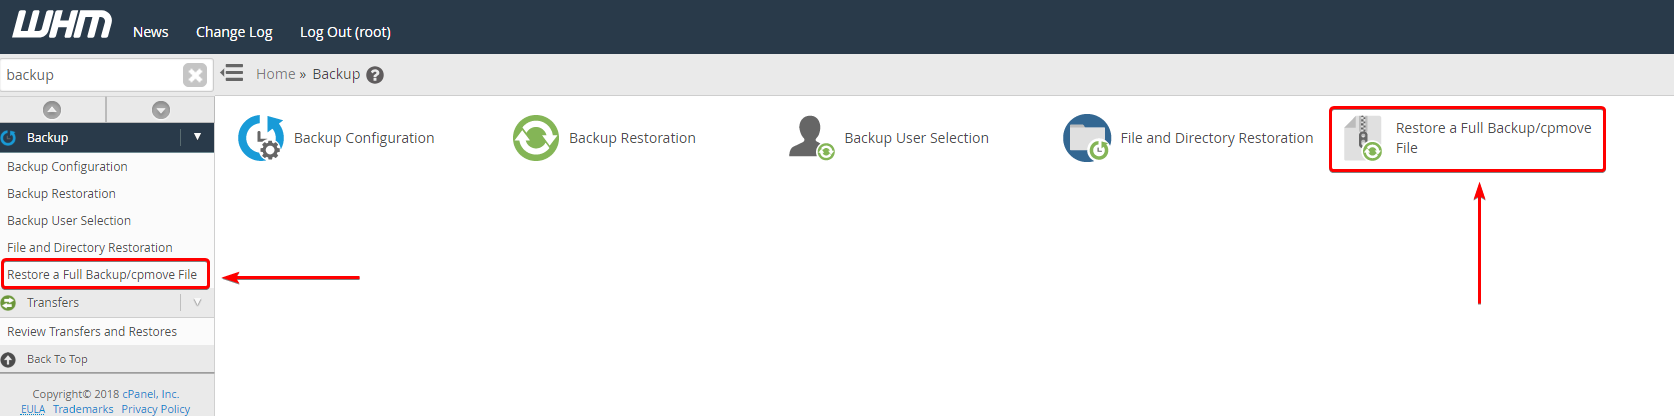
Restore A Full Backup/cpmove File Option
Step 1: Go to WHM (These login details were provided in your welcome email when purchasing your cPanel license)
Step 2: Go to the Backup section, either by finding in the column on the left-hand side or selecting Backup among the available options in the WHM menu.
This can be done by searching for the word "backup" in the search bar.
Step 3: Select the Backup Restoration option.
Step 4: Select if this should be a Restricted Restore
Step 5: Under Transfer Method, select whether to restore with the username or with a file
5a: If restoring using a username, select the username that you wish to restore
5b: If restoring using a file, select the file that you wish to use to complete the restoration
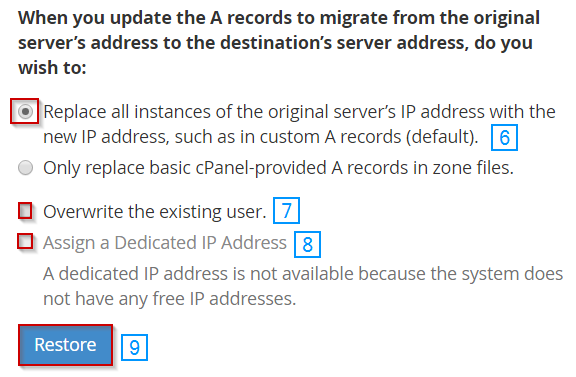
Step 6: Select if you want to overwrite each instance of the servers' IP addresses that originally existed with this one or replace the basic A records given by cPanel.
Step 7: If this user account already exists and you wish to replace the users content with the content from the backup, select overwrite that user
Step 8: If you have an unused IP address on your server and you'd like this account to have a dedicated IP, you can select to assign a dedicated IP address for the account
Step 9: Once you're satisfied with the options that have been selected, click Restore at the bottom of the page
Written by Michael Brower / December 13, 2016