
Hostwinds Tutorials
Search results for:
Table of Contents
How To See If FTP is Blocked By Your Firewall
The TCP port for FTP is normally set to 21 as a default. If you're having trouble connecting with FTP, it may be blocked by your firewall. Check your firewall's logs to see if it's been blocking connecting to or from the server IP you're trying to connect to.
To see if your ISP is by chance blocking the port, use these command prompts:
For Windows
- Open the command prompt window by clicking Start or pressing the Windows key plus the "x" key at the same time.
- Type this: telnet my-domain-name.com 21
- Hit enter
For Apple or Mac
- Go to Mac HC
- Go to Applications
- Go to Utilities
- Type this: telnet my-domain-name.com 21
- Hit enter
For Linux
- Open the terminal emulator you use
- Execute this: telnet my-domain-name.com 21
If you don't get something similar to this (see below), then it's probably blocked:
220———- Welcome to Pure-FTPd [TLS] ———-
20-You're user number 2 of 50 allowed.
220-<<
220-#########################################################
220-Please upload your web files to the public_html directory.
220-Note that letters are case sensitive.
220-#########################################################
220->>
220-Local time is now 03:35. Server port: 21.
220-This is a private system – No anonymous login
220-IPv6 connections are also welcome on this server.
220 You'll be disconnected after 15 minutes of inactivity.
How Do I Allow FTP Through Windows Firewall?
If your firewall is blocking FTP on Windows 7 or 8, here's how you can fix it so FTP can connect and transfer successfully:
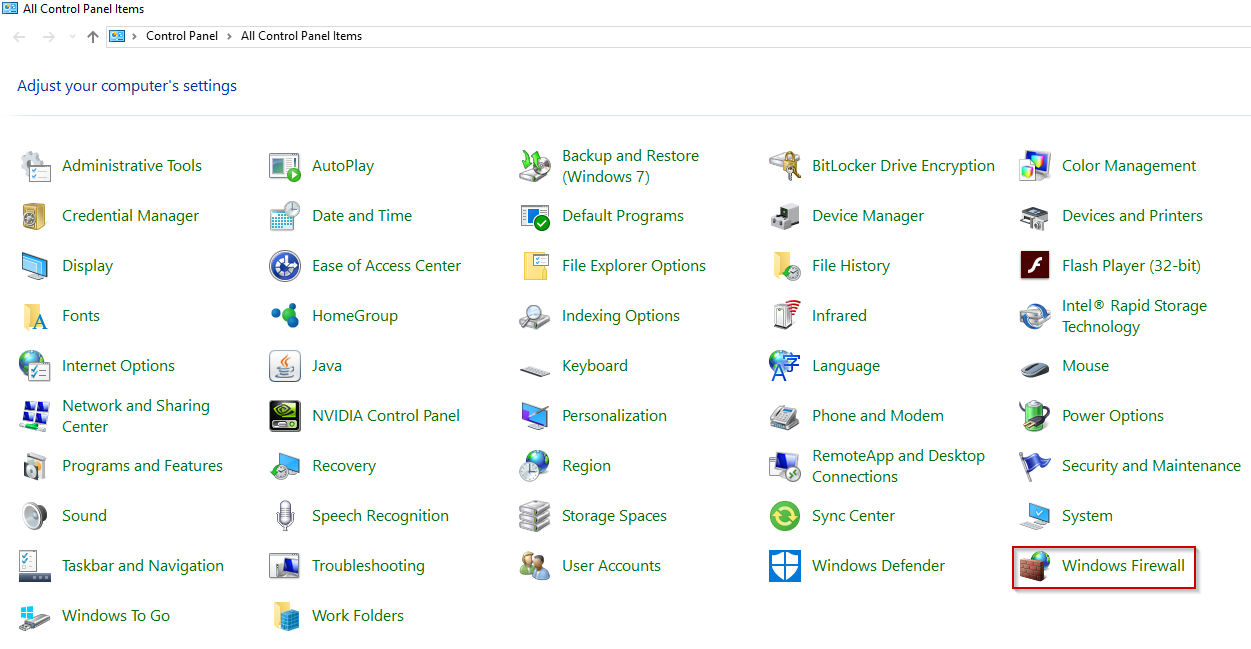
Step 1: Go to Control Panel
Step 2: Go to Windows Firewall
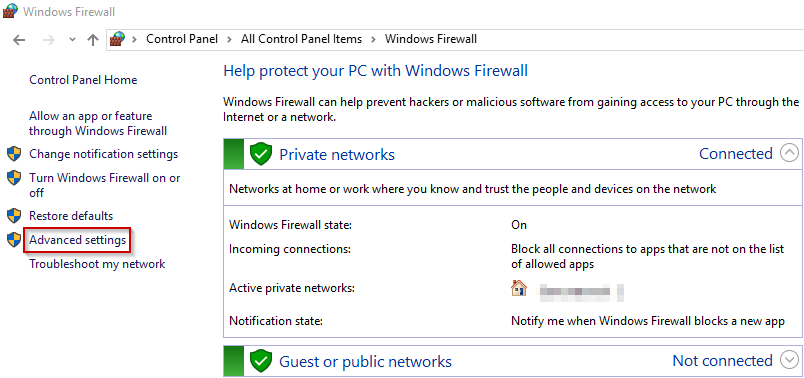
Step 3: Go to Advanced Settings
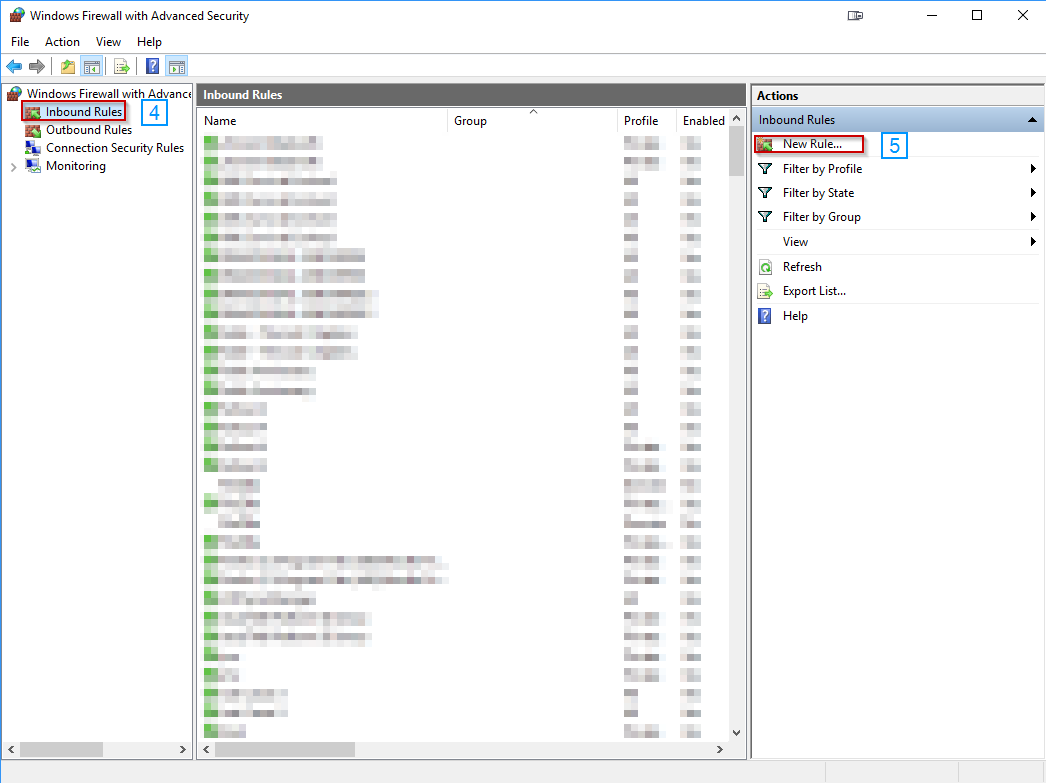
Step 4: Click Inbound Rules on the left
Step 5: Then click New Rule on the right
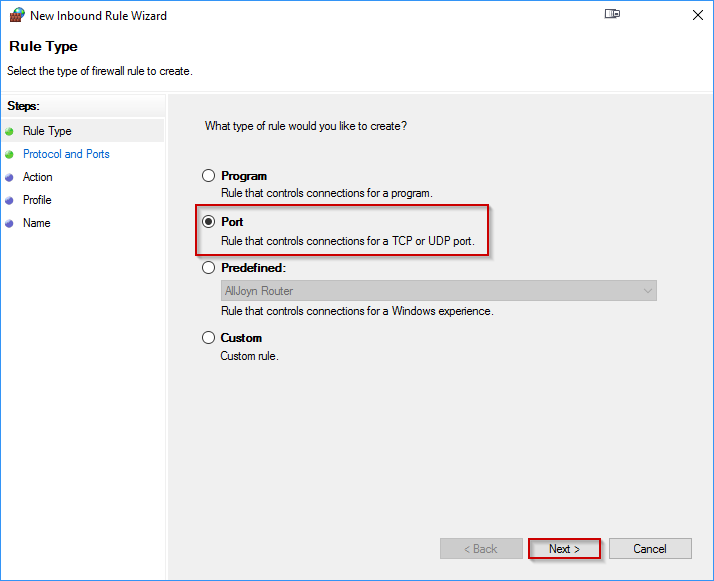
Step 6: Choose Port for your rule type and click next.
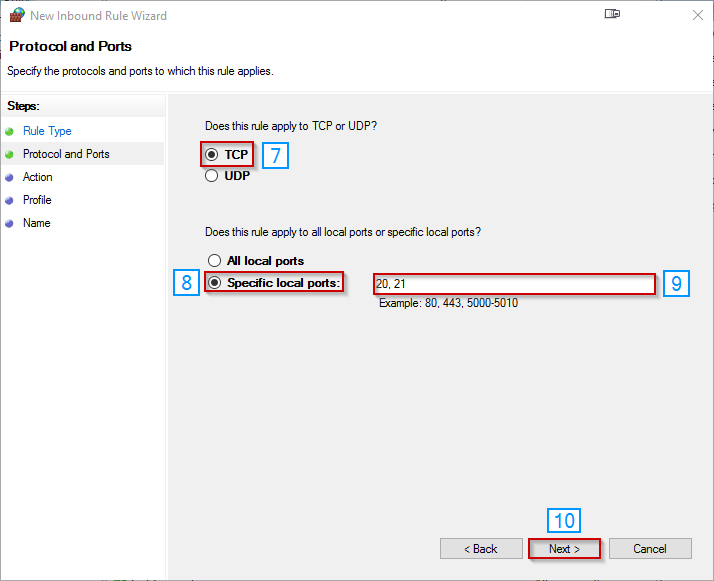
Step 7: Select TCP at the top of the new box=
Step 8: Select Specific Local Ports on the bottom
Step 9: Put 20 and 21 into the box, separated by a comma
Step 10: Click Next
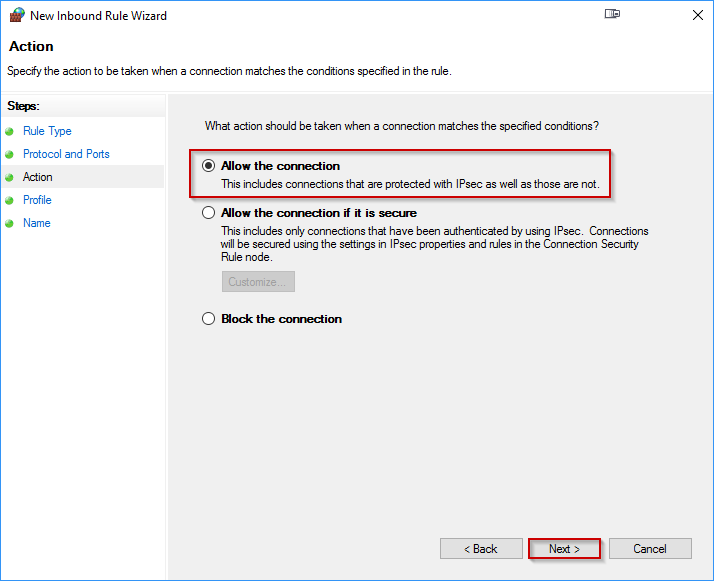
Step 11: Select Allow the Connection and click Next
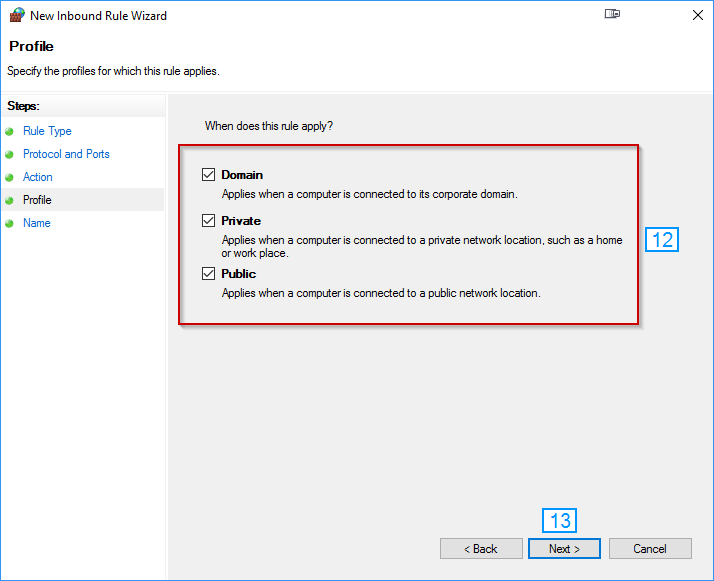
Step 12: On the next screen, select all three options if you aren't sure (domain, private, public)
Step 13: Click Next
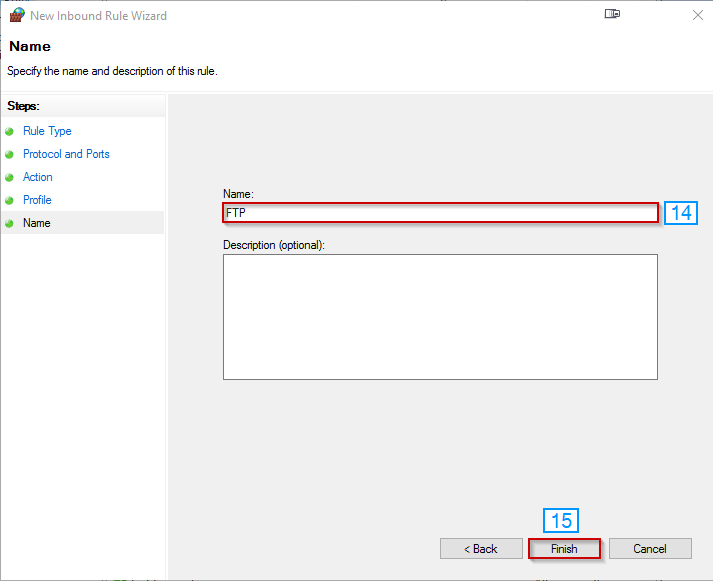
Step 14: Name your new rule – we recommend naming it FTP for easy identification.
Step 15: Click Finish
FTP should now connect, and you should see this new rule listed under the firewall's advanced settings. You can turn it off at any time by right-clicking it.
Written by Hostwinds Team / December 13, 2016