
Hostwinds Tutorials
Search results for:
Table of Contents
How Do I Set Up a Remote Hostwinds Server for cPanel/WHM Backups?
How to Set a Remote Backup Server for cPanel Backups
How to Set a Remote Backup Server for WHM Backups
Setting up a Remote Hostwinds Server for cPanel/WHM Backups
How Do I Set Up a Remote Hostwinds Server for cPanel/WHM Backups?
How to Set a Remote Backup Server for cPanel Backups
How to Set a Remote Backup Server for WHM Backups
This guide is intended for Hostwinds clients who have access to WHM on their VPS, Cloud, or Dedicated Server. Shared, Business and Reseller hosting clients will want to ensure they have the Web Hosting Cloud Backups addon enabled to manage backups and have these available at any time.
How Do I Set Up a Remote Hostwinds Server for cPanel/WHM Backups?
You can easily have your backups sent to a remote server using FTP in both WHM and cPanel, as explained below.
How to Set a Remote Backup Server for cPanel Backups
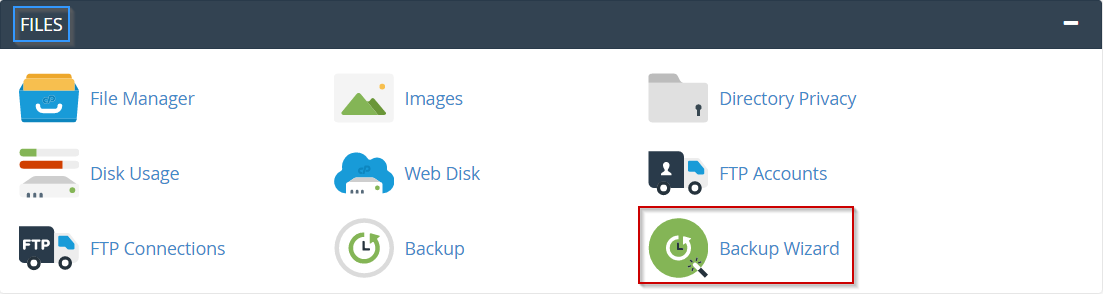
- Login to your cPanel account
- Select Backup Wizard under the Files section
- Select Backup
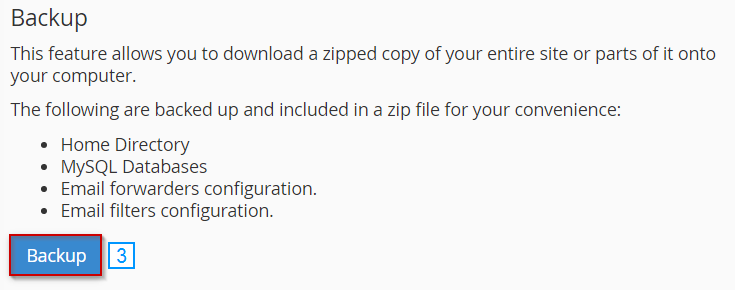
- Select a full or partial backup. If you're unsure, select the Full Backup option.

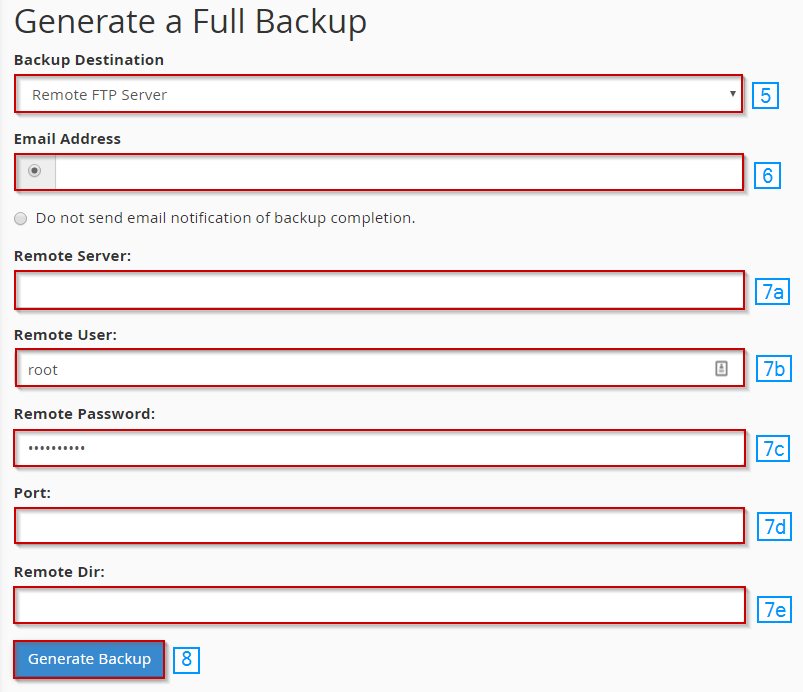
- Under Backup Destination, select Remote FTP Server.
- Fill in the Email Address where you'd like to receive a notification once the backup is complete.
- Enter the required fields for the remote connection
- Remote Server
- Remote User
- Remote Password
- Port
- Remote Dir (If left blank, a directory called cpbackup will be created in the root directory)
- Click Generate Backup
How to Set a Remote Backup Server for WHM Backups
To set a remote backup server for backups generated in WHM, you'll first need to configure automatic backups.
Once you reach the "Additional Destinations" section, please refer to the following steps:
- Choose FTP as the Destination Type
- Click Create new destination

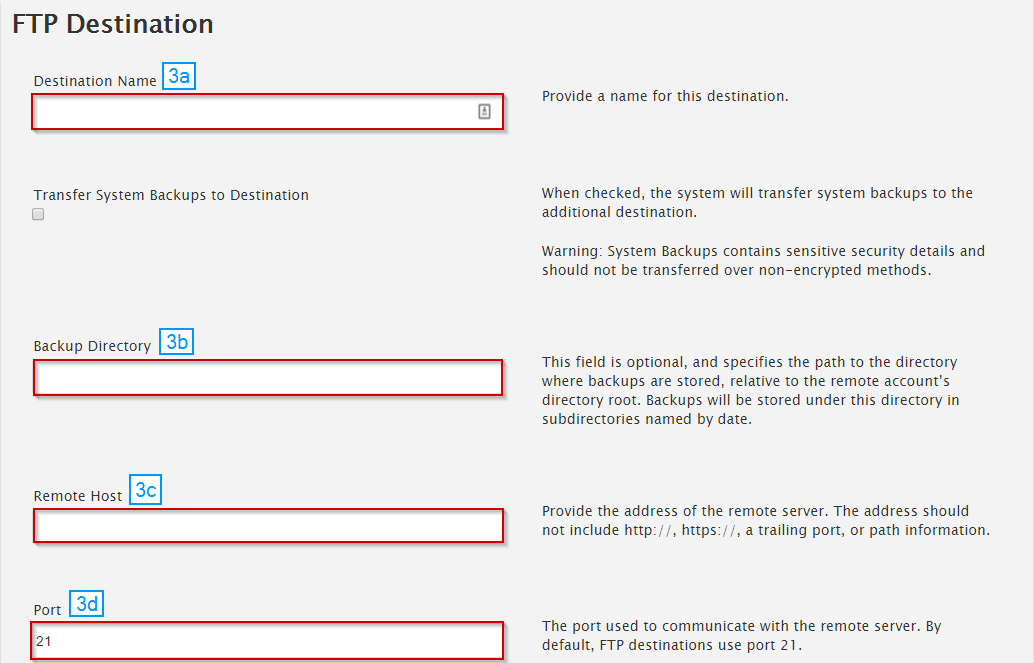
- In the FTP Destination section, fill in the required fields:
- Destination Name
- Backup Directory
- Remote Host
- Port
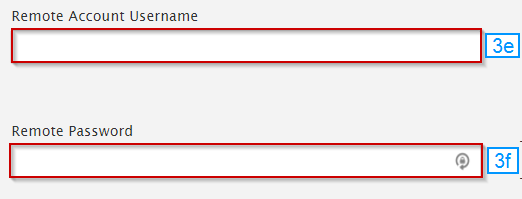
- Remote Account Username
- Remote Password
- Enable Passive FTP
- Click Save Destination and Validate Destination

Written by Hostwinds Team / June 5, 2021