
Hostwinds Tutorials
Search results for:
Table of Contents
Transfer/Migrate a Server with No Downtime (or Database Lag)
Tags: Web Hosting
How Can I Transfer Servers With No Downtime?
If you're using a Cloud or Dedicated server and want to change servers, you can do the following to ensure there's no downtime:
This guide is written with both servers using WHM/cPanel. However, the general principles should apply to most transfers.
These steps are ONLY to be utilized once the content from the original server has been restored to the new server and confirmed working. These steps should be performed just before updating the nameservers for the transferred domain(s). If you have not transferred the content to the new server and have WHM access on both, please refer to the following guide: how to transfer/migrate an entire server to a new server guide.
Step 1: Log in to WHM on the original server
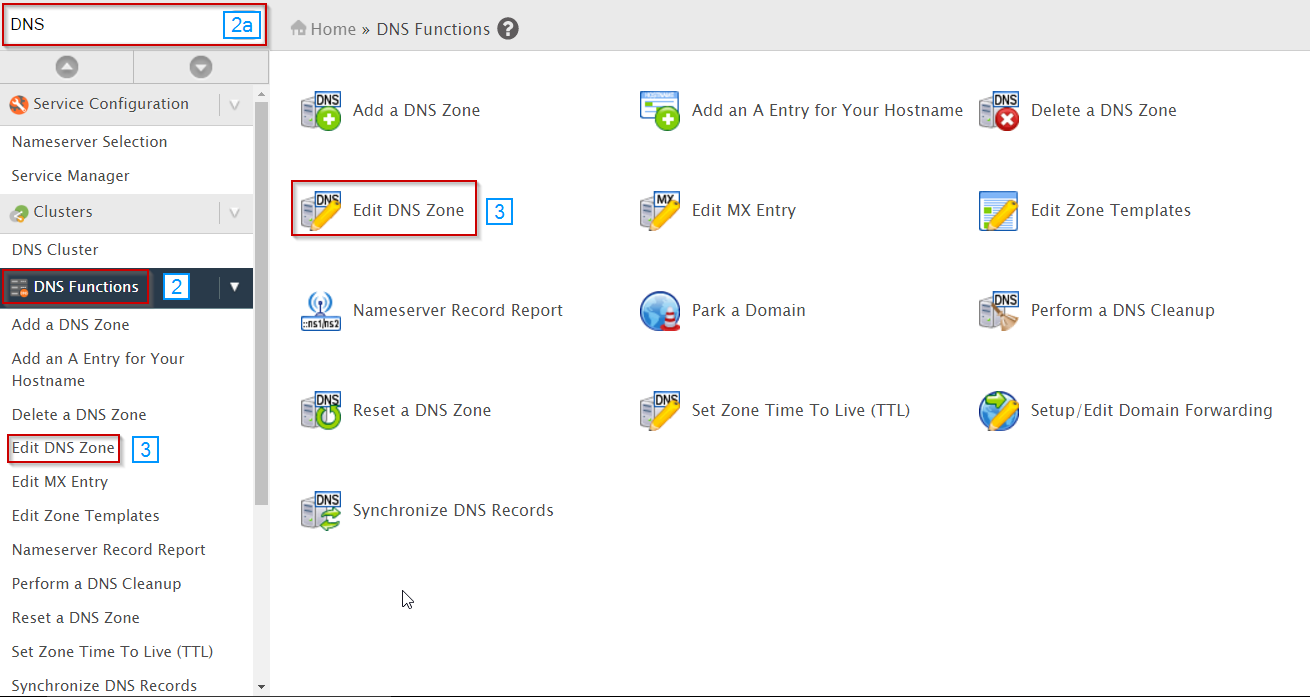
Step 2: Go to DNS Functions
You can locate this quickly by searching for DNS in the search bar
Step 3: Go to Edit DNS Zone once you search for DNS in the search box in the upper left corner.
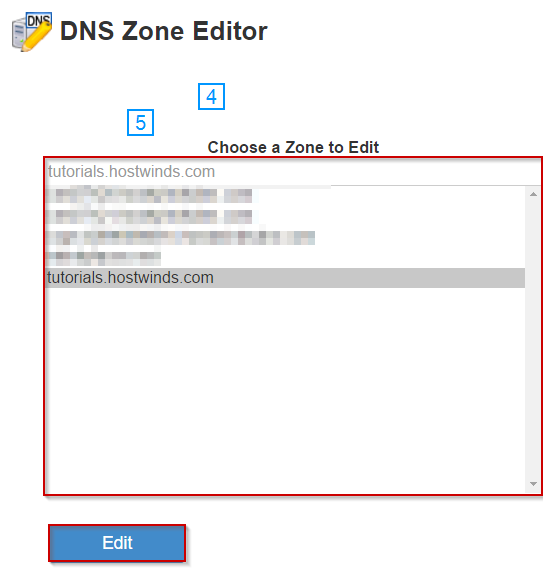
Step 4: Choose the right server/domain.
Step 5: Click the Edit button.
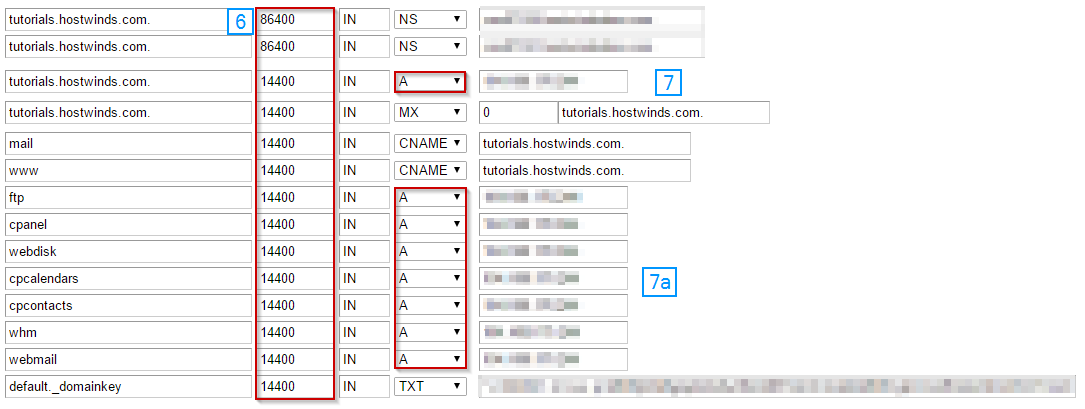
Step 6: Change the number in the second column (probably currently 86400 or 14400) to 300
The number in the second column you changed to 300 is the Time to Live amount (TTL). This amount controls how long the site's content is cached and when it will be rechecked. It's normally set to 24 hours or 4 hours. Changing it to 300 will change it to five minutes.
Once you make this change, you will want to wait to proceed with the following until the current TTL has passed before making any changes to minimize downtime. For example, if the TTL was set to 14400, you will want to wait at least 14400 seconds (four hours) before proceeding.
Step 7: Once the previously set TTL has expired and been changed, change the A Record IP to the new server IP
**7a: ** You can also change the other A records for services such as FTP
**Step 8: ** If you no longer would like to manage your DNS Zone through WHM, you can change your Nameservers with your domain registrar at this stage so that your DNS is handled elsewhere. Before changing your domain's Nameservers, it is important to confirm with your Authoritative Nameserver provider that your DNS Zone is configured properly and ready to be utilized.
Step 9: Repeat steps 1-7 for any additional domains that were transferred
DNS nameserver changes can take 24-48 hours to propagate across the internet fully. Do not close or cancel the old server until then. To be safe, wait 72 hours. For more information, please review What is DNS Propagation?
Written by Michael Brower / December 13, 2016