
Hostwinds Tutorials
Search results for:
Table of Contents
Update TLS to 1.2 Minimum
Due to recent changes made by most major Internet Browsers, they are moving support for TLS to no longer cover 1.0 or 1.1. This guide will show you how to update your WHM to allow for TLS version 1.2 or 1.3 so that your sites continue to show security.
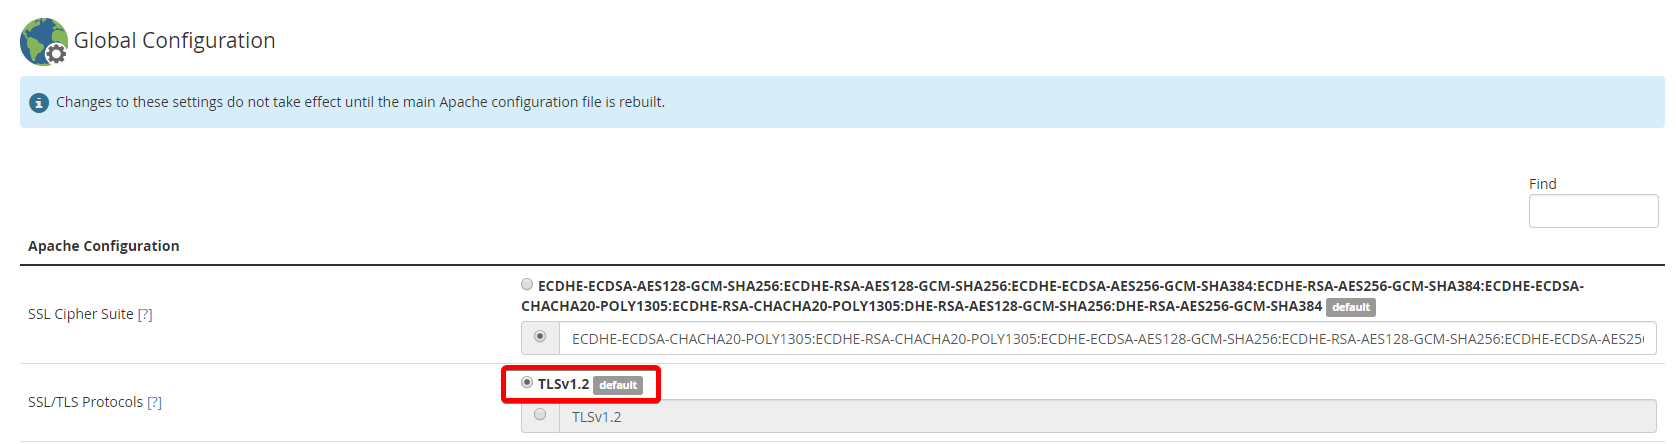
WHM – Update TLS Apache
To update TLS to 1.2 in a WHM installation with Apache. You would first log in to your WHM server and go to Service Configuration > Apache Configuration > Global Configuration. Next in the SSL/TLS Protocols, simply select the TLS 1.2 [default]
Update TLS for WHM Apache Global Configuration
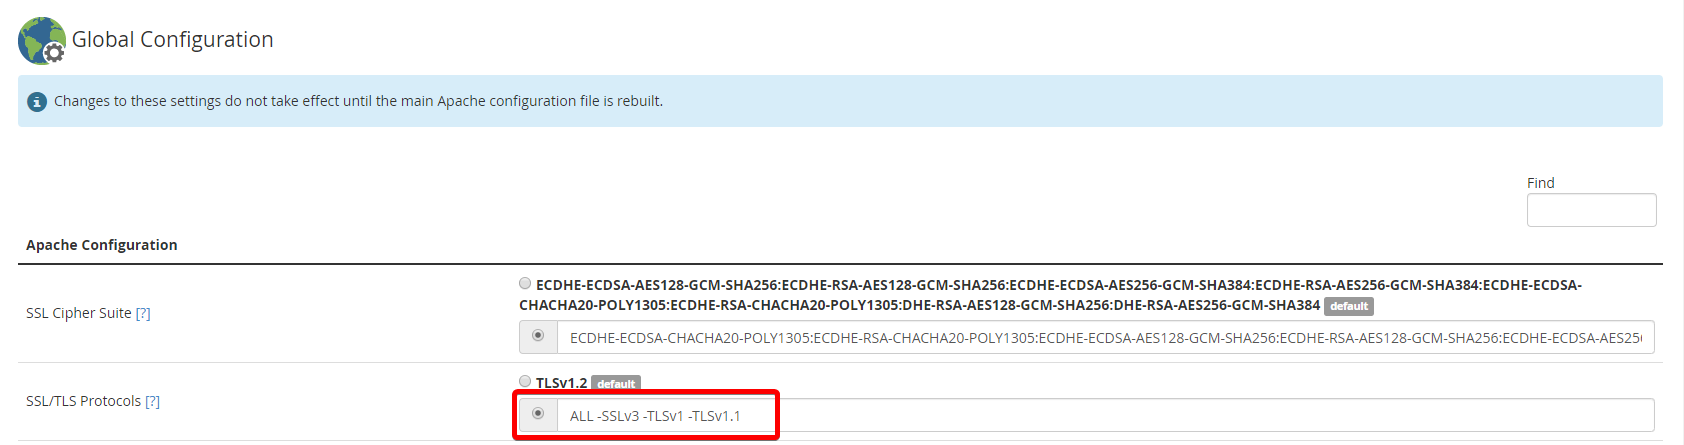
However, if you need to continue to support TLS 1.1, you would want to add the following line and select the other option in the menu above.
All -SSLv2 -SSLv3 -TLSv1
This will support all TLS other than the ones above, which are excluded. To finish these changes, scroll to the bottom, then Save, and restart your web server.
WHM – Exim Mailserver
You can also be sure that you have the correct TLS setup in the mail servers as well. It is, however, important to know that email tends to update very slowly, so not all servers are going to update their TLS right away. So it may be best to keep some of the older protocols active as if a message is sent with an older protocol, it may be rejected, either by you or to who you send it. Go to Service Configuration > Exim Configuration Manager > Security > Options for OpenSSL
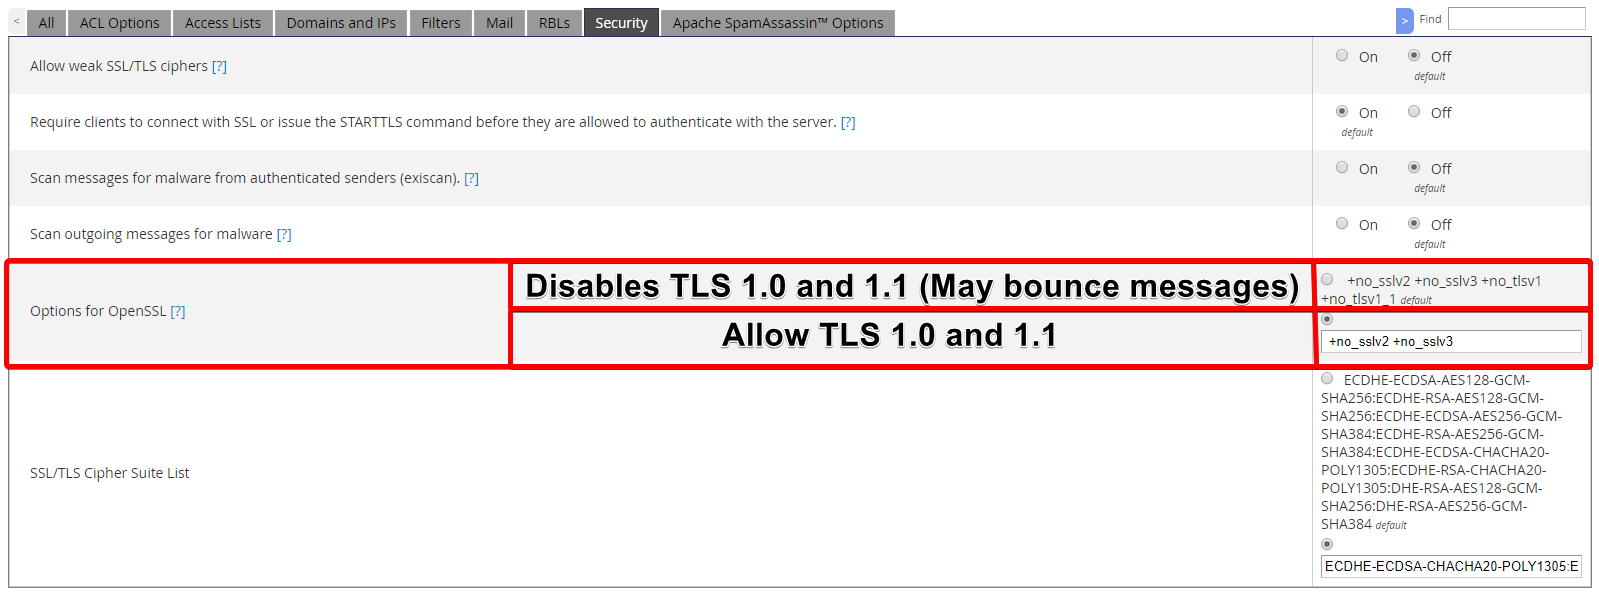
Update TLS Exim SSL config settings
I recommend keeping the server to accept TLS 1.0 and 1.1 as there will likely be others that continue to use these for some time.
WHM – Dovecot
You can also update the minimum TLS that must be active to pull mail from the server. To set this, go to Service Configuration > Mailserver Configuration >SSL Minimum Protocol.
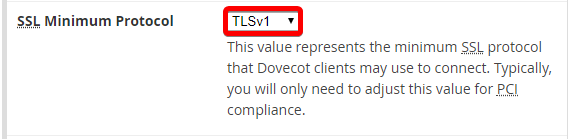
Update TLS Dovecot SSL Minimum Protocol
Then select the minimum you would like to allow. Do keep in mind that not everywhere will be updated right away, so setting this higher can cause connection issues. So if you change it and an issue occurs due to the TLS version, this may need to be set to a lower value. Or ensure that they are connecting to Dovecot with the proper TLS.
WHM – LiteSpeed
Lite Speed can update TLS to 1.3 through WHM, so if you are using the Lite Speed Webserver, you would select the bottom option and then enter the below code to the line.
Update TLS for LiteSpeed Server to 1.2 and 1.3
ALL -SSLv3 -TLSv1 -TLSv1.1
This will allow for all available TLS connections other than those excluded, which would include TLS 1.3. Next, scroll to the bottom of the page and save; Then restart the webserver.
Update TLS for Apache
If you do not have a panel or simply want to update your Apache server directly, you can also edit the SSL.conf file. Make a backup of your files before making any major changes. You would edit the SSLProtocol line:
SSLProtocol -all +TLSv1.2 +TLSv1.3
This updates your Apache server only to use TLSv1.2 and TLSv1.3. Save the changes, and restart your Apache Server.
Update TLS for Nginx
To update TLS for your Nginx web server, open the Nginx. conf file. Make a backup of your files before making any major changes. Next, we are going to edit the ssl_protocols line, so it looks like the one below:
ssl_protocols TLSv1.2 TLSv1.3
This disables TLS 1.0 and 1.1 but updates TLS to use 1.2 and 1.3. Then restart Nginx.
Written by Gregory Gilbert / March 23, 2020