
Hostwinds Tutorials
Search results for:
Table of Contents
Using the WHMCS Calendar
An easy way to glance at recent and upcoming events regarding your WHMCS is through the WHMCS Calendar feature. From this page, you will see upcoming events, To-do tasks, and information about newly ordered Products, Services, Addons, and Domains.
How to Access the WHMCS Calendar
Step One: Log into your WHMCS Administrator Dashboard
Step Two: From the top menu, navigate through to Utilities -> Calendar. Clicking through that will bring you to a new page where you will view the Calendar.

WHMCS Calendar Show/Hide Options
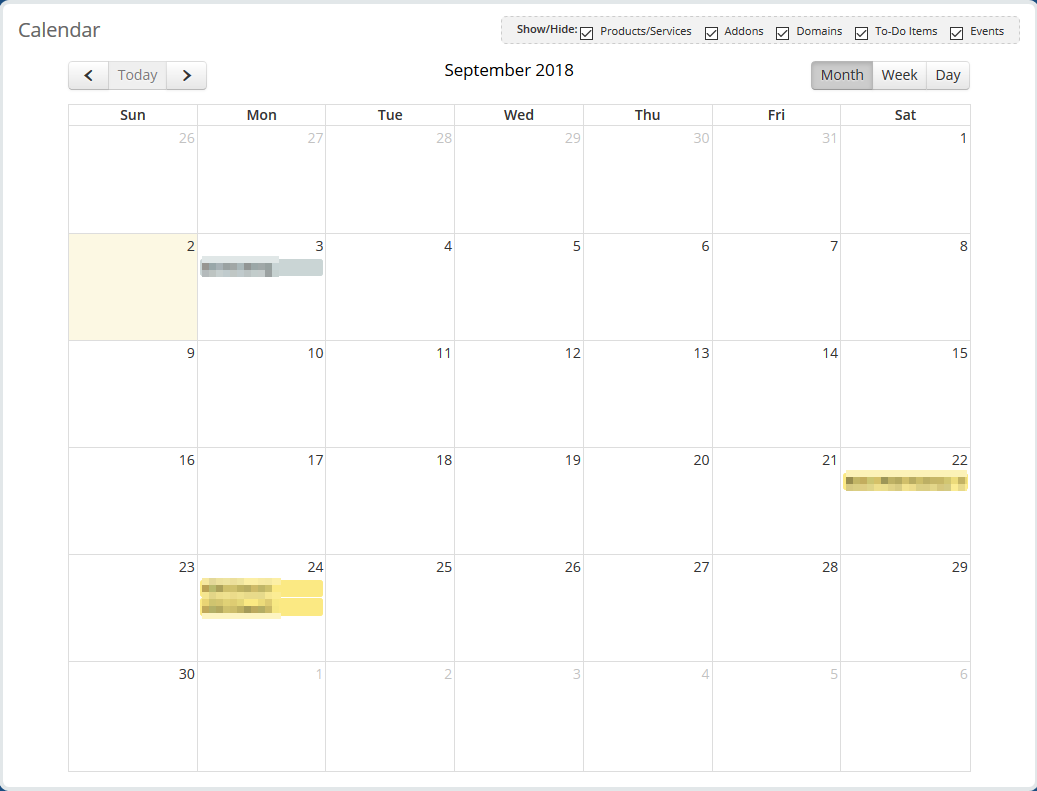
With the WHMCS Calendar, there are various things that you can see at a glance. By default, these will be hidden from your view to avoid a cluttered calendar from the start but can be enabled one at a time.

- Products/Services – This allows you to view recent and past products purchased as an event on the Calendar.
- Addons – This allows you to view recent and past add-ons purchased, displayed as an event on the Calendar.
- Domains – Enabling this will allow you to see recent and past domain registrations that have come through the WHMCS.
- To-Do Items – This allows you to view To-Do list items that have been created in the past or future.
- Events – This displays Events that have been created on the Calendar.
WHMCS Calendar Changing Time Frame
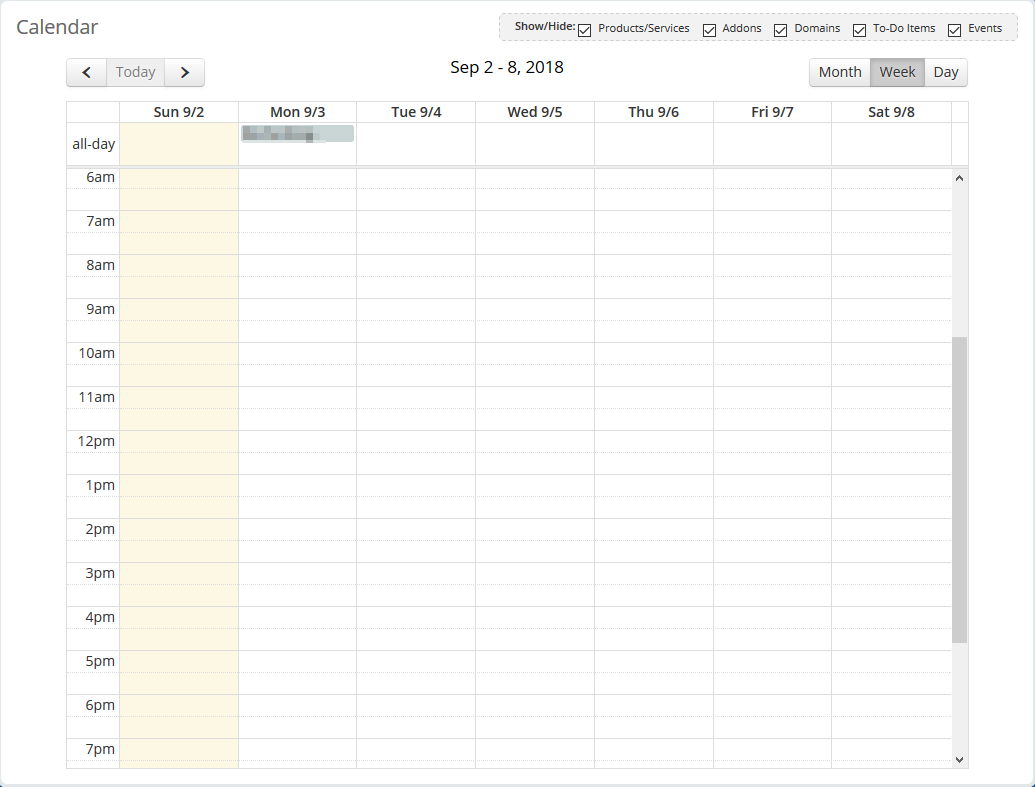
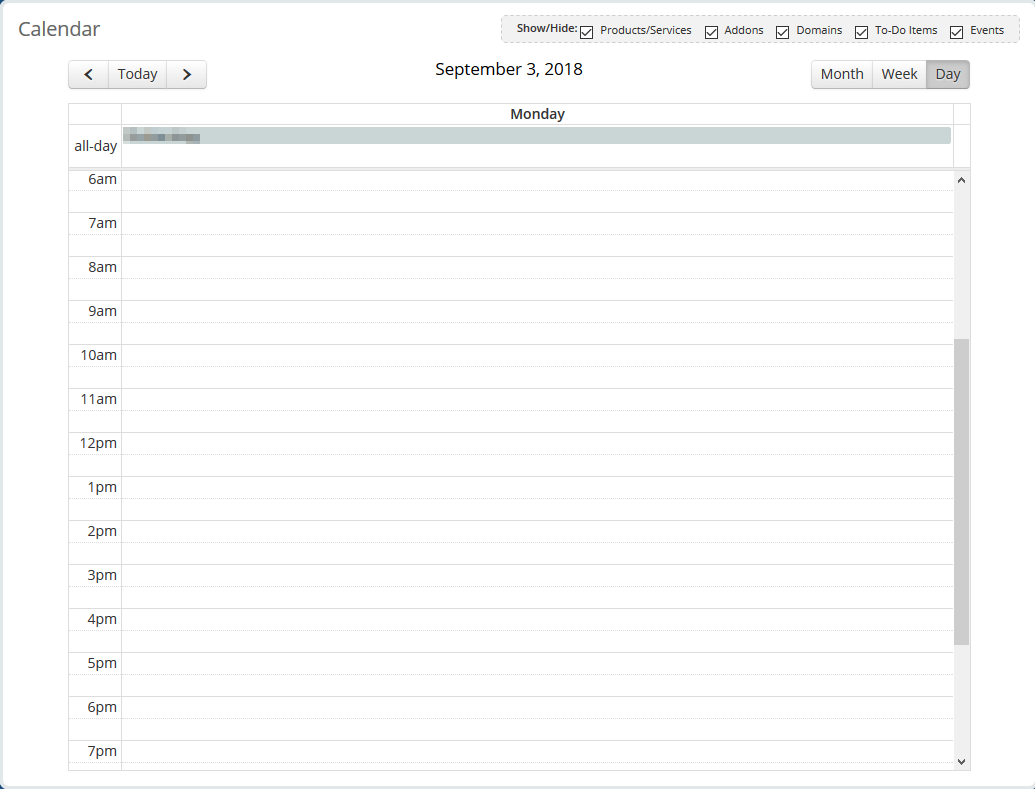
The time frame in which you are viewing the events can also easily be changed. You can change the View to be per month, per week, or daily (to view more time-specific events).

The arrows in the upper left of the page allow you to change the particular Month, week, or day you are currently viewing. This allows you to go into the future events or past events that have occurred.
Monthly Time Frame
Weekly Time Frame
Daily Time Frame
Adding an Event To the WHMCS Calendar
Step One: Navigate to the WHMCS Calendar main page when logged into your WHMCS Administrator Dashboard.
Step Two: From whichever time frame views you would like, left-click on the Calendar to be prompted with the Add a New Event dialog.
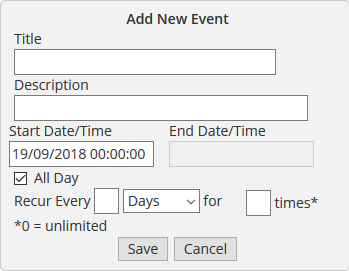
Step Three: Fill out the details for the event as to how you would like them. Then finish by clicking on the Save button at the bottom. This will add it to the calendar immediately.
- Title – This is the main title you will be giving the event.
- Description – Here, you can enter a brief description of the event, such as how your WHMCS staff should prepare, for example, or a link to more information.
- Start Date/Time – This is where you can specify the time and date that the event will start.
- End Date/Time – If this is not an all-day event, you can set it for when the event is scheduled to end.
- All Day – This check box allows you to set the event to be an all-day event. Selecting this will grey out the End Date/Time box.
- Recur Every – This is where you can set the event to recur every so often. The first input box is for the frequency of the recurring event. The next drop-down is for the time frame to repeat. (Days, Weeks, Months, Years). And the last input box allows you to set how many times it will reoccur. If left at 0, it will, by default, keep recurring until removed.
Editing / Deleting An Event In The WHMCS Calendar
Step One: Navigate to the WHMCS Calendar main page when logged into your WHMCS Administrator Dashboard.
Step Two: Click on the Event listed on the calendar, and a new small dialog box should appear around your cursor.
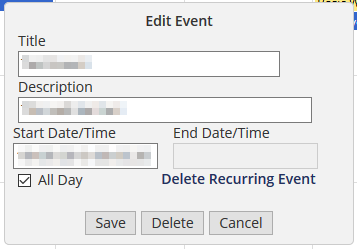
Editing The Event
You can modify the event's values such as Start Date/Time, Description, and Title from the dialog. You can also change the event to be All Day with the selection box as well. Once done making any necessary changes, click Save to save the changes to the event. If it is a recurring event, it will change on those as well.
Deleting The Event
There will be an option towards the bottom of the dialog window from the dialog that pops up. This option will be displayed as Delete. If it is a recurring event and you want to remove the other recurring events made from it, you can select the Delete Recurring Event button. Both deletion options will NOT ask for confirmation. It will immediately delete the event.
Written by Hostwinds Team / September 6, 2018