
Hostwinds Tutorials
Search results for:
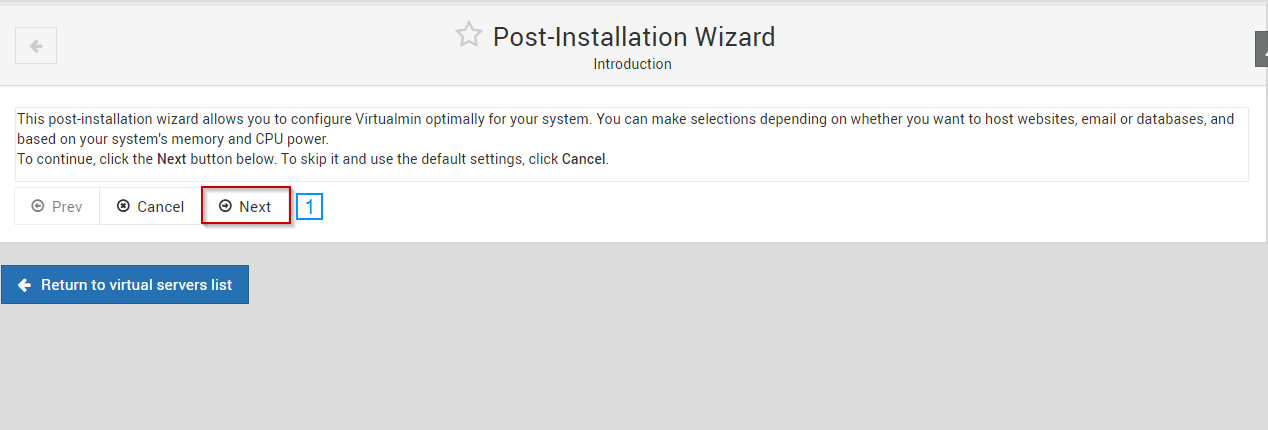
To continue with this guide, you will want to have installed Virtualmin on your Cloud/VPS or Dedicated Server. The installation may take up to 10 minutes to complete. Still, after it does, you can move on to the Post-Installation Wizard by logging into Virtualmin using http://ip.addresss.of.server:10000 as Virtualmin operates on port 10000 by default. You may get redirected if "Virtualmin is running in SSL mode" and a browser warning trying to go there because it is 'unsecure' — the server will be using a self-signed certificate until real domains are set up on it. You will want to be sure to add an exception for this URL to continue to this page.
You can choose to perform the post-installation steps later. However, it is strongly advised to proceed with them now using the following steps.
- Click the "Next" button.
- Select the appropriate setting for your system
- Click "Next"

- Select if you'd like to run clamd in the background
- Click "Next"

- Select if you'd like to run spamd in the background
- Click "Next"

Select if you'd like to run a MySQL server, PostgreSQL server, or both — note that this will not install PostgreSQL, use it if installed on the server.
Click "Next"

- Set a root password for the database server (MySQL/PostgreSQL)
- Select if you'd like to remove the test MySQL database
- Select if you'd like to remove the anonymous MySQL user
- Click "Next"

- Select the appropriate configuration for your system
- Click "Next"

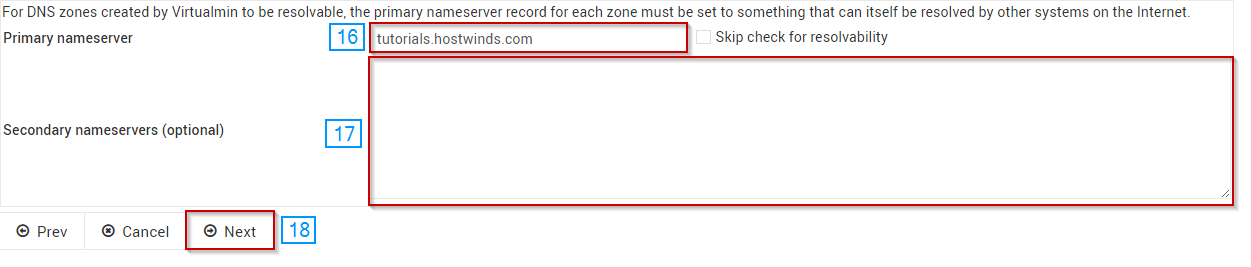
- Set the Primary nameserver
- Set the Secondary nameservers if needed
- Click "Next"
- Select to store plain-text or hashed password
- Click "Next"

- Select whether you want to use quotas — as noted, turning this option on will require a reboot of the server.
- Click "Next"

The Post-Installation Wizard should now be complete, and you should be able to start using your new control panel. The first thing you should do is create a new virtual server to begin hosting your site(s). We have written the following article to help you set up a virtual server in Virtualmin: Creating a New Virtual Server in Webmin/Virtualmin
Written by Hostwinds Team / December 26, 2018