
Hostwinds Tutorials
Search results for:
Table of Contents
How to Disable Automatic Updates and Restarts in Windows Server 2016
Tags: Windows
With Windows, Microsoft pushes updates to the operating system fairly frequently. These updates often include important aspects such as security updates, which it is highly recommended you install. However, by default, Windows updates will automatically download and install and force your server to reboot even if you didn't want it to.
To avoid this, it is recommended to change how Windows handles updates, to either reserve them to automatic downloads but manual installs or completely manual downloads and installs. When Windows updates are set to either of these two options, the server will not reboot automatically until you manually install updates.
You can change to either of these methods within Windows Server 2016 by using the config command in a command prompt or Powershell window.
How to Disable Automatic Updates
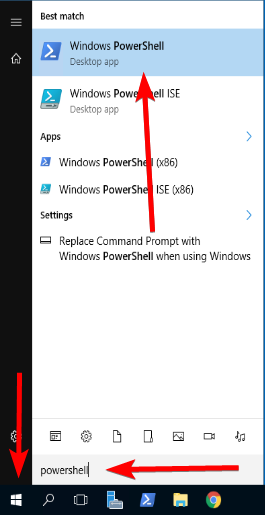
First: Open a command prompt or Powershell window as the Administrator. You can open the start menu and search for either "cmd" or "powershell" to show the two options in the search results.
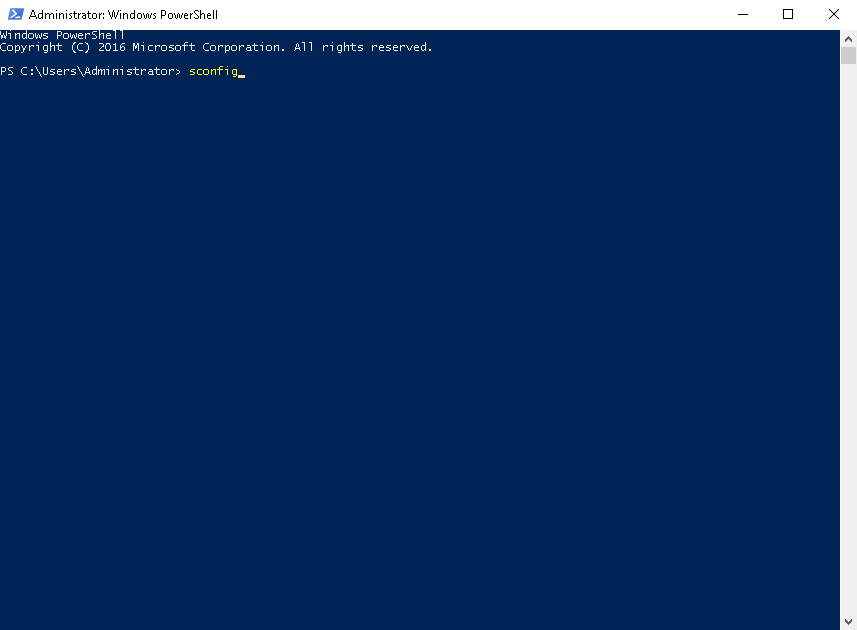
Second: Run the sconfig command.
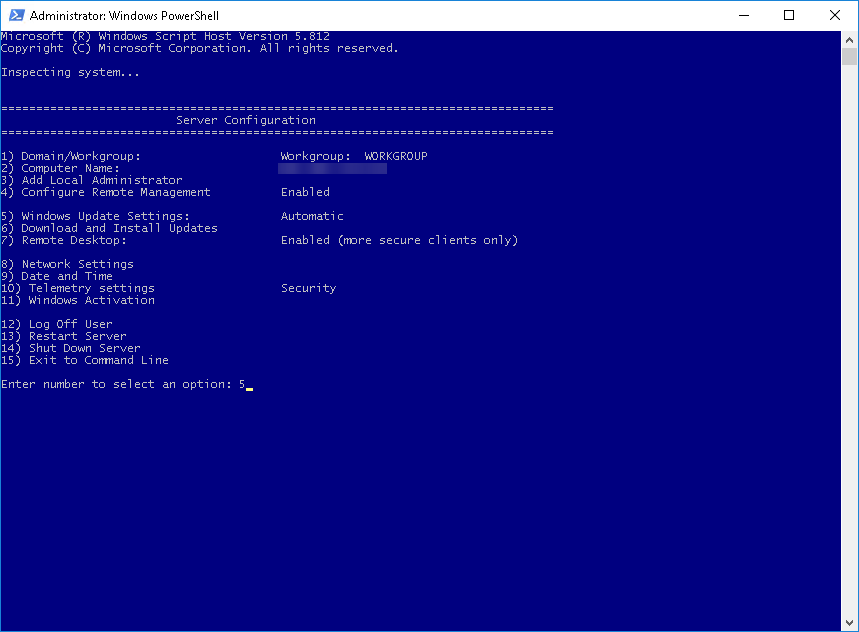
Third: Enter "5" to edit the Windows Update Settings.
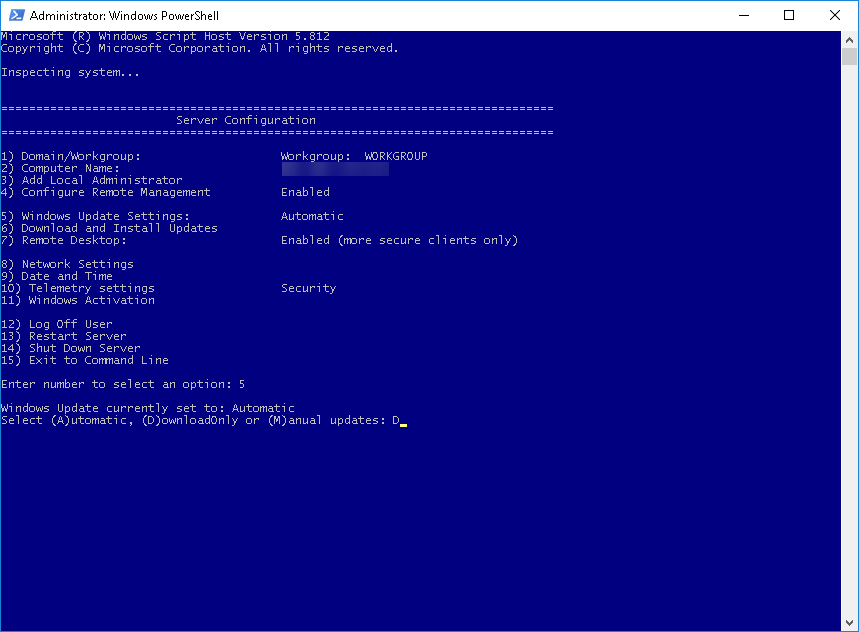
Sixth: Enter either "D" for download-only mode or "M" for manual mode. Click OK on the dialog box that pops up to confirm the change.
- Download Only: Automatically downloads updates but does not install them until manually installed.
- Manual: Does not download or install updates automatically, only manually.
Seventh: Exit the sconfig menu by entering "15".
Eighth: Close the command prompt or Powershell window.
Written by Hostwinds Team / January 16, 2019