
Hostwinds Tutorials
Search results for:
Table of Contents
How to Enable Automatic Updates Using Softaculous
Tags: Softaculous
Softaculous can help you keep most applications up to date with the latest versions. Keeping software up to date is considered best practice and critical for a web-based application, such as WordPress. The following guide will show you how to enable automatic updates/upgrades for most installed applications using Softaculous.
By default, Softaculous should automatically update itself every 24 hours.
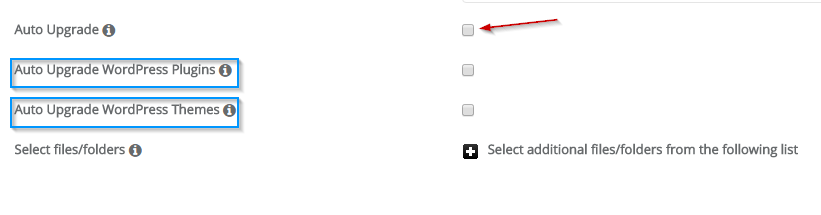
Enabling Automatic Upgrades
To enable this feature for any application that supports it, follow the steps listed below.
These steps assume that you're already logged in to cPanel.
This example shows specifically how to enable this feature for WordPress.
First: Navigate to Home > Software > Softaculous Apps Installer
Second: Click on the All Installations icon.
Third: Click on the Edit Details icon, which should look like a pencil
Fourth: Scroll down and select the checkbox next to Auto Upgrade
Fifth: Scroll to the bottom of the page and click Save Installation Details

That's all there is to it, and we highly suggest having your applications auto-upgrade when possible to keep your site and applications up to date.
Written by Michael Brower / December 12, 2016