
Hostwinds Tutorials
Search results for:
Table of Contents
Install WireGuard VPN - Ubuntu Linux
What Is WireGuard?
WireGuard is a VPN service that can run on any Linux installation. It has a client for many popular operating systems like Windows, IOS, Android, and many others. WireGuard boasts of being more secure than OpenVPN while having over a million fewer lines of code, meaning that the installation is smaller and faster as well. As private VPN solutions go, this one is promising to be an easy setup and usage.
Objective:
This guide's objective is to install Wireguard on Ubuntu 16.04, 18.04, or 20.04 and configure a Windows desktop PC to connect to the VPN server. This will be the most common use of WireGuard for many users. The only steps for other operating systems that differ from this guide are the initial install which can be done in 3 lines or less and can be found at https://Wireguard.com/install.
Other uses for this software could be networking servers together into a private local network that is ideal for servers that run a remote database that should not accept requests from servers other than those they are meant to serve content to.
Installation:
It is best practice not to use the root user for anything, but instead, use a sudo user that can run things as root when needed. In this guide, we will be prefixing commands with "sudo."
On Ubuntu 16.04 and 18.04, the command to install WireGuard is simple. However, the repository for the install is not included by default. Here are the 3 commands to run to add the repository and install the software.
sudo add-apt-repository PPA:wireguard/wireguard
sudo apt-get update
sudo apt-get install wireguard
On later releases of Ubuntu, the repository for WireGuard is included by default. you can install using the command:
sudo apt-get install wireguard
Now that Wireguard is installed, it's time to start configuring it as a VPN server.
Server Configuration:
First, we have to generate a public and private encryption key pair.
sudo -i
cd /etc/wireguard/
umask 077; wg genkey | tee private key | wg pubkey > public key
Now we can view them using the cat command. You will want to save the private key in a notepad or something for later use.
ls -l private key public key
cat private key
Now we will work on adding the VPN network adapter to allow other machines to connect through it securely. Using your favorite text editor, we will make some configuration changes to /etc/wireguard/wg0.conf, and for this guide, we will use nano.
sudo nano /etc/wireguard/wg0.conf
We will need to add the following to the end of the file. Please note that this is only a template, and you will need to change the values as they relate to your server.
[Interface]
Address = **YOURSERVERIPHERE**
SaveConfig = true
PostUp = iptables -A FORWARD -i %i -j ACCEPT; iptables -A FORWARD -o %i -j ACCEPT; iptables -t nat -A POSTROUTING -o **ens3** -j MASQUERADE
PostDown = iptables -D FORWARD -i %i -j ACCEPT; iptables -D FORWARD -o %i -j ACCEPT; iptables -t nat -D POSTROUTING -o **ens3** -j MASQUERADE
ListenPort = **41194**
PrivateKey = **YOURPRIVATEKEYDETAILSHERE**
[Peer]
PublicKey = **YOURSERVERIPHERE**
AllowedIPs = **192.168.9.2/32**
use ctrl + x to save hit y for yes, and enter to keep the same file name.`
Before we move on, I want to explain a few different things here. First is the IP address. This address needs to be an internal or private IP of your choosing. 192.168.xxx.xxx or 10.xxx.xxx.xxx are common. Here I set it to YOURSERVERIPHERE because all other machines will talk to this one to connect to the VPN. Next is the Private key in the [Interface] section. This is the key that we generated earlier.
The next thing we want to talk about is PostUp and PostDown. These are called when the VPN starts and stops and allows you to forward the traffic through WireGaurd. You will need to replace ens3 with the name of your public IP address's network adapter. If you wanted to have an "Internal Lan" type environment or point to point, you would leave these out. The application for a point-to-point environment is, for example, connecting a remote database server. The ListenPort can be whatever port you want, as long as it does not have something running on it already.
Moving down to the [Peer] section, we have a few things that are a bit different than software like OpenVPN. We have a Public Key and another internal IP address. This template is the finished product of a working configuration, and you will be replacing that PublicKey value with your own. Wireguard does not allow just anyone to connect to it. It would be best to generate a new public / private key pair and manually assign each user to the server in a new [Peer] block with a public key and the internal IP address you are assigning that connection.
We are on the home stretch now. We need to allow traffic through the firewall, assuming your using UFW:
sudo ufw allow 41194/UDP
Now we need to enable IPv4 forwarding. We do this by entering the following command:
sysctl -w net.ipv4.ip_forward=1
Last but certainly not least, we start everything up.
wg-quick up wg0
Let's verify everything is in good working order
sudo wg show
Now your Wireguard server is up and running. It is a good idea to reboot the server at this point, do not worry about turning Wireguard back on. It will come back automatically. It's time to use that public key we generated and get our windows PC connected to the VPN.
A download for the official client can be found here, and we will be using it for this guide. Once installed, you should see a client like this.
Setting up the Client:
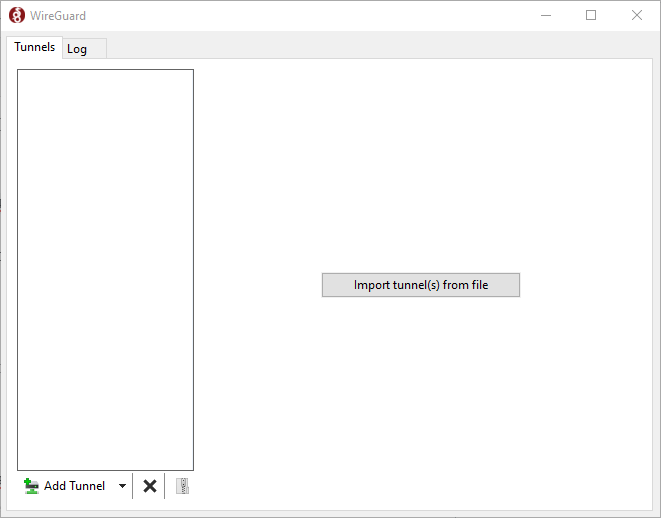
Clicking the arrow next to the "Add Tunnel" will allow us to add an empty tunnel. Your Empty tunnel will come pre-loaded with a public / private key pair, which we will use.
First, let's use the information we have to configure a Windows VPN client.
[Interface]
PrivateKey = **YOURPRIVATEKEY**
Address = **YOURSERVERIP**
DNS = 8.8.8.8
[Peer]
PublicKey = **YOURPUBLICKEY**
AllowedIPs = 0.0.0.0/0, ::/0
Endpoint = 255.255.255.255:**LISTENPORT**
Again in the [Interfaces] block, we are manually assigning the private IP we will be using in our private network, storing our private key. We are also going to assign an address to use for DNS resolution. In this example, we are using Google's Public DNS servers.
In the [Peer] Block, we are providing our server's information. First, provide the server's public key. In the allowed IP fields, we want to allow all traffic to connect because we use the server to connect to web addresses. Above, we allowed both IPv4 and IPv6 traffic from all addresses. The last setting is the endpoint, and it tells your client where to find the VPN server. This address and port are the ones on your server.
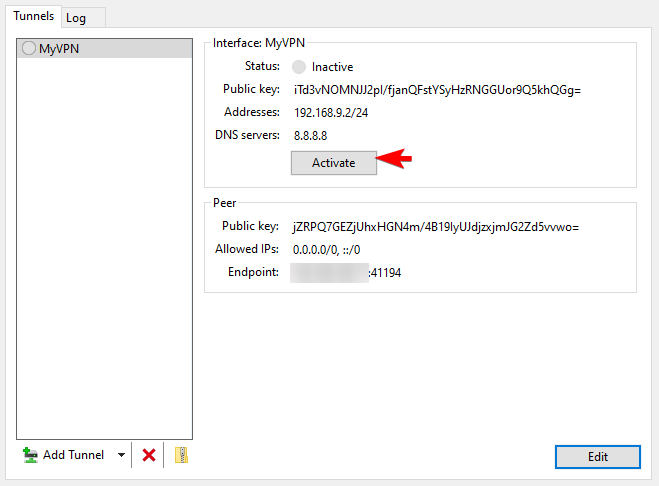
It is time to wrap this up by adding that public key we mentioned before in the [Peer] block for YOURSERVERIP. For reference, that was /etc/wireguard/wg0.conf.
We are now ready to Activate the VPN and enjoy our secure Virtual Private Network.
Written by Hostwinds Team / May 14, 2020