
Hostwinds Tutorials
Search results for:
Table of Contents
Install wordpress on Ubuntu 16.04
Tags: WordPress, Linux, Ubuntu
WordPress is one of our most popular Website builders. It allows you to build sites with a MySQL backend and PHP processing. We're going to focus on getting this installed on Ubuntu 16.04 using the terminal. Before we begin, there are a few other things that need to be taken care of.
Prerequisites:
- Create a sudo user
- Install a LAMP
- Secure your site with SSL
Alright, now that you got the pre-workout of the way, you should be a bit more familiar with the terminal interface. There are still a few more steps before we actually start installing WordPress, but let's take care of those now.
Step 1: Create a MySQL database and User for WordPress.
First, we're going to log in to MySQL as the root user. Run this command to log in as the root MySQL user:
mysql -u root -p
This will prompt you for the password created during the MySQL setup.
Next, we're going to create a database named WordPress. You can call it whatever you want, but I'll be using WordPress to keep it simple.
CREATE DATABASE WordPress DEFAULT CHARACTER SET urf8 COLLATE utf8_unicode_ci;
All MySQL commands MUST end in a ;
Next, we will create a user named WordPress user (feel free to change this if you want). We will create the account, set the password, and grant access to the WordPress database we created using this command.
GRANT ALL ON WordPress.* TO 'wordpressuser'@'localhost' IDENTIFIED BY 'password';
Lastly, we need to flush the privileges so that MySQL knows about the new information.
FLUSH PRIVILEGES;
then type the exit command.
EXIT;
Step 2: Install Common PHP Extensions
First, we're going to make sure our software is up to date and grab some of the more popular WordPress PHP extensions with the following commands:
sudo apt-get update
sudo apt-get install PHP-curl PHP-gd PHP-mbstring PHP-mcrypt PHP-XML PHP-XML-RPC x
WordPress plugins have a variety of requirements. You need to check your plugin documentation to determine those. You can use the apt-get command above to get these.
Now we need to restart apache.
sudo systemctl restart apache2
Step 3: Configure Apache to allow for .htaccess Overrides and Rewrites.
Before installing WordPress, we need to make some adjustments to apache's configuration. By default, the use of .htaccess files is disabled. WordPress uses these for in-directory changes to the server's behavior. We're also going to be enabling mod_rewrite, which is needed for permalinks to work correctly.
First, we need to open Apache's primary config file with the following command:
sudo nano /etc/apache2/apache2.conf
We're going to add some code to the bottom of this file to allow .htaccess files in the document root directory.
<Directory /var/www/html/>
     AllowOverride All
Save and close the file.
Finally, restart apache using the same code as before.
Step 4: Downloading WordPress
Now that we've changed the server configuration as needed, we can actually install WordPress. You're in the home stretch!
Change to a writable directory. We suggest making a directory named tmp in the root folder. In the examples below, replace that with whatever directory you use instead.
cd /
mkdir tmp
cd tmp
Then download the WordPress zip file. For security reasons, it's always advisable to download WordPress from the official site.
curl -O https://wordpress.org/latest.tar.gz
Extract the file to our writeable directory:
tar xzvf latest.tar.gz
We're going to be moving these to the WordPress directory in a few steps, but for now, let's create a .htaccess file and set its permissions using the following commands:
touch /tmp/wordpress/.htaccess
chmod 660 /tmp/wordpress/.htaccess
We're also going to use WordPress's default configuration by running the following command:
cp /tmp/wordpress/wp-config-sample.php /tmp/wordpress/wp-config.php
Let's also go ahead and create a directory for our WordPress upgrades, to avoid permissions issues later on
mkdir /tmp/WordPress/wp-content/upgrade
Now that we've got all our permissions and directories set, we're going to copy everything over to our WordPress primary directory:
sudo cp -a /tmp/WordPress/. /var/www/HTML
Step 5: Configuring the WordPress Directory.
Before moving to the wp-admin page, we need to make some final adjustments to our Primary WordPress Directory.
We'll start with ownership of all the files in the WordPress directory to our sudo user. I'll be using HWUSER, but you should use the sudo account you set up during the Pre-requisite setup.
sudo chown -R HWUSER:www-data /var/www/html
Next, we're going to set it so that new files in this directory will inherit permissions.
sudo find /var/www/html -type d -exec chmod g+s {} ;
Let's then give group writes access to the wp-content directory. This will allow the web app to make theme and plugin adjustments
sudo chmod g+w /var/www/HTML/wp-content
Lets make sure we have all the permissions for plugins and themes by also running
sudo chmod -R g+w /var/www/html/wp-content/themes; sudo chmod -R g+w /var/www/html/wp-content/plugins
Step 6: Setting up the configuration file
WordPress uses secure keys to authenticate each install and provides a key generator to ensure key complexity. Let's use that generator now by running the following command:
curl -s https://api.wordpress.org/secret-key/1.1/salt/

You'll get back a list of secure values that look similar to this. Be sure to have them accessible for the next step.
Make sure to generate your own. You want these to be private
Now open the WordPress config file:
nano /var/www/html/wp-config.php
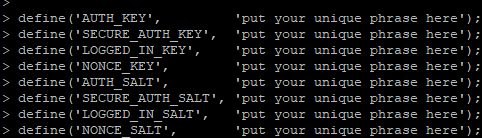
Find the section that contains the dummy values. It'll look something like this:
You'll want to plug in those values generated earlier into this file, replacing the dummy ones.
Next, we'll need to tell WordPress to use the username and password we set up in MySQL.
Inside the same file you put those secure values in, you'll want to add these lines. If you used a user other than WordPress user in that step, you'd replace those values here:
define('DB_NAME', 'WordPress);
/** MySQL database username */
define('DB_USER', 'wordpressuser');
/** MySQL database password */
define('DB_PASSWORD', 'password');
define('FS_METHOD', 'direct');
Finally, save and close.
WordPress is now installed on your server! Navigate to http://YOUR_SERVER_IP and follow the onscreen prompts.
Written by Hostwinds Team / May 15, 2018