
Hostwinds Tutorials
Search results for:
Table of Contents
How to Enable Two-Factor Authentication in Wordpress
Tags: WordPress
With any portal where you can log in from anywhere, it is advisable to enable Two Factor Authentication to increase security for the account. This way, even if someone could guess your password correctly, they will still need to obtain your 2 Factor Authentication method to log in. This guide will assist in enabling this option within WordPress.
Installing and Activating WordFence Security
Since WordPress does not have a built-in 2 Factor Authentication feature, we will be relying on the WordFence Security plugin available for Free with WordPress.
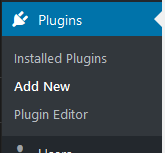
Step One: While logged into your WordPress dashboard, navigate from the left menu to Plugins -> Add New.
Step Two: In the Search box for Plugins, enter in '_wordfence_' and press enter.

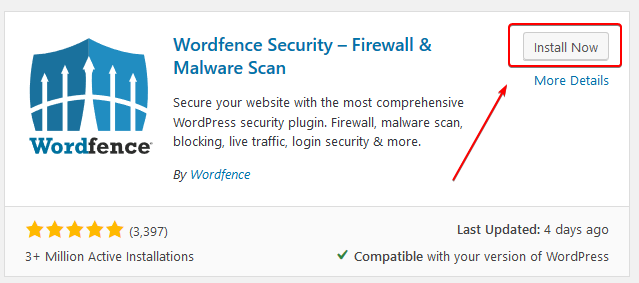
Step Three: From the list of found Plugins, click Install Now next to the Wordfence Security – Firewall & Malware Scan plugin. It may take a couple of moments to download and install on the WordPress installation.
Step Four: After Wordfence Security has been downloaded and Installed, to make the plugin active, click the Blue Activate button next to the plugin. This should take no more time than it did to install the plugin.

Enabling Two Factor Authentication
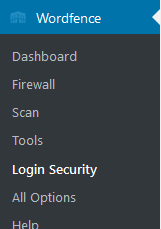
Step One: While logged into your WordPress dashboard, after you have installed and activated the Wordfence Security plugin, navigate in the left menu to Wordfence -> Login Security.
Step Two: From the tabs at the top, make sure you have Two-Factor Authentication selected.

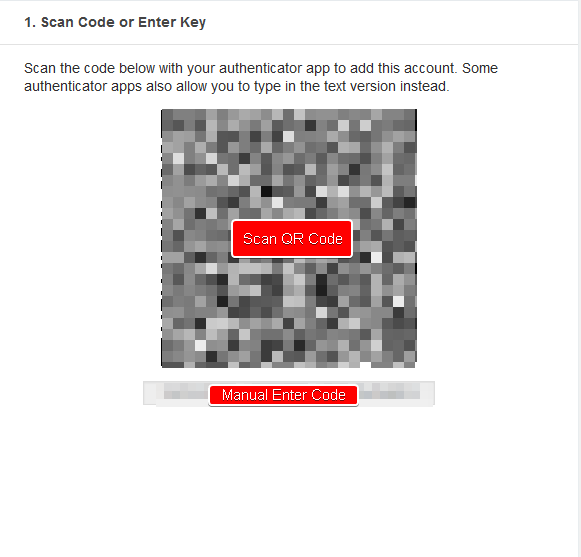
Step Three: Now, you will see the option to scan a QR code or enter a key. With your Two Factor Authentication app, you can choose your desired method of entry (both will yield the same values and can be used)
Some Apps that can be used for 2 Factor Authentication include OTP Authenticator, FreeOTP+, and OTP Auth.
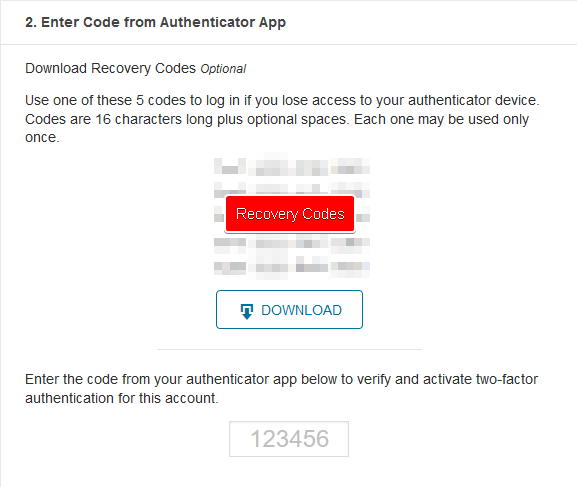
Step Four: You will see a list of Recovery Codes. It is recommended to write these down, or copy them to a safe place, as these will allow you to access your account if you lose access to your 2 Factor Authentication device.
After adding the account to the Authenticator app, you will now be presented with Time Based codes. Enter the code you see in the input box under the second step.
Step Five: After inputting the Code, you can now click the Activate button listed on the same page to enable Two Factor Authentication.

Once you have Two Factor Authentication Enabled, the change will be immediate. Next time you attempt to log in, you will be prompted for a 2FA Code. Using an incorrect code will not allow access to the WordPress account.

Written by Hostwinds Team / June 17, 2019