
Hosting Tutorials
Search results for:
Table of Contents
How To Check and Unblock an IP from WHM
To improve security with cPanel / WHM, it is common to have a firewall installed. The most common being ConfigServer Security & Firewall. Otherwise known as csf. While this firewall is intended to prevent malicious users from gaining unauthorized access to the server, sometimes it might kick you out as well, as it may think you are an attacker. Usually, this will happen if there are too many incorrect login attempts for cPanel, or even when trying to access email through webmail, from your mobile device, or another email client. If this happens, you can unblock the IP address (and, if desired, permanently allow access from your IP address).
How To Access ConfigServer Security & Firewall (CSF)
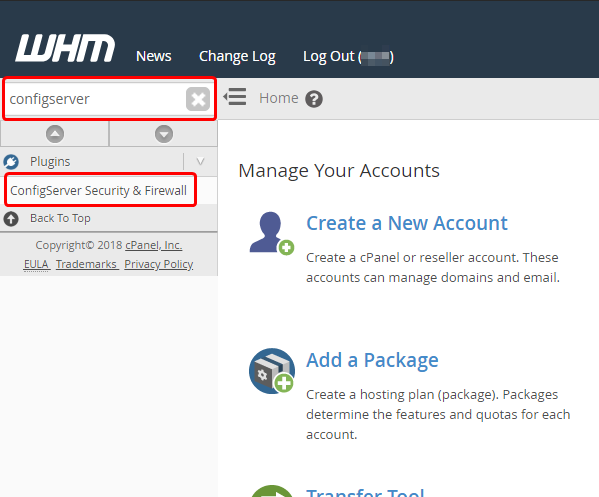
If you have ConfigServer Firewall installed in your WHM as a plugin, this will be easily accessed from WHM.
Step One: Login to your WHM Dashboard for your server
Step Two: In the upper left, there will be a text box that can be used to search for Menu Items. To quickly find CSF, type '_configserver_'
How Do I Check If My IP is Blocked?
Once you have navigated through to ConfigServer Security & Firewall, you will be able to check if the IP has been blocked. (This can also be used to check if there are any Temporary or Permanent Allows in the Firewall for the IP address as well)
Step One: From the Firewall management page, you will want to scroll down to Search for IP; it should look similar to the following:
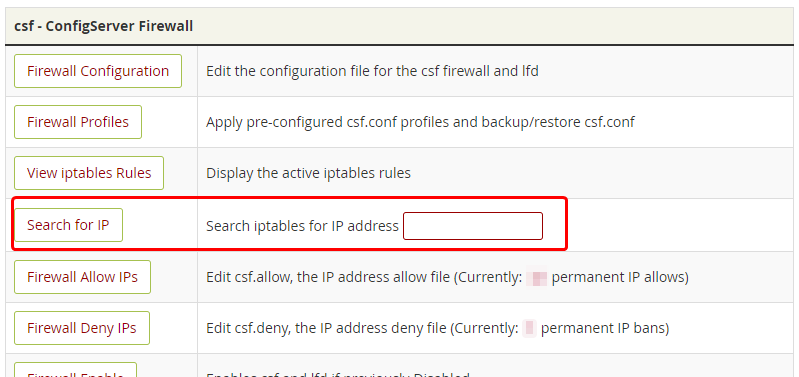
Step Two: In the empty text input, paste your IP address of the computer that has been blocked.
To find the public IP address of your local computer, you can search '_ip_' on Google and show you your IP address. Alternatively, https://whatsmyip.com/ may work as well.
Step Three: Once you have entered your IP address, click on Search for IP. This will take you to a new page with the report of the scan.
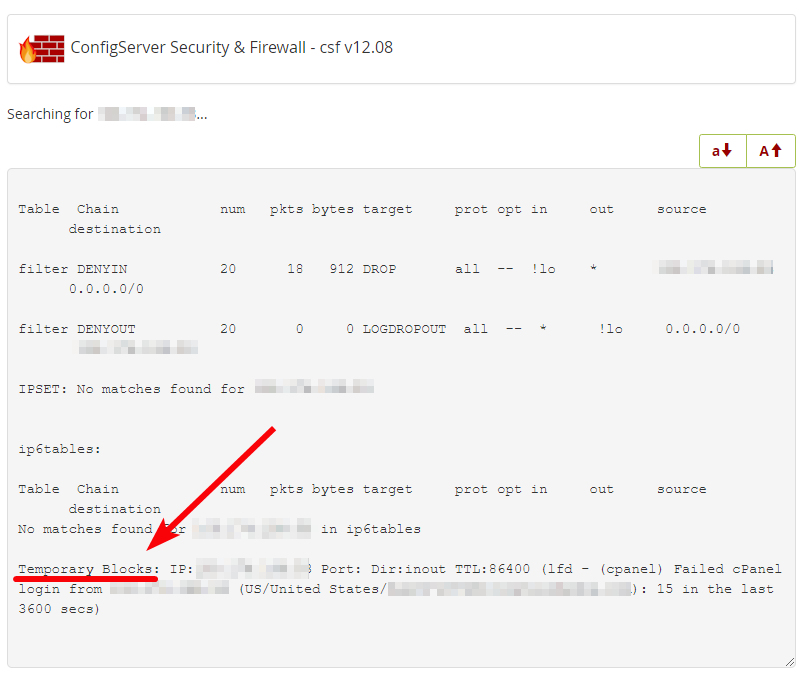
This report will show you any Permanent or Temporary Allows or Blocks on the IP address. In the case of the image above, the IP address had been Temporarily Blocked as it had failed 15 cPanel Login attempts in the past hour.
How To Unblock An IP Address
Using ConfigServer Security & Firewall in WHM
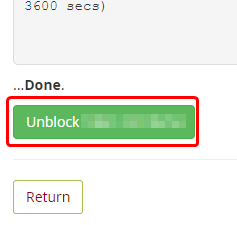
Using the above method can be used to check if the IP address is blocked in the firewall. If it does show up on the Firewall, there will be a button towards the bottom of the Report to Unblock the IP address. Clicking on this will Unblock the IP address:
Using Command-Line via VNC
If you are on the same computer that has been blocked from accessing the server in the Firewall, you will not be able to proceed with the steps listed above, as you are blocked from the server. Though you should still be able to access the Server through VNC (if on a VPS, this is done from the Cloud Control, if on a Dedicated Server, this would be in the Console, which can be accessed from the Client Area)
Cloud VPS
Step One: From your Hostwinds Client Area, navigate to the Cloud Control -> Cloud Portal menu option
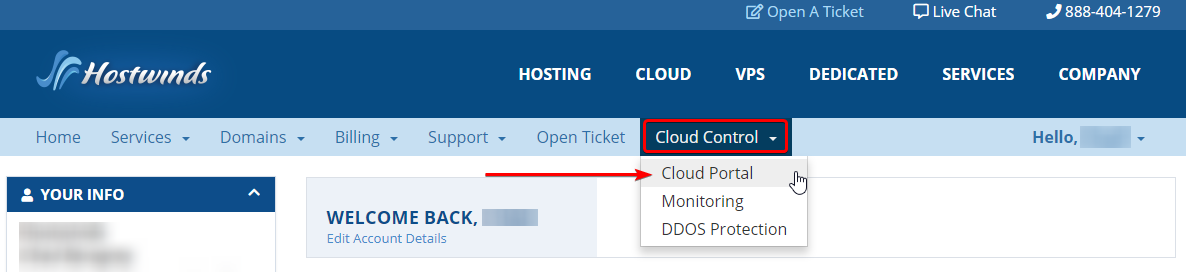
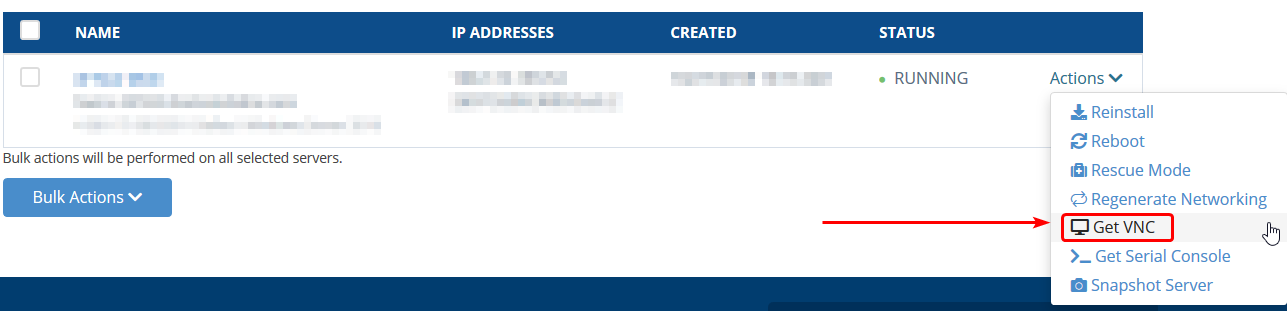
Step Two: From the cloud portal, click the Actions button to the right of the VPS that has the Firewall, then from the Dropdown, select Get VNC. Once you have the VNC Window Open, you can proceed with steps Three and Four.
If you do not see the VNC Pop Up Window make sure that you have Pop-ups enabled for the site.
Dedicated Server
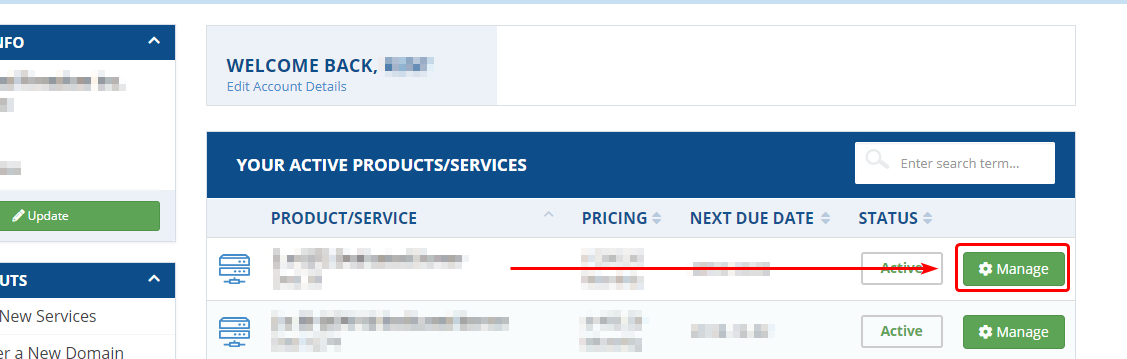
Step One: From your Hostwinds Client area, click on the Green Manage button to the right of the dedicated server that you have been blocked from
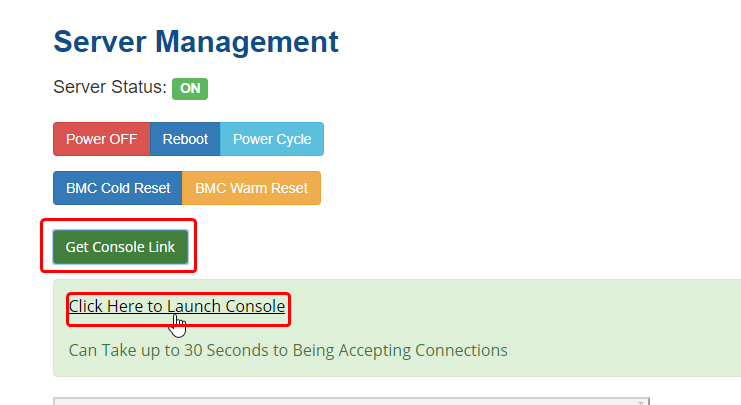
Step Two: On the next page, you should see a button lower down, under Server Management, to get the VNC / Console Link. This will be Get Console Link. After clicking on that, it may take a few seconds, but there will be a link to access the VNC. Once you are there, you can proceed with the next steps.
Step Three: From VNC, you will type the login credentials for the server. By default, the username will be root. When typing the password, it will look like nothing is being typed. However, this is for security. The characters being typed are still going through. (If you feel you messed up on the password, there is no such thing as too many backspaces)
Step Four: Once you have logged in successfully into the Command Line, you will want to type the following command to unblock your IP address:
csf -dr
Replace with your local IP address.
After entering that command, if your IP address was blocked before, it should no longer be blocked. (For preventing the IP from getting blocked in the future, refer to the steps below). For the change to go into effect, however, there is another command that must be run:
csf -r
This will restart the firewall, so the change goes into effect.
How To Prevent An IP Address From Getting Blocked?
Once you have unblocked the IP address, you may want to add an Allow in the Firewall to get blocked again. For example, if you unblock an IP with too many incorrect login attempts, and the IP does another failed login, it risks getting blocked in the firewall again. An easy way to prevent this from happening is either adding a Temporary or Permanent allows for the IP address. (A Permanent allow is recommended for Home IP addresses that you will always trust. Otherwise, a Temporary allow will do)
Adding a Temporary Allow
Step One: Using the Steps above, navigate through to the ConfigServer Security & Firewall page.
Step Two: Scroll down on the page until you can find the Temporary Allow / Deny option.

Step Three: Select Allow from the first Dropdown box. Enter in the IP address that had been previously blocked, or one you would not want to get blocked. Then in the 4th box (the 3rd can be left as Default unless only certain ports should be allowed/denied), enter the amount of time you would like the Temporary Allow to be in. You can select whether this is in Seconds, Minutes, Hours, or even Days to have the Temporary Allow in place from the next drop-down box. Typically 2 – 12 hours should suffice for Temporary Allows. You can also add a C**comment** for this Temporary Allow as well (This will show up when searching for the IP to give a brief reason why this Temporary Allow / Deny was added).
Step Four: Once you have filled out the fields to your liking, click on Temporary Allow/Deny. This will add it and make the new rule effective immediately.
If the IP address is currently blocked in the Firewall, the Allow will not effect until the IP has been unblocked.
Adding a Permanent Allow
Step One: Using the Steps above, navigate through to the ConfigServer Security & Firewall page.
Step Two: Scroll down on the page until you can find the Quick Allow option.
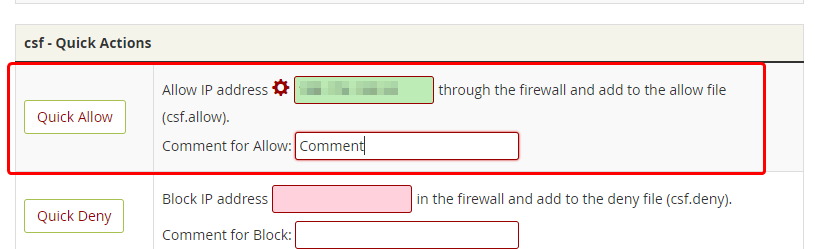
Step Three: Enter the IP address that you would like to add the Allow for into the Green Input box.
Step Four: Add a comment to identify this. Allow later on if needed easily. For example, "_Work Computer_" or "_Home Laptop_".
Step Five: Click on Quick Allow. This will add the Allow for the IP address and should be effective immediately. This rule will remain in place until explicitly removed.
Written by Hostwinds Team / November 13, 2018