
Hosting Tutorials
Search results for:
Table of Contents
How To Open and Block Ports in Windows Firewall
What is Windows Firewall?
Windows Firewall is a security feature built into Windows that helps protect your system by filtering incoming and outgoing network traffic. It does this by allowing or blocking specific traffic based on a set of rules you define. For example, when a program needs access to the internet, you might see a pop-up asking you to allow or deny the connection. This is Windows Firewall working to ensure you're aware of what's trying to connect to your computer.
By default, Windows Firewall focuses on external connections and unknown networks. Local connections, such as those to your printer, are not typically blocked unless you manually set rules to do so.
How to Open Ports in Windows Firewall
The following guide explains how to open firewall ports on Windows 10 and Windows Server 2016. Steps for other versions of Windows should be quite similar.
Step 1: Open the Control Panel
- Search for "Control Panel" in the Windows search bar.
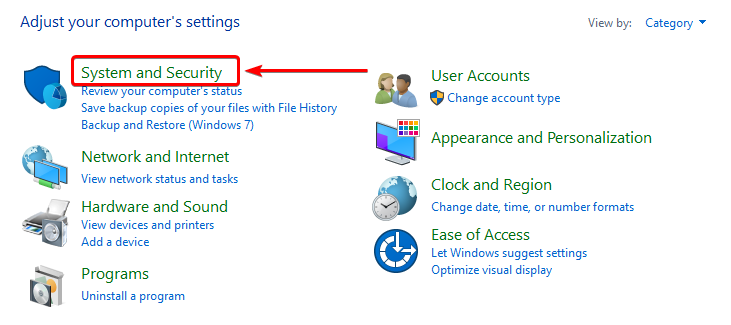
Step 2: Select System and Security
Click on System and Security.
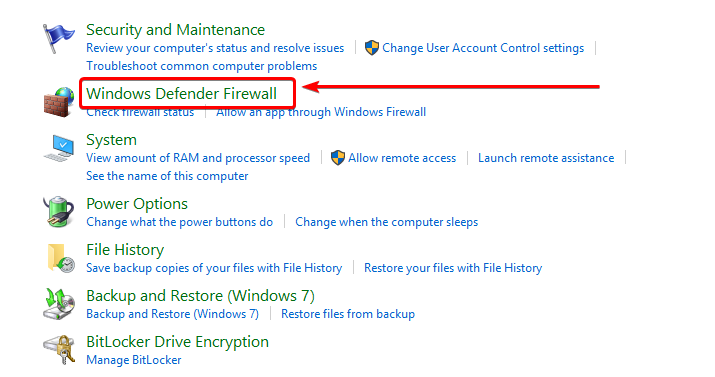
Step 3: Choose Windows Defender Firewall
- Click on Windows Defender Firewall from the list of options.
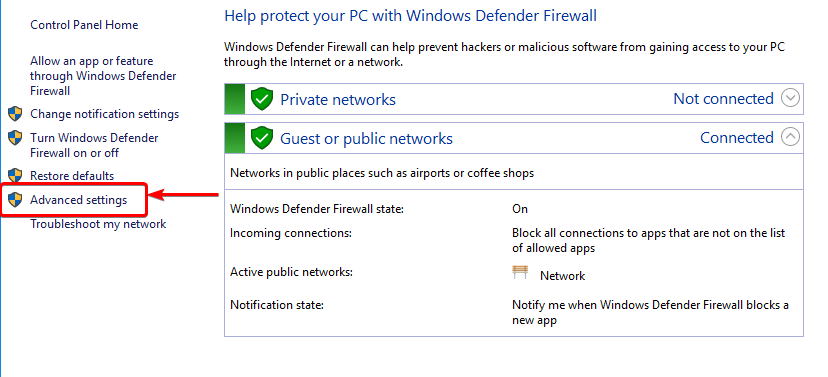
Step 4: Select Advanced Settings
- On the left side, find and click on Advanced Settings.
Step 5: Create a New Rule
Depending on your needs, choose either Inbound Rules (regulating incoming traffic) or Outbound Rules (regulating outgoing traffic).
Right-click on the rule you want to edit and click New Rule.
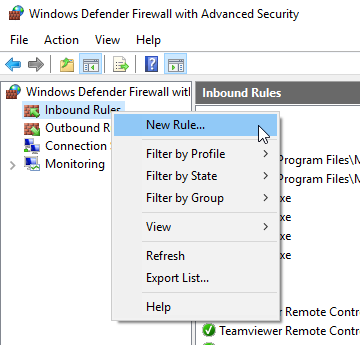
Note: it is suggested to create the same rule for the opposite option for simplicity and security.
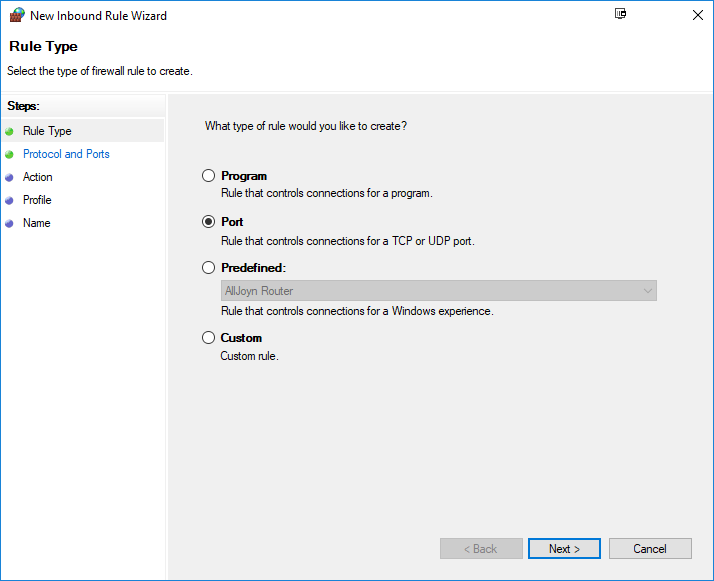
Step 6: Select Port
- Choose Port to create a rule for a specific port.
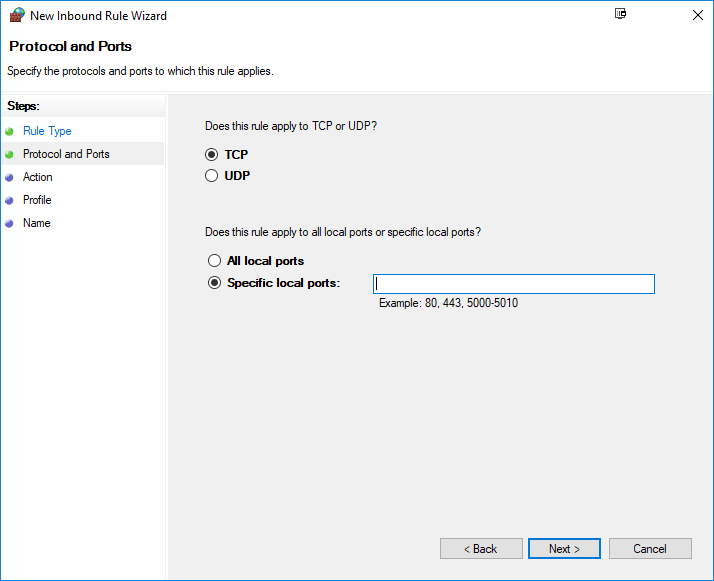
Step 7: Choose TCP or UDP
Most ports use TCP, but some may use UDP. Select the type of connection you want to control.
Add the port manually in the text box and click "Next" when you have specified this to fit your needs.
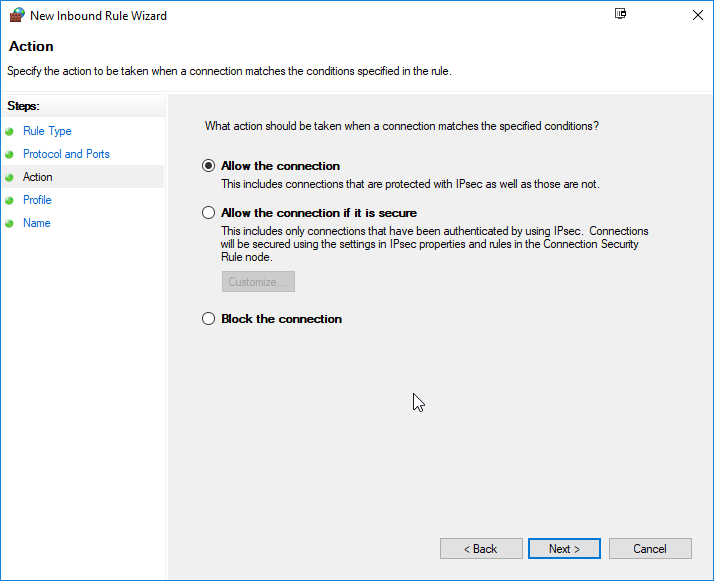
Step 8: Allow or Block the Connection
Decide whether you want to allow or block the connection through this port.
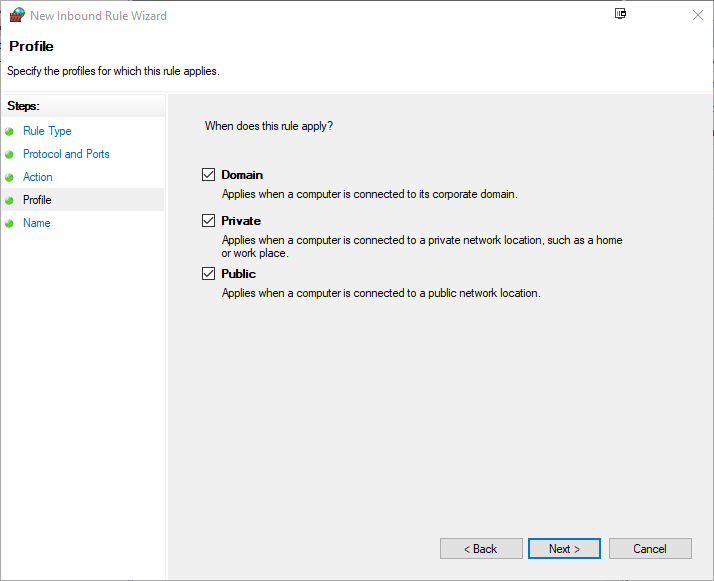
Step 9: Specify Rule Options
Choose the profiles to which the rule applies. You can select all profiles, but typically you want to ensure the Public profile is checked
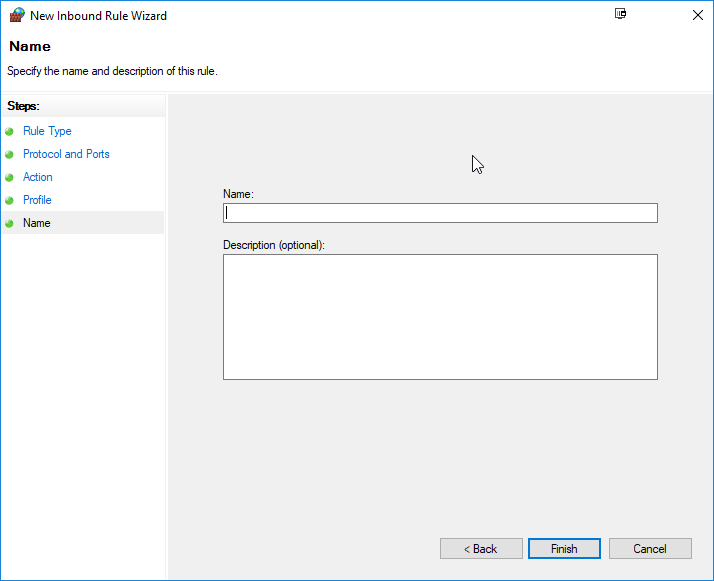
Step 10: Name and Finish
Give the rule a name and optional description, then click Finish.
Your new rule should now be active and the port open according to your settings.
How to Block a Port
Step 1: Select the Rule
In the Advanced Settings, locate and click the rule (inbound or outbound) you want to block.
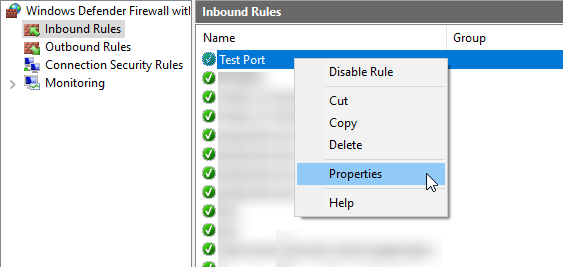
Step 2: Access the Rule's Properties
Locate the rule name you want to block, Right-click it and select Properties.
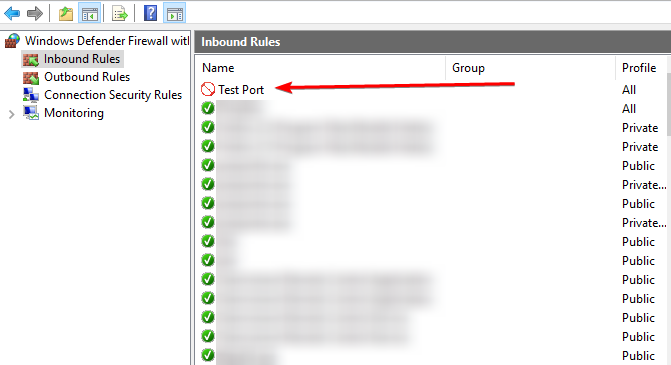
Step 3: Choose Block the Connection
In the General tab, select Block the connection and click Apply.
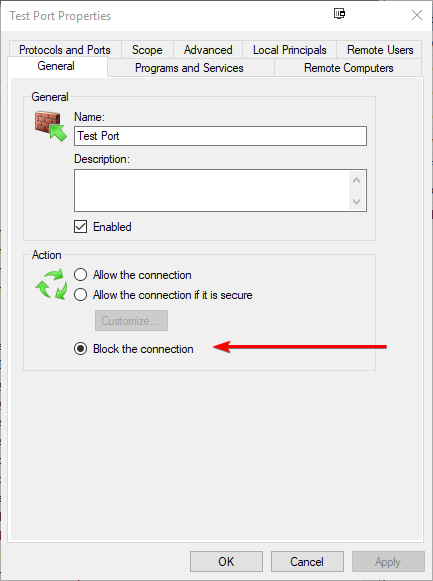
The rule should now be updated to block the connection, and you may see a red circle or other indicator showing the rule has been changed.
How to Disable or Delete a Firewall Rule
You can disable or delete firewall rules within your Windows Firewall by following these steps.
Step 1: Open the Control Panel
Search for "Control Panel" in the Windows search bar.
Step 2: Select System and Security
Choose System and Security from the options.
Step 3: Open Windows Defender Firewall:
- Click on Windows Defender Firewall.
Step 4: Select Advanced Settings
- Locate and click on Advanced Settings on the left side of the window.
Step 5: Navigate to Inbound or Outbound Rules
- Depending on the rule you want to adjust, select either Inbound Rules or Outbound Rules.
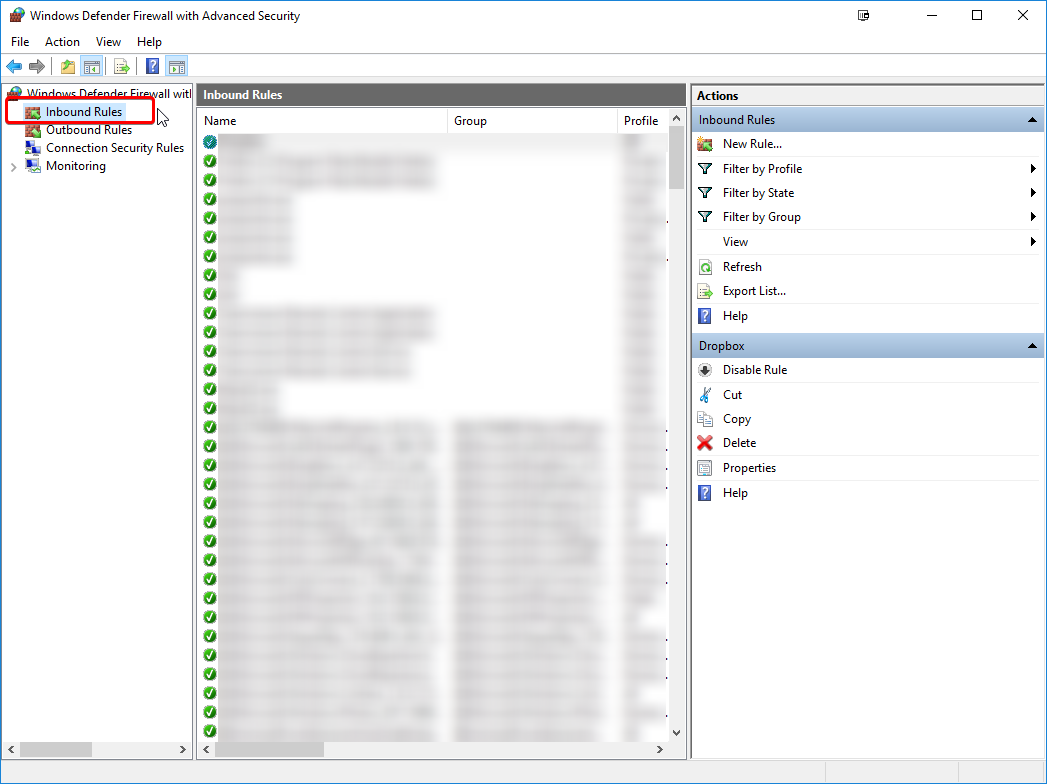
Step 6: Find the Rule
Locate the rule you want to disable or delete.
Step 7: Disable or Delete the Rule
Right-click the rule and choose either Disable Rule or Delete.
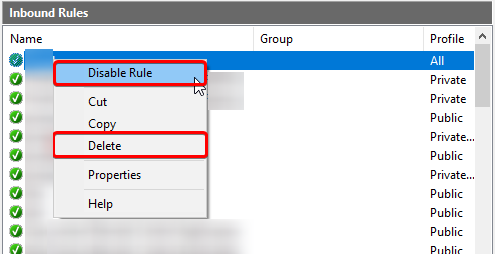
Disabling a rule keeps it inactive but available for future use (Reenable by right-clicking the rule and selecting Enable Rule), while deleting a rule removes it permanently. Only delete a rule if you're sure you no longer need it.
Remember, when making changes to firewall rules, proceed with caution to avoid unintended disruptions in your network traffic. Always double-check your choices before applying changes.
Written by Hostwinds Team / August 22, 2018