
Hosting Tutorials
Search results for:
Table of Contents
How to Install cPanel on your VPS
cPanel is the most widely-used web-based control panel in the web hosting industry. Shared and Business web hosting and reseller web hosting plans with Hostwinds include access to cPanel to manage the web hosting account from an easy-to-use Control Panel. Hostwinds Cloud VPS and Dedicated Servers do not include access to cPanel by default. However, you can purchase a cPanel license for your Cloud VPS or Dedicated Server if you need to use cPanel/WHM on your Cloud VPS or Dedicated Server. This guide will discuss installing cPanel on your Cloud VPS or Dedicated Server manually here at Hostwinds after you have purchased a license.
Prerequisites
- Hostwinds Virtual Private Server that meets minimum requirements
- cPanel License active and pointing to your IP Address
- Access to your cloud control portal
Create a New VPS
For the quickest access to a cPanel server, create a new Cloud VPS from the cloud control portal. This section of this guide will detail this method.
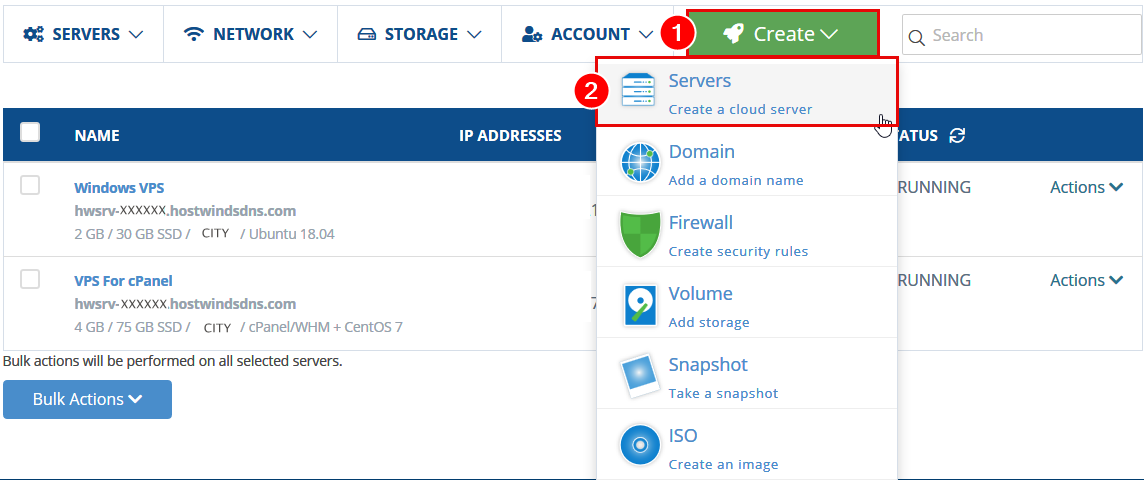
Step 1: From your cloud control portal, click the Create button, then click Servers. This will lead you to the Create new VPS page that will generate the order.
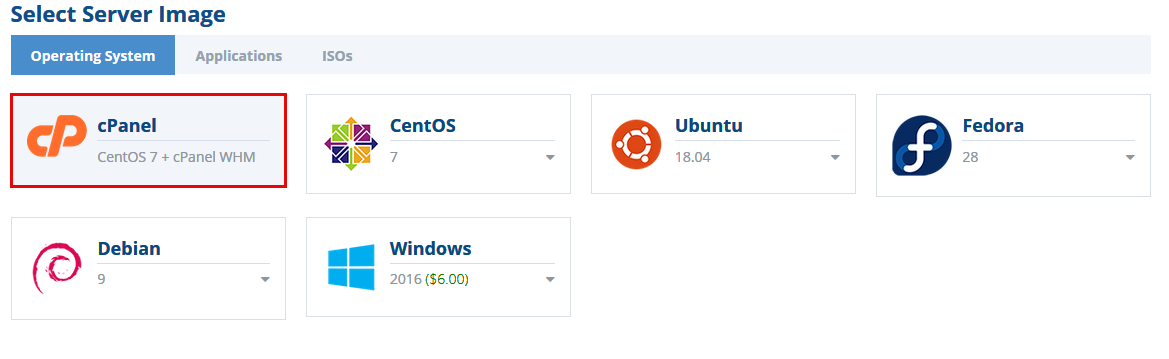
Step 2: In the Select Server Image section, Click into the Operating System tab if not there already. Then, click the cPanel option.
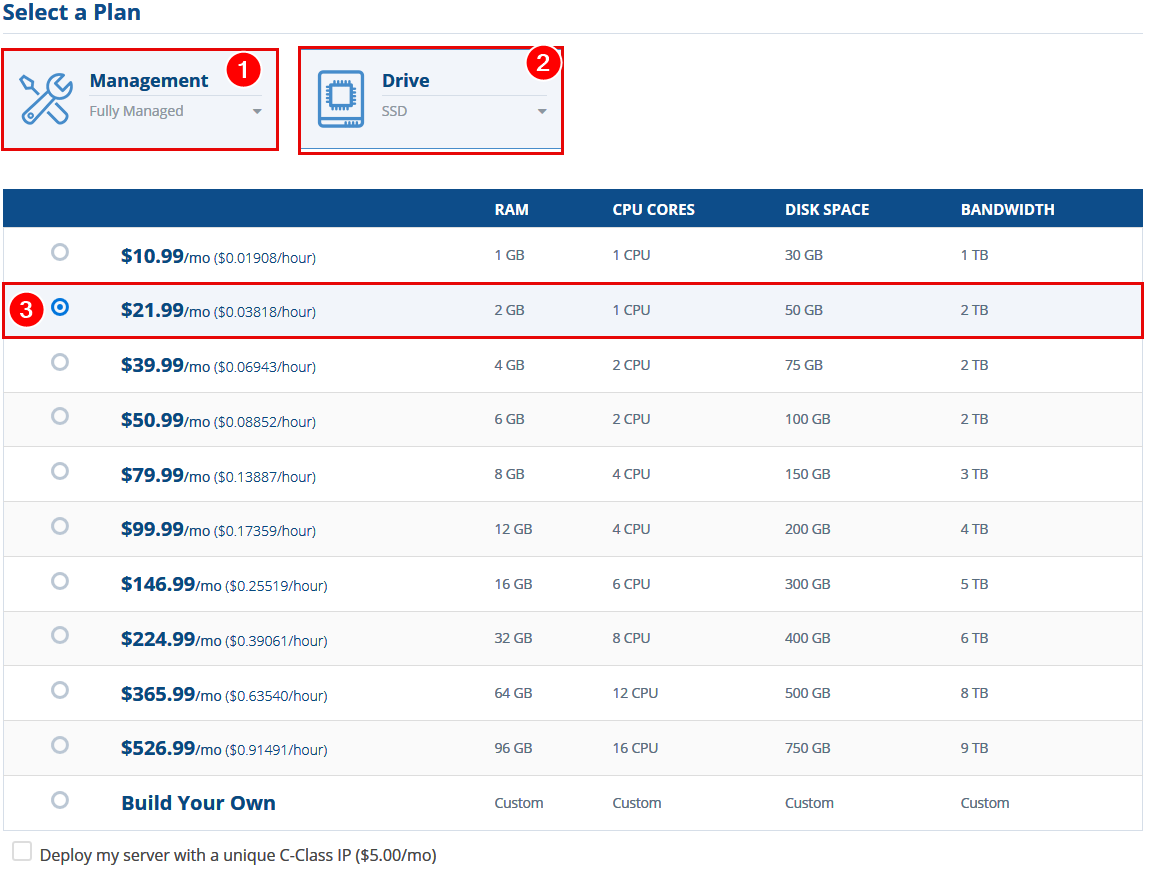
Step 3: The default selection in the Management and Drive option sections is already set to our recommended settings. However, you can change these to Unmanaged and HDD, respectively, if you wish. Keep in mind Unmanaged services provide inferior tiers of support for the VPS. Select at least the second-level option for specifications, as these meet the recommended specifications for cPanel.
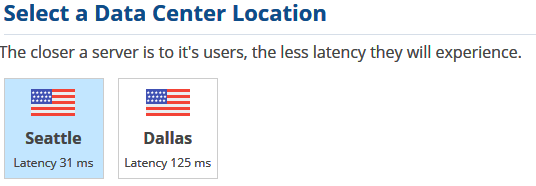
Step 4: Select the location that the new Cloud VPS will be created within. Keep in mind your target audience will benefit most from a server that is closest to them. In general, serving a website to the US is best done from a centralized location.
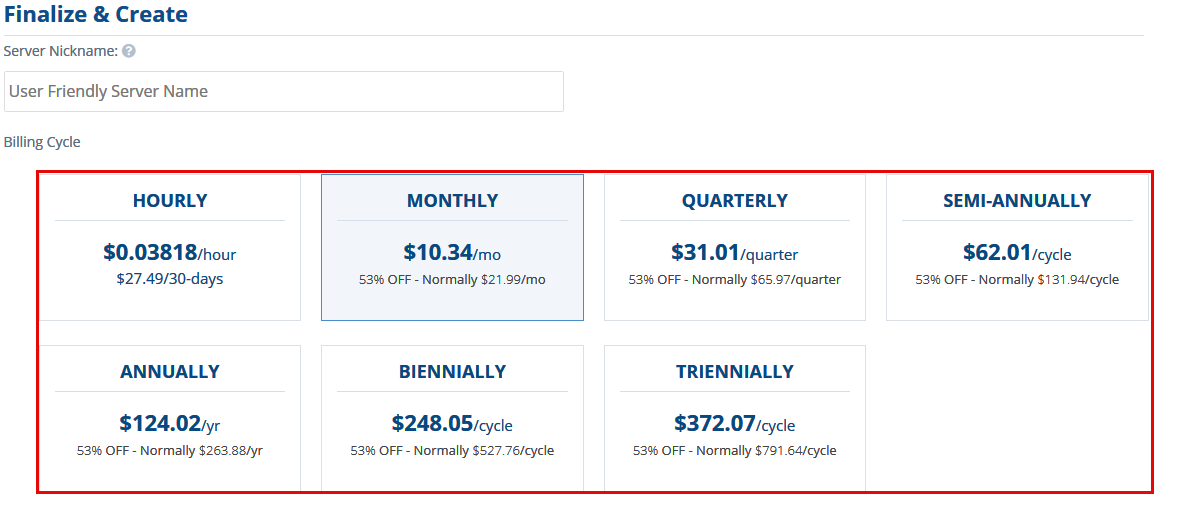
Step 5: You can enter a server nickname here, which is only for the benefit of easy identification. It will not affect the price, performance, or other functional aspects of the server. Select the Billing Cycle for this instance, keeping in mind that there will be a prorated rate based on your Anniversary Billing date.
Please note that, although Hourly Billing can be selected here, we do not recommend it for long-term services.
Step 6: Click Create Server to complete the order and generate the invoice.

Step 7: After the generated invoice is paid and completed, the server will spawn and create automatically. You will receive the server details in an email sent to the file after the server is successfully created.
Reinstall an Existing VPS
Another method of obtaining access to a VPS with cPanel is to reinstall the Operating System of an existing VPS. This section of this article will discuss this method.
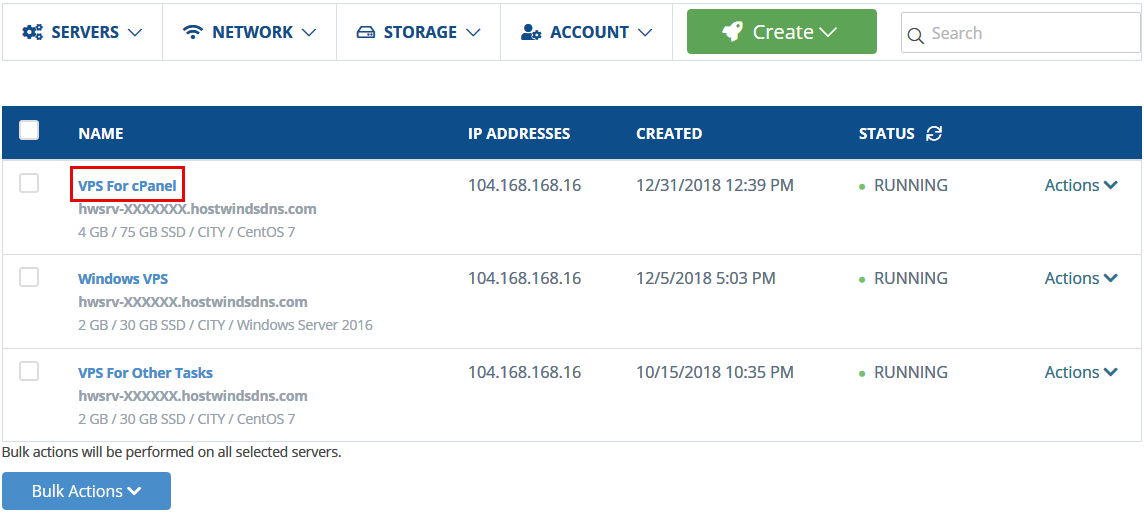
Step 1: From your cloud control portal, click the title of the VPS you plan on using for cPanel. Alternatively, you can click Actions and then Advanced from the actions menu on the right.
The following step will delete all data on the VPS. Ensure you have a backup or confirm you have no information you care to keep on the VPS before proceeding. Any data deleted in this process is NOT RECOVERABLE. You choose to continue with this process at your own risk and understanding that this will permanently and irreversibly delete any data on the chosen Cloud VPS.
Step 2: Click on the green Actions button, then click on Reinstall. An overlay will display that shows the available options for install. Click the Operating Systems tab if it is not already selected. Then, click the cPanel tile. Finally, click Confirm to install the selected image to the VPS.
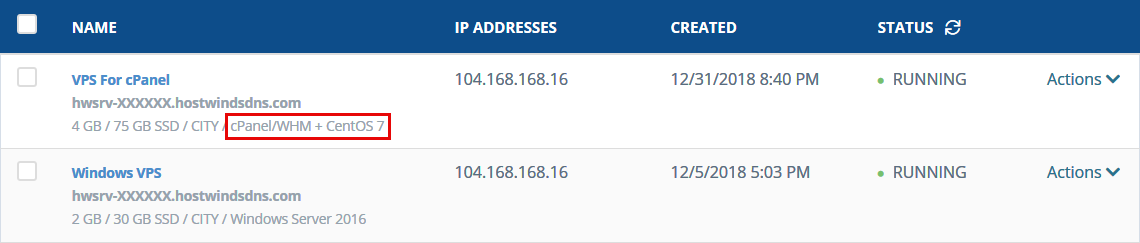
This may take up to two or three minutes to complete. Eventually, you will see the same VPS listed in your list of instances now showing the cPanel + CentOS 7 OS template installed.
Written by Michael Brower / June 11, 2021