
Hosting Tutorials
Search results for:
Table of Contents
How to Install Virtualmin (CentOS 7)
Tags: CentOS Web Panel, Virtualmin
What Is Virtualmin?
Virtualmin is a Webmin module typically used to manage multiple virtual hosts through a single interface, similar to cPanel. It supports multiple functions such as creating/managing Apache virtual hosts, MySQL database creation/management, generating DNS zones, managing mailboxes, and much more.
How Do I Install Virtualmin On CentOS 7?
This guide implies that you're using the root account on a Hostwinds Cloud, VPS, or Dedicated Server to perform the installation and that you have a basic working knowledge of a Linux shell.
We highly suggest taking a backup of your server before proceeding with this guide.
Although this guide is written strictly for CentOS 7, Virtualmin offers an automated installation script for the following distros:
- CentOS/RHEL/Scientific Linux 7 on x86_64
- CentOS/RHEL/Scientific Linux 5 and 6 on i386 or x86_64
- Debian 6, 7, and 8 on i386 or amd64
- Ubuntu 12.04 LTS, 14.04 LTS, and 16.04 LTS on i386 or amd64 (non-LTS releases are not supported)
The following steps can install Virtualmin in a CentOS 7 (RHEL 7) environment on a fresh OS installation.
Ensure your server is up to date
yum update -y
Download the Virtualmin installer script using wget
wget http://software.virtualmin.com/gpl/scripts/install.sh
Execute the install script
sh install. sh
As per the warning, when the script is executed, ensure that your OS is listed and type "y," then press "Enter" to continue with the installation.

If prompted, you may need to enter in a fully qualified hostname.
-
- Please note that this domain name will need to resolve to your server.
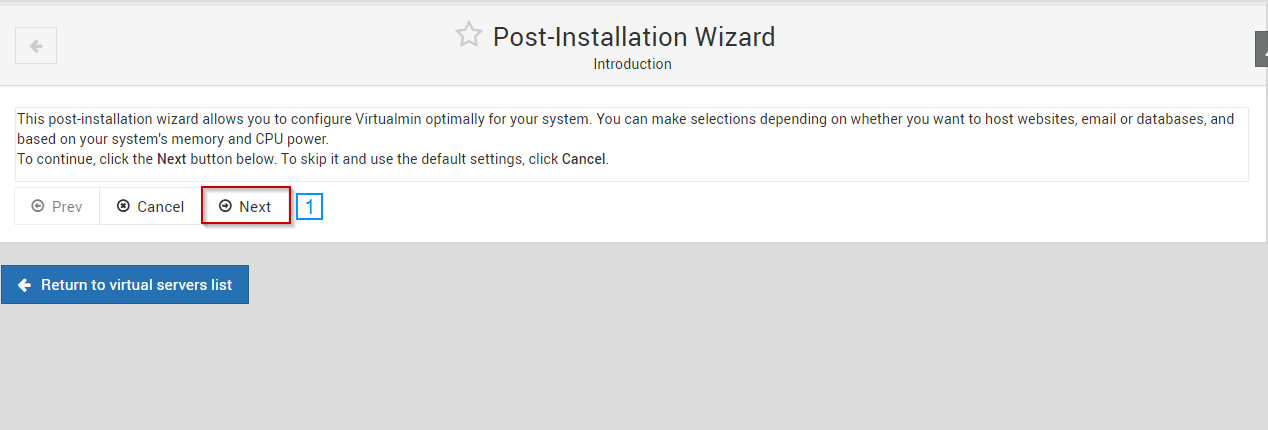
Finish Setting Up Virtualmin With The Post-Installation Wizard
The installation should now be underway and may take a bit of time to complete. Once the installation is complete, you can move on to the Post-Installation Wizard by logging into Virtualmin using YOURIPADDRESS:10000 as Virtualmin operates on port 10000 by default. You can choose to perform the post-installation steps later. However, it is strongly advised to proceed with them now using the following steps.
- Click the "Next" button.
- Select the appropriate setting for your system
- Click "Next"

- Select if you'd like to run clamd in the background
- Click "Next"

- Select if you'd like to run spamd in the background
- Click "Next"

- Select if you'd like to run a MySQL server, PostgreSQL server or both
- Click "Next"

- Set a root password for the database server (MySQL/PostgreSQL)
- Select if you'd like to remove the test MySQL database
- Select if you'd like to remove the anonymous MySQL user
- Click "Next"

- Select the appropriate configuration for your system
- Click "Next"

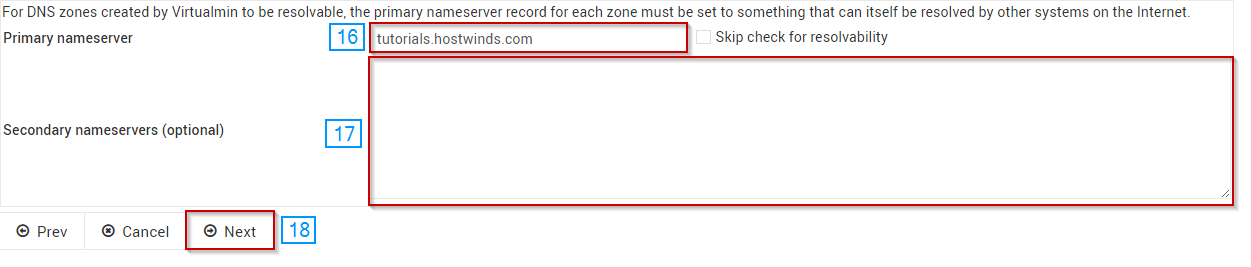
- Set the Primary nameserver
- Set the Secondary nameservers if needed
- Click "Next"
- Select to store plain-text or hashed password
- Click "Next"

The Post-Installation Wizard should now be complete, and you should be able to start using your new control panel. The first thing you should do is create a new virtual server to begin hosting your site(s). We have written the following article to help you set up a virtual server in Virtualmin: Creating a New Virtual Server in Webmin/Virtualmin
Written by Michael Brower / June 22, 2017