
Hostwinds Tutorials
Search results for:
You can add a new Network Interface in Virtualmin using the Networking Interfaces module located under the Network Configuration option. This article will cover this process and the different types of interfaces that you can add. Please have Virtualmin installed on your server and access Webmin to get full use of this guide. If this is not something that you're familiar with, please see the following articles:
Once you're ready to proceed, please refer to the following steps to add a new network interface:
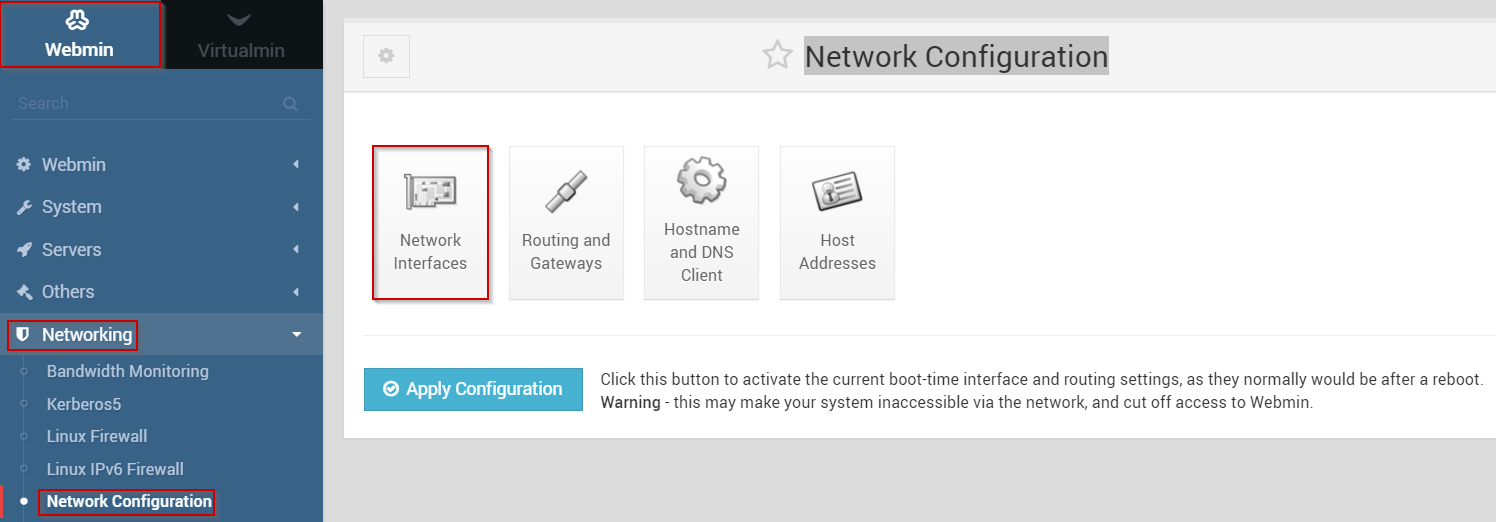
- Click on the Webmin section
- Select the Networking option
- Click the Network Configuration module
- Select the Network Interfaces module
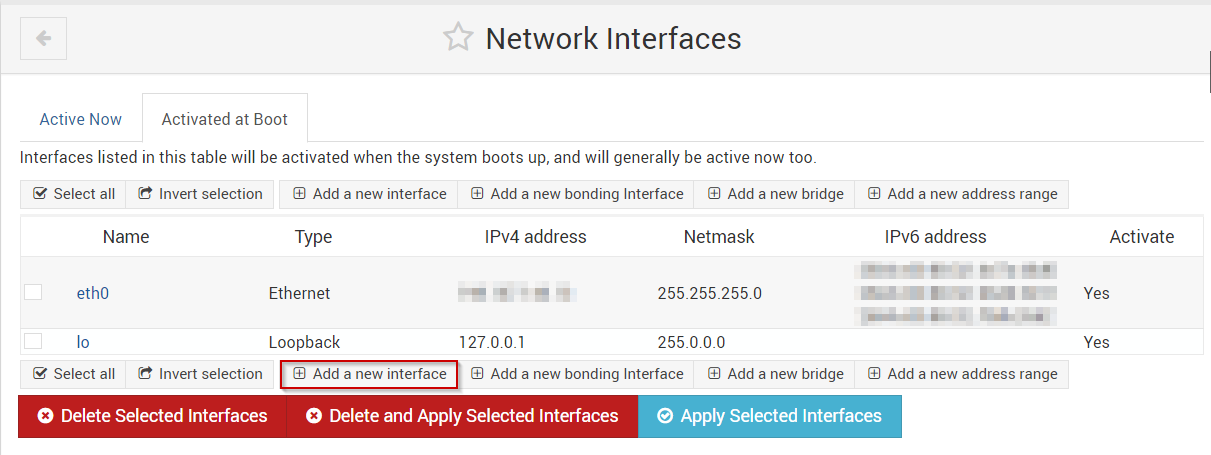
- Select the corresponding button for the type of interface that you wish to add
- Add a new interface
- Add a new bonding Interface
- Add a new bridge
- Add a new address range
- For this guide, we'll be selecting the Add a new interface button.
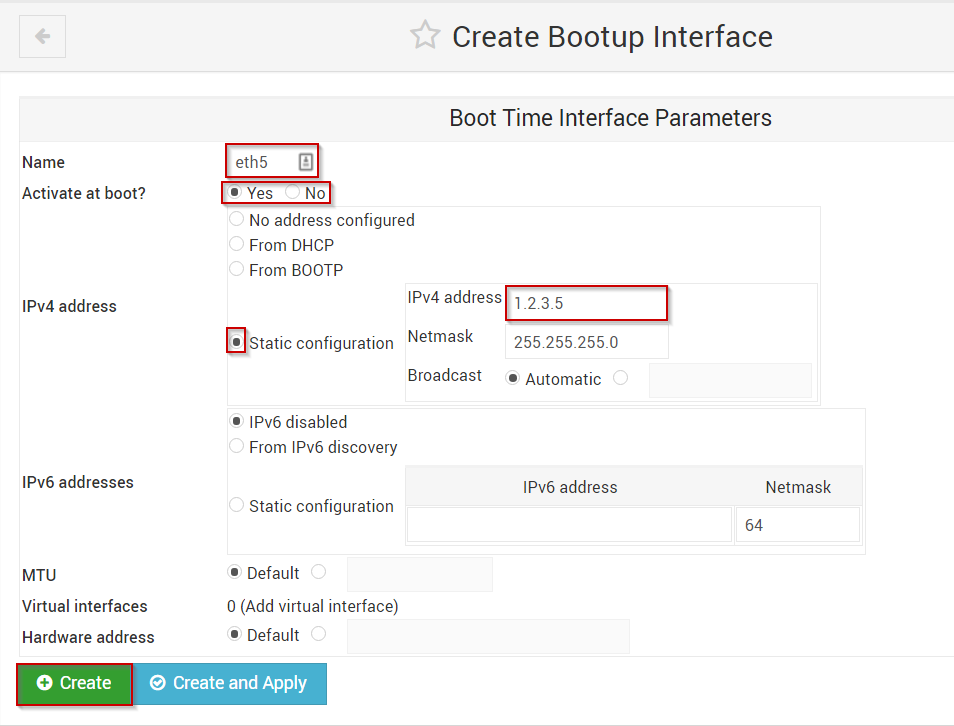
- Name the interface
- Select if you'd like it to be active on boot
- Select Static configuration under the type of IP address you're setting up if you'd like to configure an IP statically
- Enter in the IP address that you'd like to use with this interface
- When you're satisfied with your selections, click the Create button
If this process is completed with no errors, your new interface should be added and usable.
Written by Michael Brower / June 21, 2017