
Hostwinds Tutorials
Search results for:
A server administrator's worst fear is some malicious entity gaining access to a server that you control. Luckily there are steps that you can take to secure your server. One of the steps you can take is to change your Virtualmin listening port not to use the standard port 10000. This can potentially make it more difficult for malicious entities to gain access to your server. The focus of this article is to teach you how to change the listening port that Virtualmin uses. This article implies that you have already installed Virtualmin. If you have not done so yet, please look at the following article: How to install Virtualmin.
You'll first need to log in to your Virtualmin control panel. If you're not certain how to do this, please refer to the following article: How to login to Webmin. Once you're logged, and you're ready to proceed, please take a look at the following steps to locate the Ports and Addresses module and change your listening port:
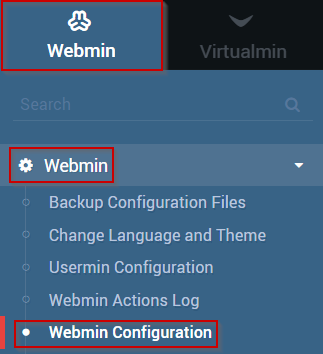
- Click on the Webmin section
- Select the Webmin from the available options
- From the next available list of options, click on the Webmin Configuration module.
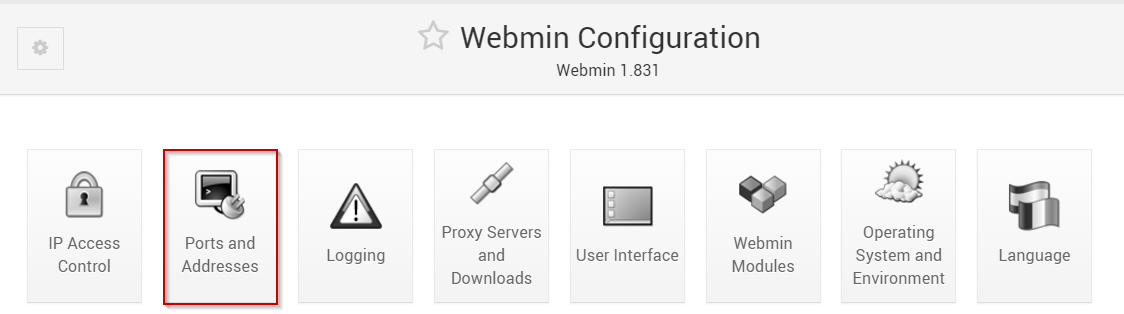
- On the next page, select the Ports and Addresses Module.
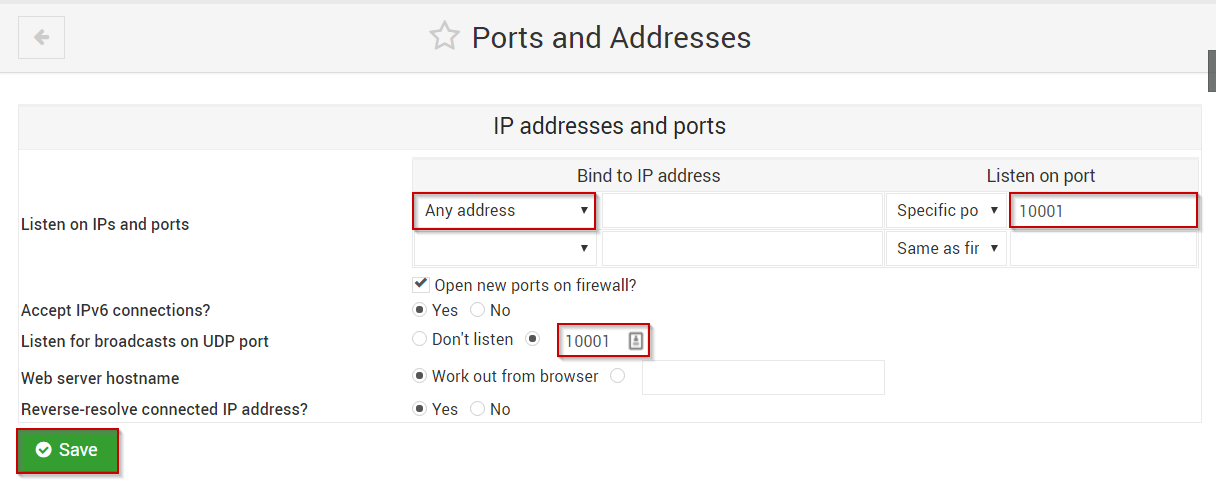
Under the Listen on IPs and ports section, select the dropdown to Any address to bind to any IP address.
Select which port you'd like to use in the textbox next to the drop-down that says Specific Port.
You can set the option to Listen for broadcasts on UDP port to the same port used above.
When you're satisfied with the information that you have provided, click the Save button.
After the changes have been saved, you will need to log back into Virtualmin using the new port you had specified.
If you should have any questions or would like assistance, please contact us through Live Chat or by submitting a ticket with our Technical Support team.
Written by Michael Brower / June 22, 2017