
Hostwinds Tutorials
Search results for:
Table of Contents
How to Create a Cron Job (Virtualmin)
Tags: Virtualmin
One very cool and handy tool in any server admin's arsenal is the power of automation, as it can allow an admin to do more with less. In Linux, setting a cron job is a great way to automate a particular task or many tasks via a script on a recurring scheduled basis. However, this would have to be set using a few commands from the Linux shell (command line). Well… with Virtualmin on your side, you can create a cron job using a user-friendly graphical interface in no time at all! This article focuses on teaching you how to create a cron job in Virtualmin using the wonderful GUI. This article implies that you have already installed Virtualmin. If you haven't done so yet, please look at the following article: How to install Virtualmin (CentOS 7).
Before we get started, you'll need to log in to your Webmin account. If you're not certain how to do this, please review the following article, which should assist you with logging in: How to login to Webmin. Once you've logged in, please proceed with the following steps to set up a cron job in Virtualmin.
How Do I Create A Cron Job Using Virtualmin?
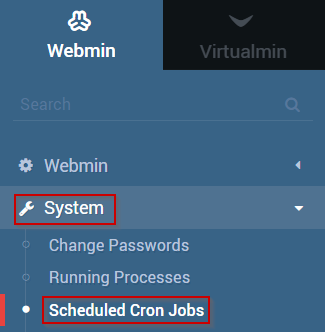
Step 1: Ensure that you're in the Webmin interface
Step 2: Select System
Step 3: Click Scheduled Cron Jobs
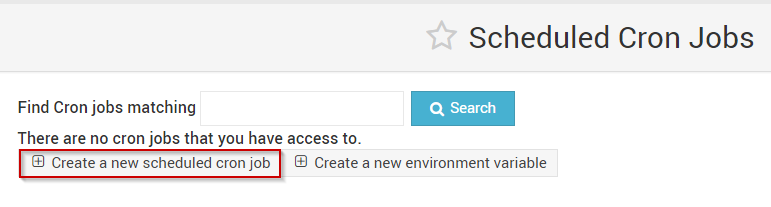
Step 4: Select the Create a new scheduled cron job button.
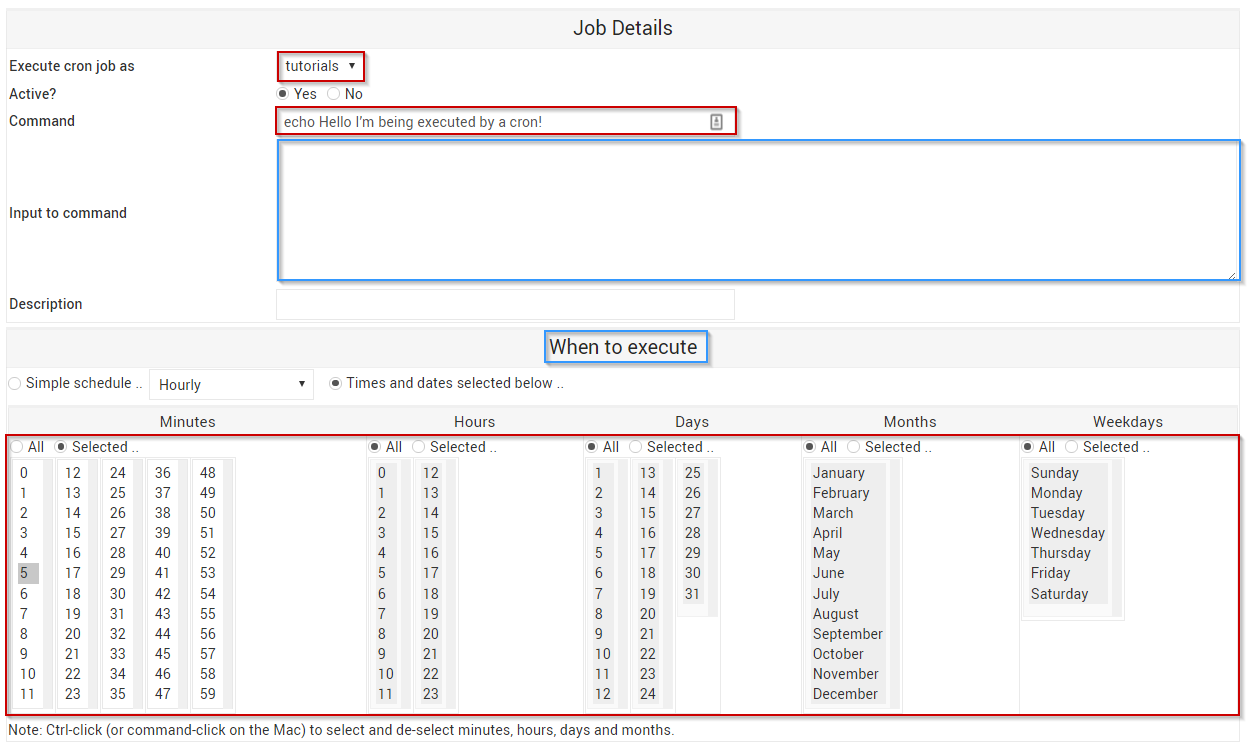
Step 5: From the Execute cron job as dropdown, select the user that you'd like to use to run the cron job.
This can be your current normal user or the root user
Step 6: Enter the command to run into the Command textbox
For this guide, we'll use the command echo. Hello, I'm being executed by a cron!
Step 7: You can generally skip the Input to command textbox as that's typically only used if the command the cron is executing requires input after it begins
Step 8: Under When to execute, select how often you'd like this command to run
For this guide, we'll set the command to execute 5 minutes past every hour.
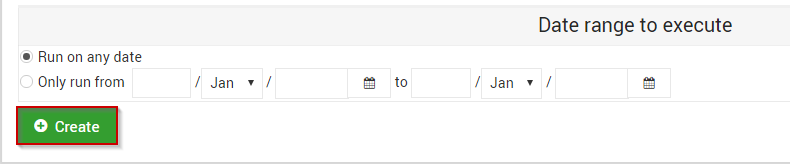
Step 9: Once you're satisfied with the information that you've entered or selected, click the Create button
Step 10: Once the cron is created, you'll be taken back to the Scheduled Cron Jobs page
Step 11: To test the cron, click on the newly created cron
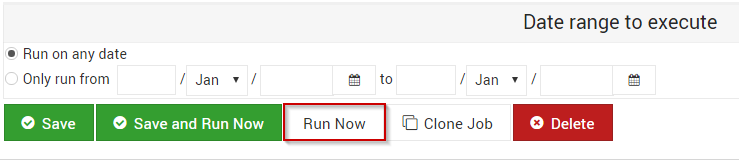
Step 12: At the bottom of the page, select Run Now
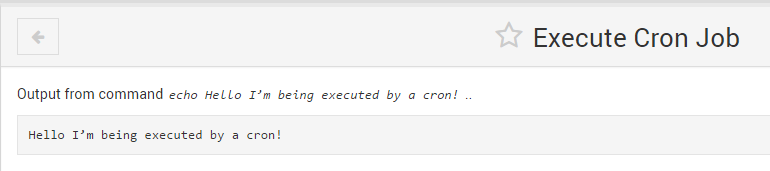
Step 13: You should now see a window similar to the following that contains the output of your cron
If you followed this guide successfully, you should now have a fully functioning cron job setup and ready to do your bidding while handling other tasks!
Written by Michael Brower / March 19, 2017