
Hostwinds Tutorials
Search results for:
Disk quotas are a great way to ensure that everyone is getting their fair share of available disk space on a server. This function is beneficial in a shared server environment or any server that has multiple users. A disk quota is essentially a limit that a server administrator can set that restricts specific parts of overall filesystem usage.
With Virtualmin, setting a disk quota is a fairly straightforward process, which we will cover in this article. This article implies that you have already installed Virtualmin. If you have not done so yet, please look at the following article: How to install Virtualmin (CentOS 7).
To set a disk quota, you'll first need to log in to your Virtualmin installation and have access to Webmin. If you're not certain how to do this, please review the following article: How to login to Webmin. Once you're logged in, please review the following process to enable disk quotas.
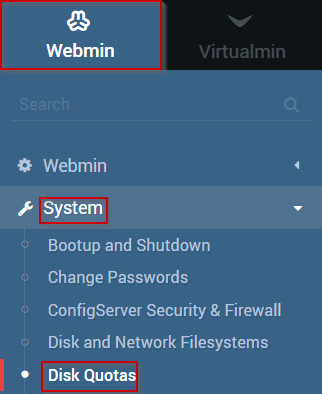
- Click on the Webmin section.
- Select the System option
- Click on the Disk Quotas module.
- You should now see the Disk Quotas module interface, which should look similar to the following.
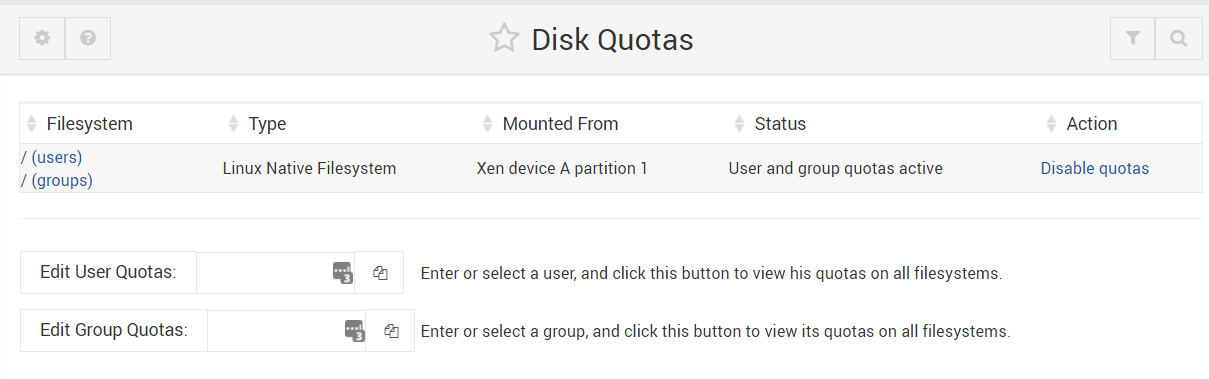
- You can choose to edit/list disk quotas using the following
- User – Edit and list disk quotas by User
- Group – Edit and list disk quotas by Group
- Both User and Group – List both User and Group quotas
- For this article, we will be editing quotas based on the User
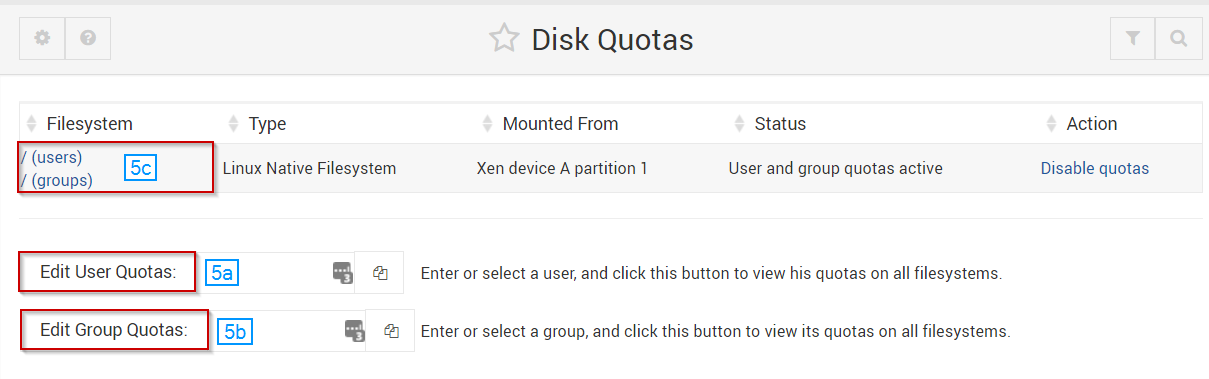
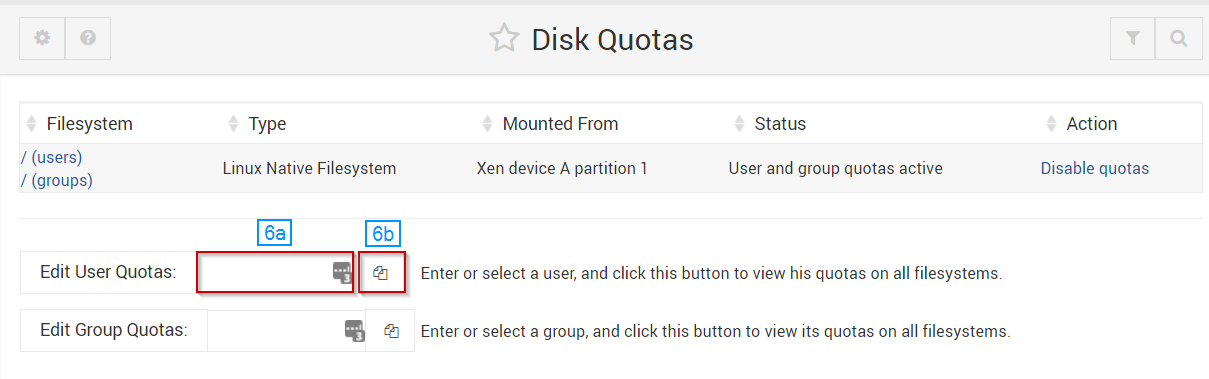
- If you know the username, you may enter it into the search box
- Alternatively, you can click the user selection icon next to the search box
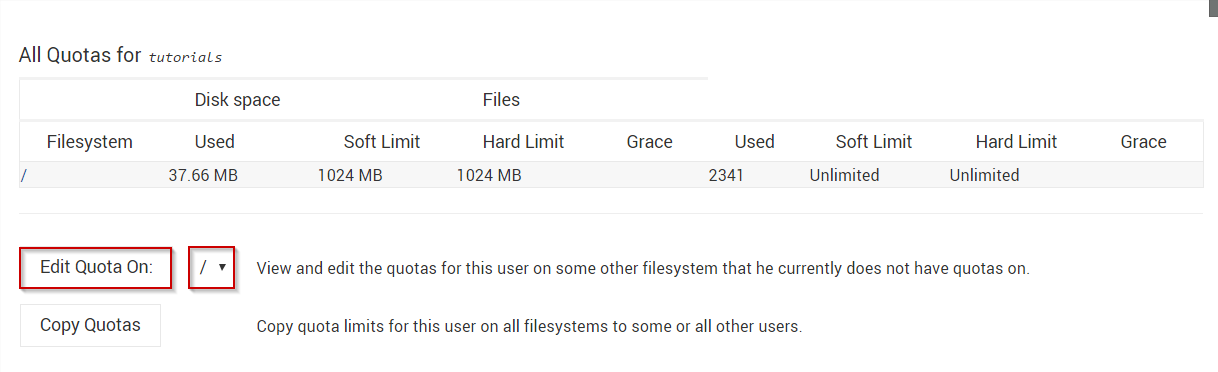
- Select the file system that you'd like to edit the quota on typically this will "/"
- Once you're satisfied with your selection, select the Edit Quota On button.
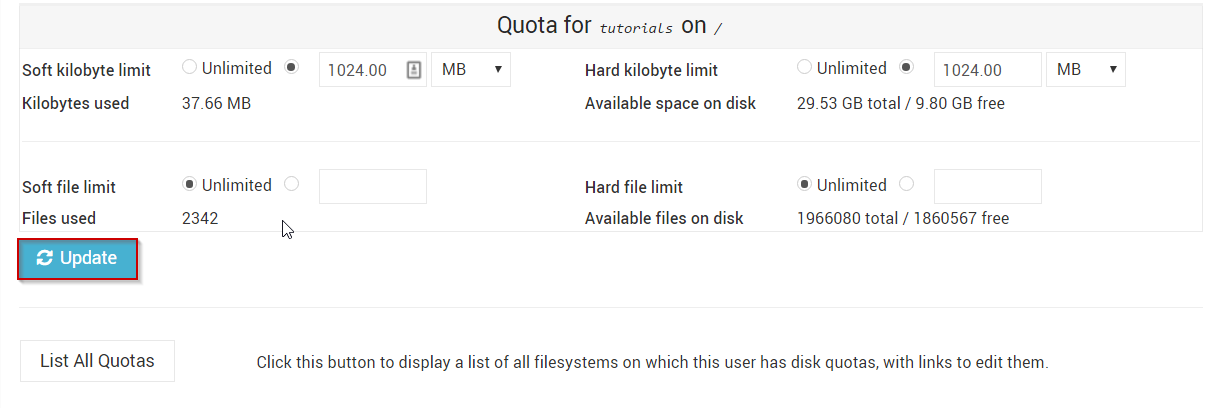
- In this interface, you can set any disk quotas or limits that you see fit
- Once you're satisfied, click the Update button
Written by Michael Brower / June 21, 2017