
Hostwinds Tutorials
Search results for:
Table of Contents
How to Password Protect a Directory in Virtualmin
Tags: Virtualmin
As far as control panels go, cPanel is a fairly common industry standard. However, it comes at a cost. But what if you did not like cPanel or did not want to pay for a control panel and still wanted to use a control panel? The answer is Virtualmin/Webmin! Virtualmin/Webmin is an open-source control panel that allows you to manage both your server and your websites with the familiar comfort of a GUI.
In this article, we will cover how to password protect a directory using the built-in functionality of Virtualmin. This article implies that you have already installed Virtualmin. If you have not done so yet, please take a look at the following article: How to install Virtualmin (CentOS 7), or you can refer to the Virtualmin Website for additional download and installation instructions, here.
How to password protect a folder/directory (Virtualmin)
Before we get started, you'll first need to log in to Virtualmin/Webmin. If you're not certain how to log in to either Webmin or Virtualmin, please refer to the following guide: How to login to Webmin. Typically after a default installation of Webmin, the login URL will be yourdomain.tld:10000, replacing yourdomain.tld with your actual domain/website name. Once you have logged in, please proceed with the following steps to password protect any directory of your choosing.
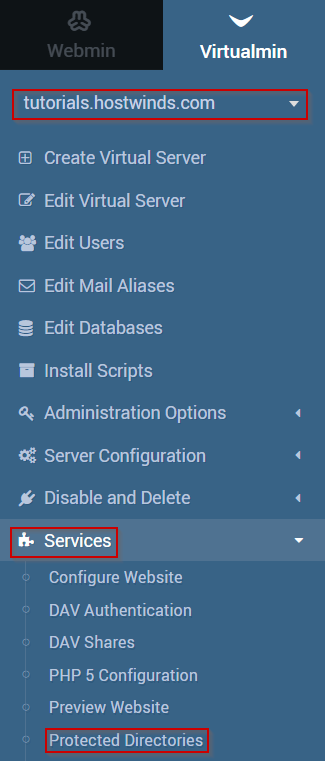
Select the domain that contains the directory that you'd like to password protect from the drop-down menu on the Virtualmin tab.
Click Services from the available options.
Select Protected Directories, which will bring you to a new page.
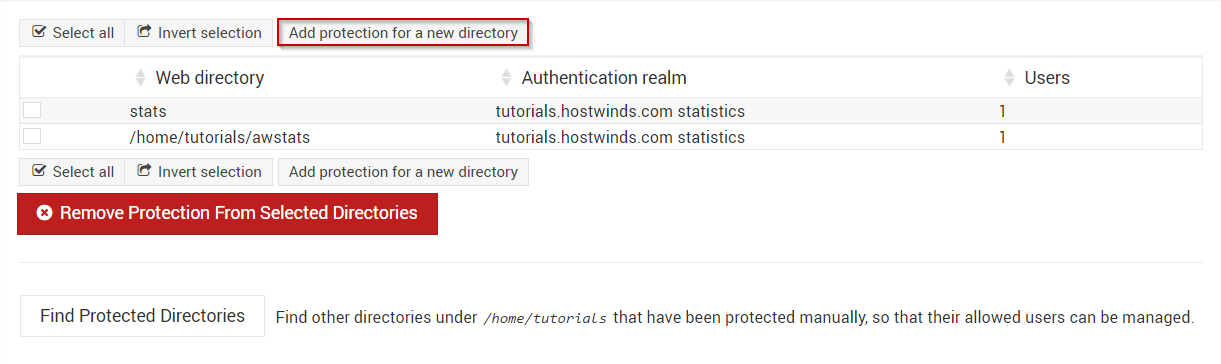
- Click Add protection for a new directory. This will bring you to a new menu where you can select the directory that you want to protect.
On the following page, select the option that best suits your needs. Most often, you may want to do a subdirectory or single folder.
Once you're satisfied with the options you have selected, click the Create button to save the changes and protect the folder.

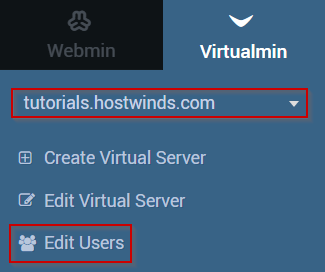
- Now to add a User that has access to view that directory. Select Edit Users
- Select the Username that you'd like to edit the permissions for
- Select Other Permissions
- Select Allow access to web directories and select the directories that this user should have access to (presumably the directory you had just created)
If everything went according to plan with no errors, your selected directory should now be password protected and only accessible to the user that you selected.
If you should have any questions or would like assistance, please contact us through Live Chat or by submitting a ticket with our Technical Support team.
Written by Michael Brower / June 22, 2017