
Hostwinds Tutorials
Search results for:
Table of Contents
How to Setup Email Forwarding in Virtualmin
Tags: Email, Virtualmin
Virtualmin supports multiple functions such as managing all aspects of a user's mailbox or account and much more. Speaking of mailboxes, you can also set up email forwards within Virtualmin to have mail routed to separate email accounts on or off the server.
The focus of this article is to cover how you can set up an email forward through Virtualmin. This article implies that you have already installed Virtualmin. If you have not done so yet, please look at the following article: How to install Virtualmin (CentOS 7). Before we get started, you'll need to login into your Virtualmin or Webmin account. If you're not certain how to do this or like me, you enjoy a good mystery. Please review the following article, which covers: How to log in to Webmin. Once you're logged into Virtualmin, please proceed with the following steps.
Setup An Email Forwarder
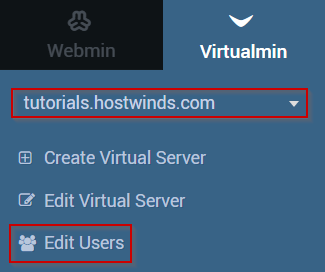
- Under the Virtualmin section, select the domain from the dropdown menu containing the email account you'd like to set up forwarding.
- Select the Edit Users option
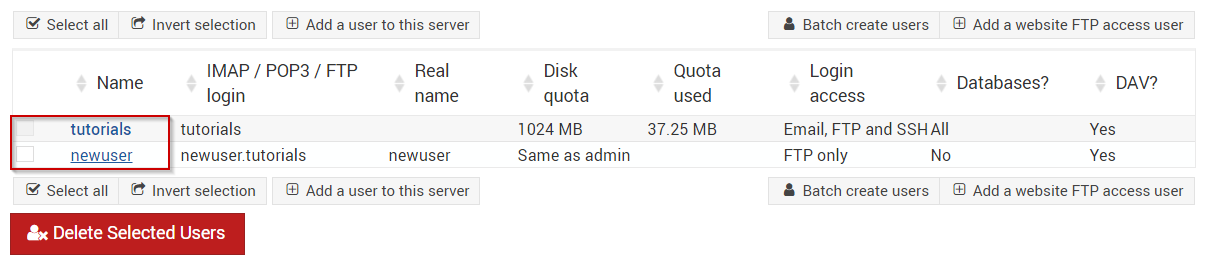
- Click the name of the account that you'd like to set up with forwarding.
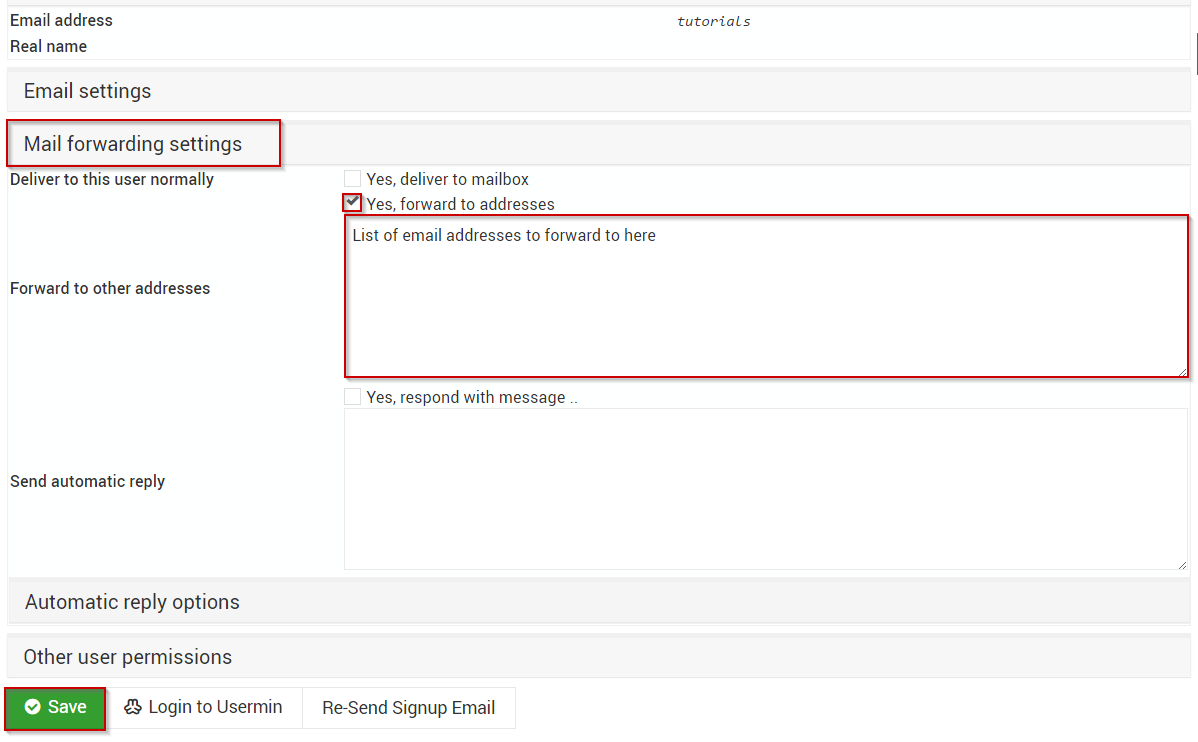
- Select the Mail forwarding settings tab
- Click the checkbox next to Yes, forward to addresses
- In the text area beneath Yes, forward to addresses, you can enter as many different email addresses that you'd like, with each being on a new line
- Once you're satisfied, click the Save button
Virtualmin's own Documentation can be viewed here, and their specific documentation for "How to set up email forwarding" can be viewed here.
Written by Michael Brower / June 22, 2017